8 Essential Steps to the Perfect Espresso Martini Drink Recipe
The has surged 163% in cocktail menu appearances over the last three years, making it one of the fastest-growing drinks in the modern bar scene. Yet despite its popularity, most home bartenders consistently get it wrong — the foam collapses, the drink tastes bitter, or the balance is completely off. Following the 8 Essential Steps to the Perfect Drink Recipe changes all of that. Each step in this guide is backed by professional bartending technique and real-world testing, so you can nail this iconic cocktail every single time.
Disclosure: This post contains affiliate links. As an Amazon Associate, we earn from qualifying purchases, and at no extra cost to you.

Key Takeaways
- 🧊 Temperature control is the single biggest factor separating a great espresso martini from a mediocre one — both your espresso and your glass need to be at the right temperature before you start.
- ☕ Fresh espresso with crema is non-negotiable; it creates the signature foam layer that defines this cocktail.
- 💪 Vigorous shaking for 10–20 seconds emulsifies the coffee oils and produces that thick, velvety froth.
- 🍸 The correct ingredient ratio (vodka, , espresso, simple syrup) keeps the drink balanced — not too sweet, not too bitter.
- 🫘 The three-bean garnish is more than decoration — it’s a tradition called con la mosca that adds aroma and visual drama.
Why the Espresso Martini Deserves Your Full Attention
The espresso martini was invented in the 1980s by legendary London bartender Dick Bradsell, reportedly at the request of a young model who asked for something to “wake me up and mess me up.” That origin story tells you everything about what this drink should be: bold, energizing, and beautifully crafted.
What separates a truly great espresso martini from a forgettable one comes down to technique. The drink has only four core ingredients, which means there is nowhere to hide. Every decision — from the temperature of your espresso to how hard you shake — directly affects the final result.
In 2026, with coffee culture at an all-time high and more popular than ever, mastering this recipe is a skill worth having. Let’s walk through every step.
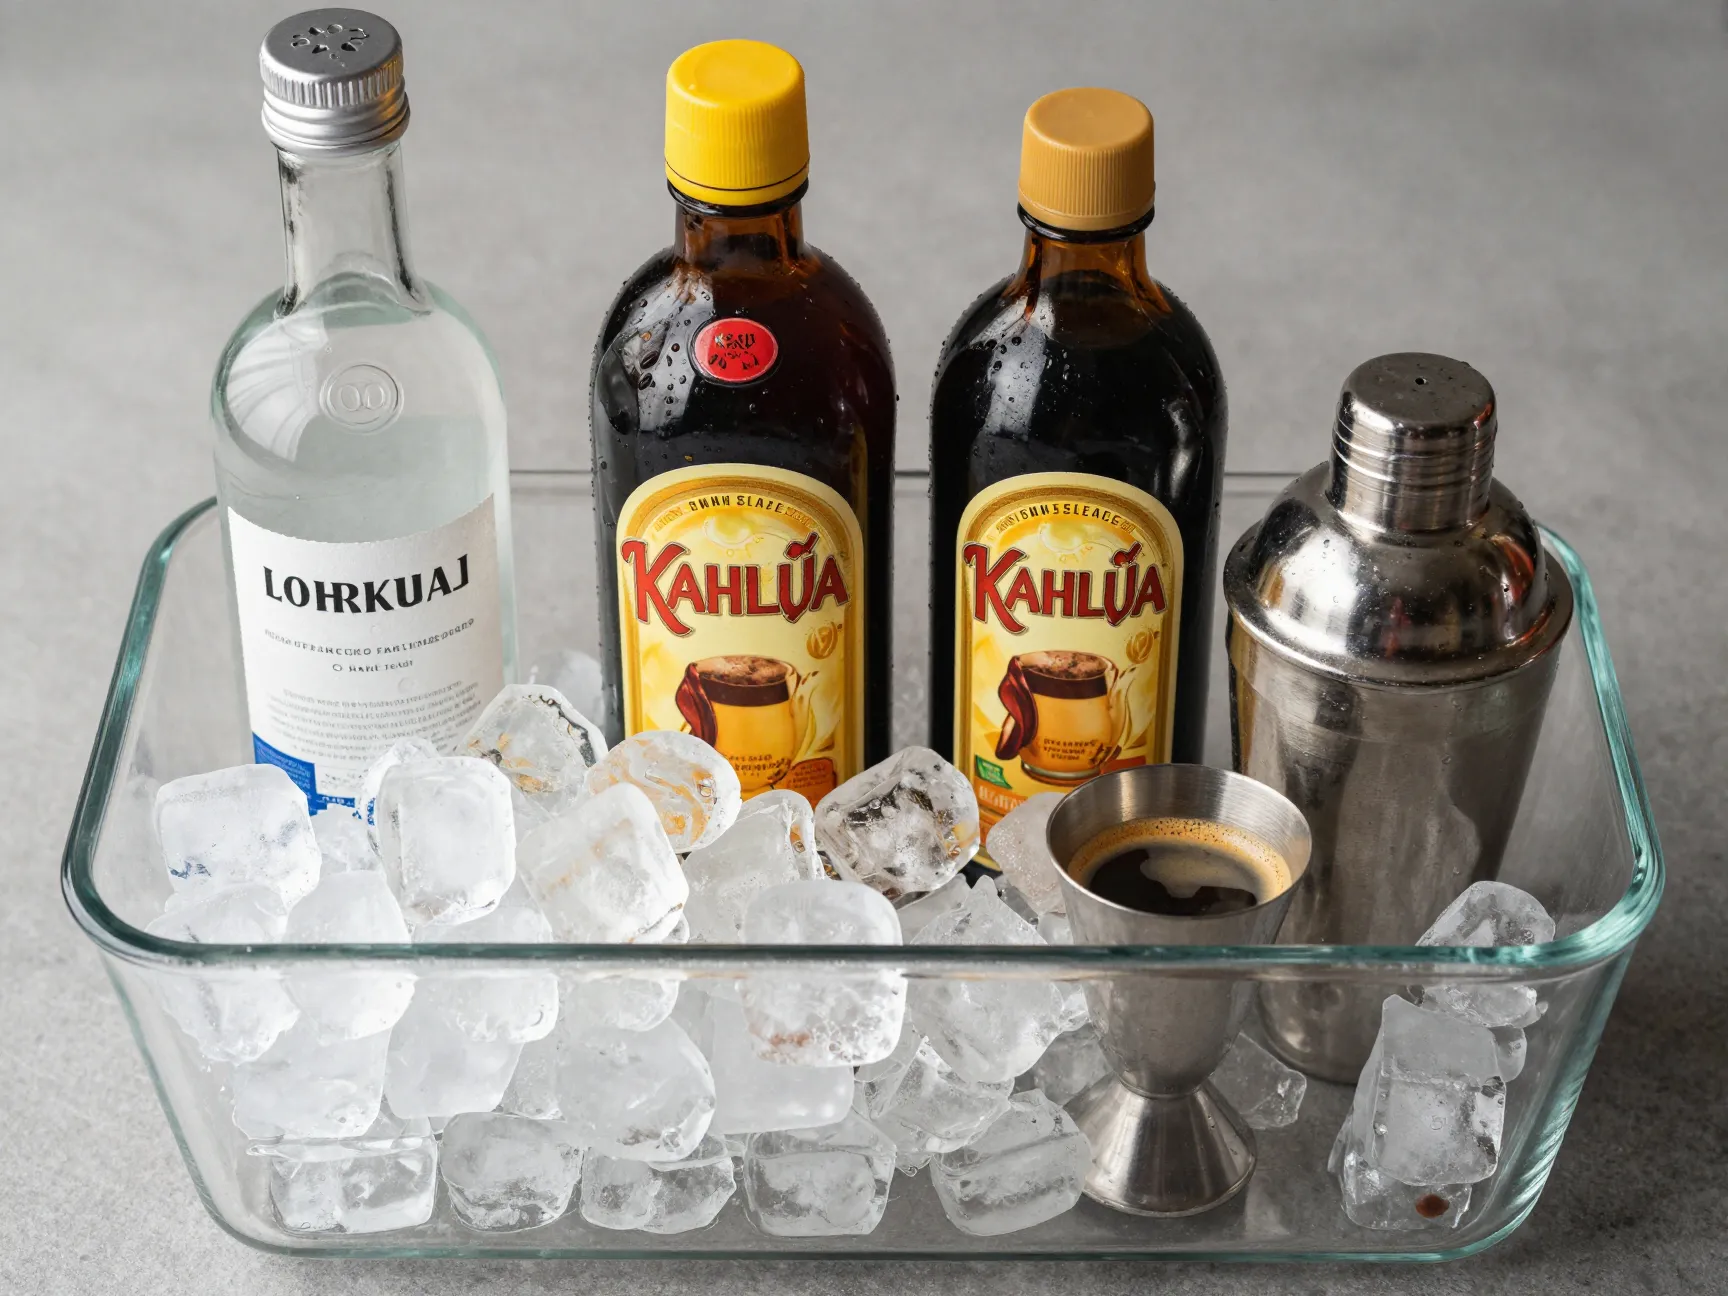
The Core Ingredients You Need
Before diving into the 8 Essential Steps to the Perfect Espresso Martini Drink Recipe, let’s get your ingredients sorted. Using quality components is the foundation of everything that follows.
| Ingredient | Amount | Notes |
|---|---|---|
| Vodka | 1.5–2 oz | Use a clean, neutral vodka |
| (Kahlúa) | 0.5–1 oz | Adds sweetness and depth |
| Fresh espresso | 1 oz | Must be freshly brewed |
| Simple syrup | 0.5 oz | Adjust to taste |
💡 Pro Tip: The quality of your espresso matters more than any other ingredient. A watery, stale shot will ruin the drink no matter how perfectly you execute every other step. [1]
Optional upgrades:
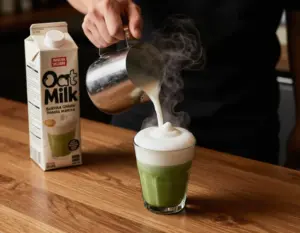
- Vanilla vodka for a sweeter, dessert-style profile
- Cold brew concentrate as a substitute if you don’t have an
- Flavored simple syrups (vanilla, hazelnut, caramel) for creative variations [4]
The 8 Essential Steps to the Perfect Espresso Martini Drink Recipe
1. Pull a Fresh Espresso Shot with Crema
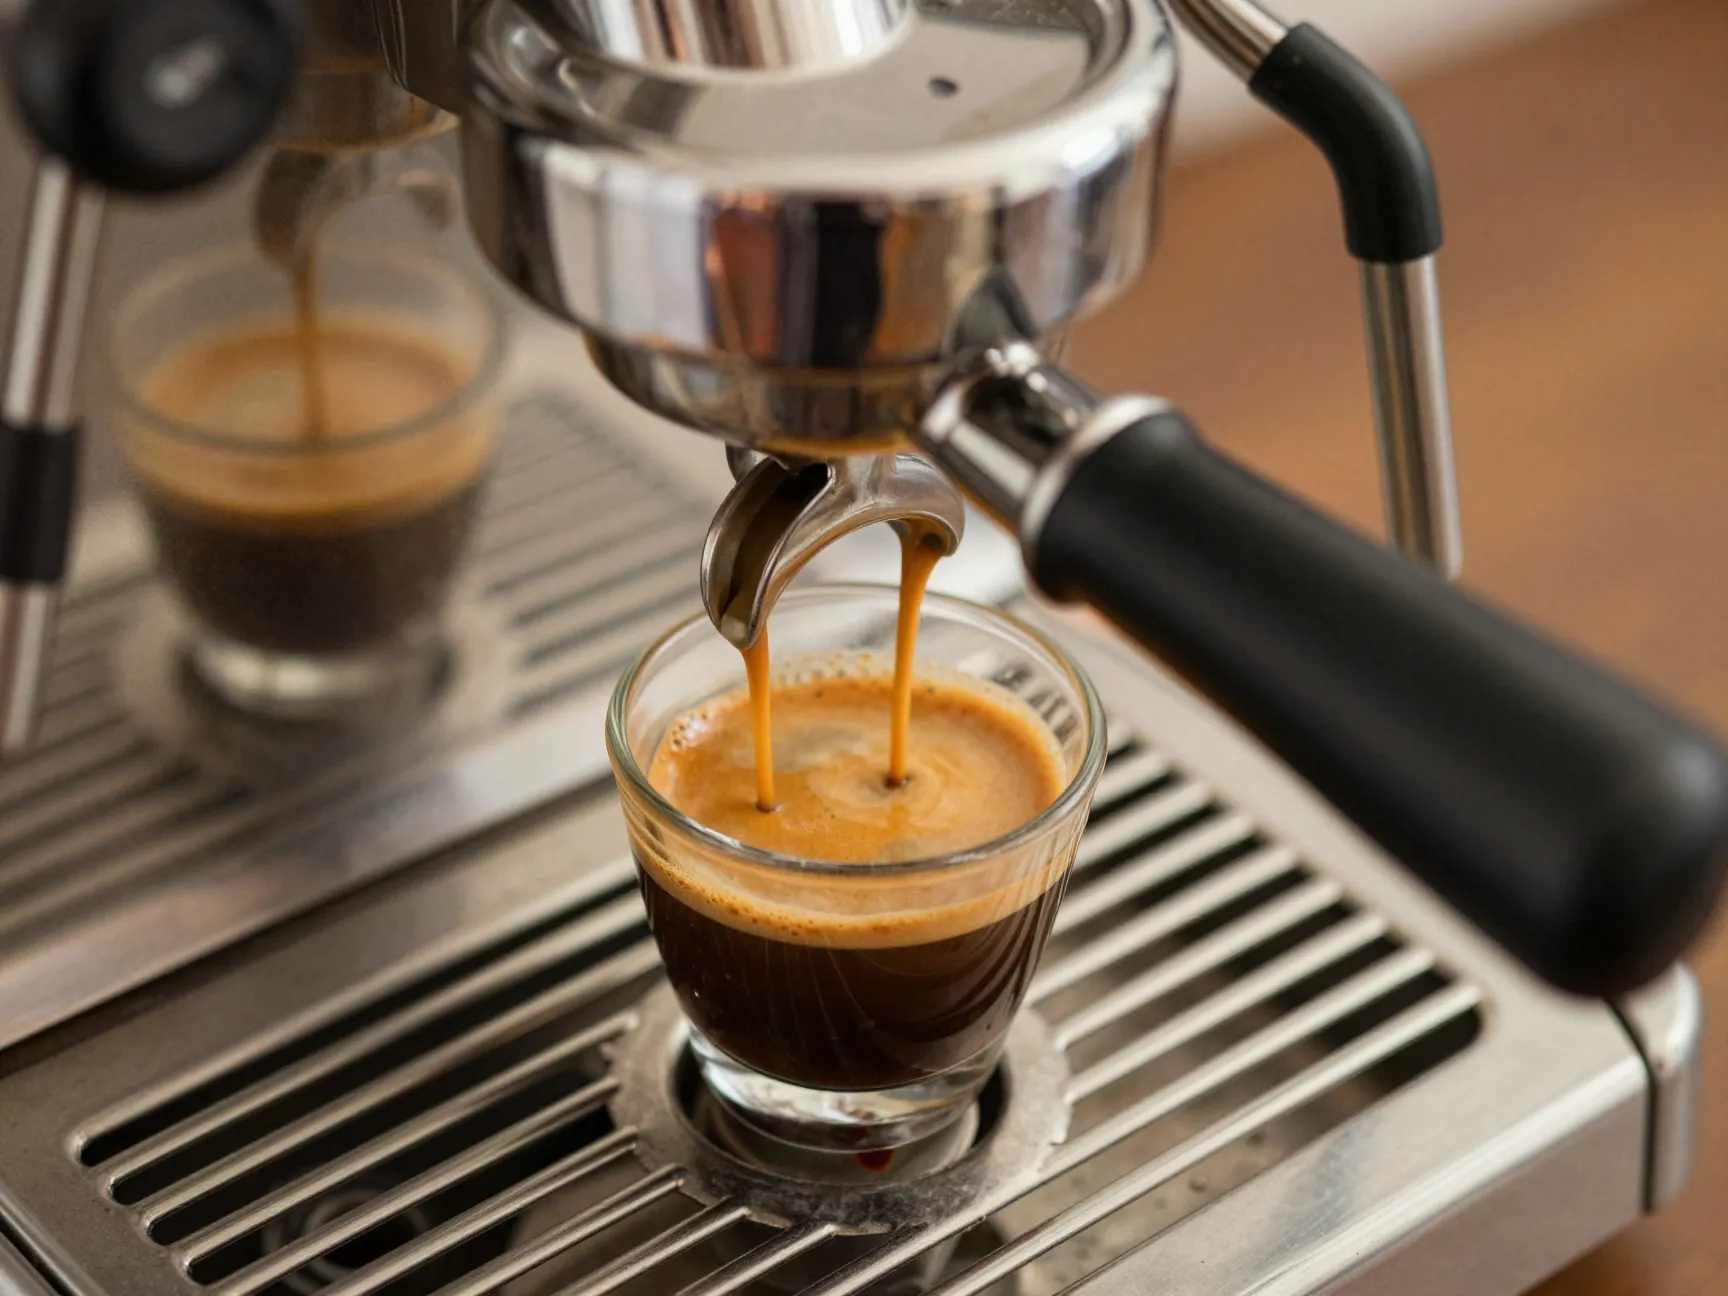
The espresso is the soul of this cocktail. Freshly brewed espresso — not instant coffee, not cold brew, not leftover morning coffee — is what creates the signature frothy foam layer that makes this drink so visually stunning. [6]
The crema (that golden-brown layer on top of a properly pulled espresso shot) contains emulsified coffee oils that are essential for foam production. When you shake the cocktail vigorously, these oils interact with air and ice to create that thick, velvety froth everyone is chasing. [1]
What to do:
- Pull a 1 oz espresso shot from an espresso machine
- Use freshly ground for maximum crema
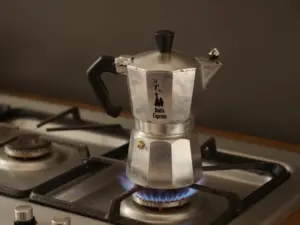
- If you don’t own an espresso machine, a stovetop Moka pot or an AeroPress can work as alternatives, though the crema will be less pronounced [2]
- Do NOT use instant coffee — it simply won’t produce the foam
“The crema is your secret weapon. Without it, you’re just making a . With it, you’re making an espresso martini.” — Professional bartending principle [6]
2. Cool Your Espresso Before Adding It to the Shaker

This step trips up more home bartenders than any other. Pouring a boiling-hot espresso shot directly onto ice in your shaker causes rapid, uneven melting. That excess water dilutes your drink, weakens the flavor, and ruins the foam. [3]
The fix is simple:
- Pour your fresh espresso shot into a small glass or ramekin
- Place it in the freezer for 3–5 minutes, or the refrigerator for 5–8 minutes
- You want it cool to the touch but not frozen solid
- Alternatively, pour it over a single ice cube in a separate glass, then strain the cooled liquid into your shaker [5]
Cooling your espresso is a small step that makes a massive difference in the final texture and strength of your drink. [3]
3. Pre-Chill Your Glassware
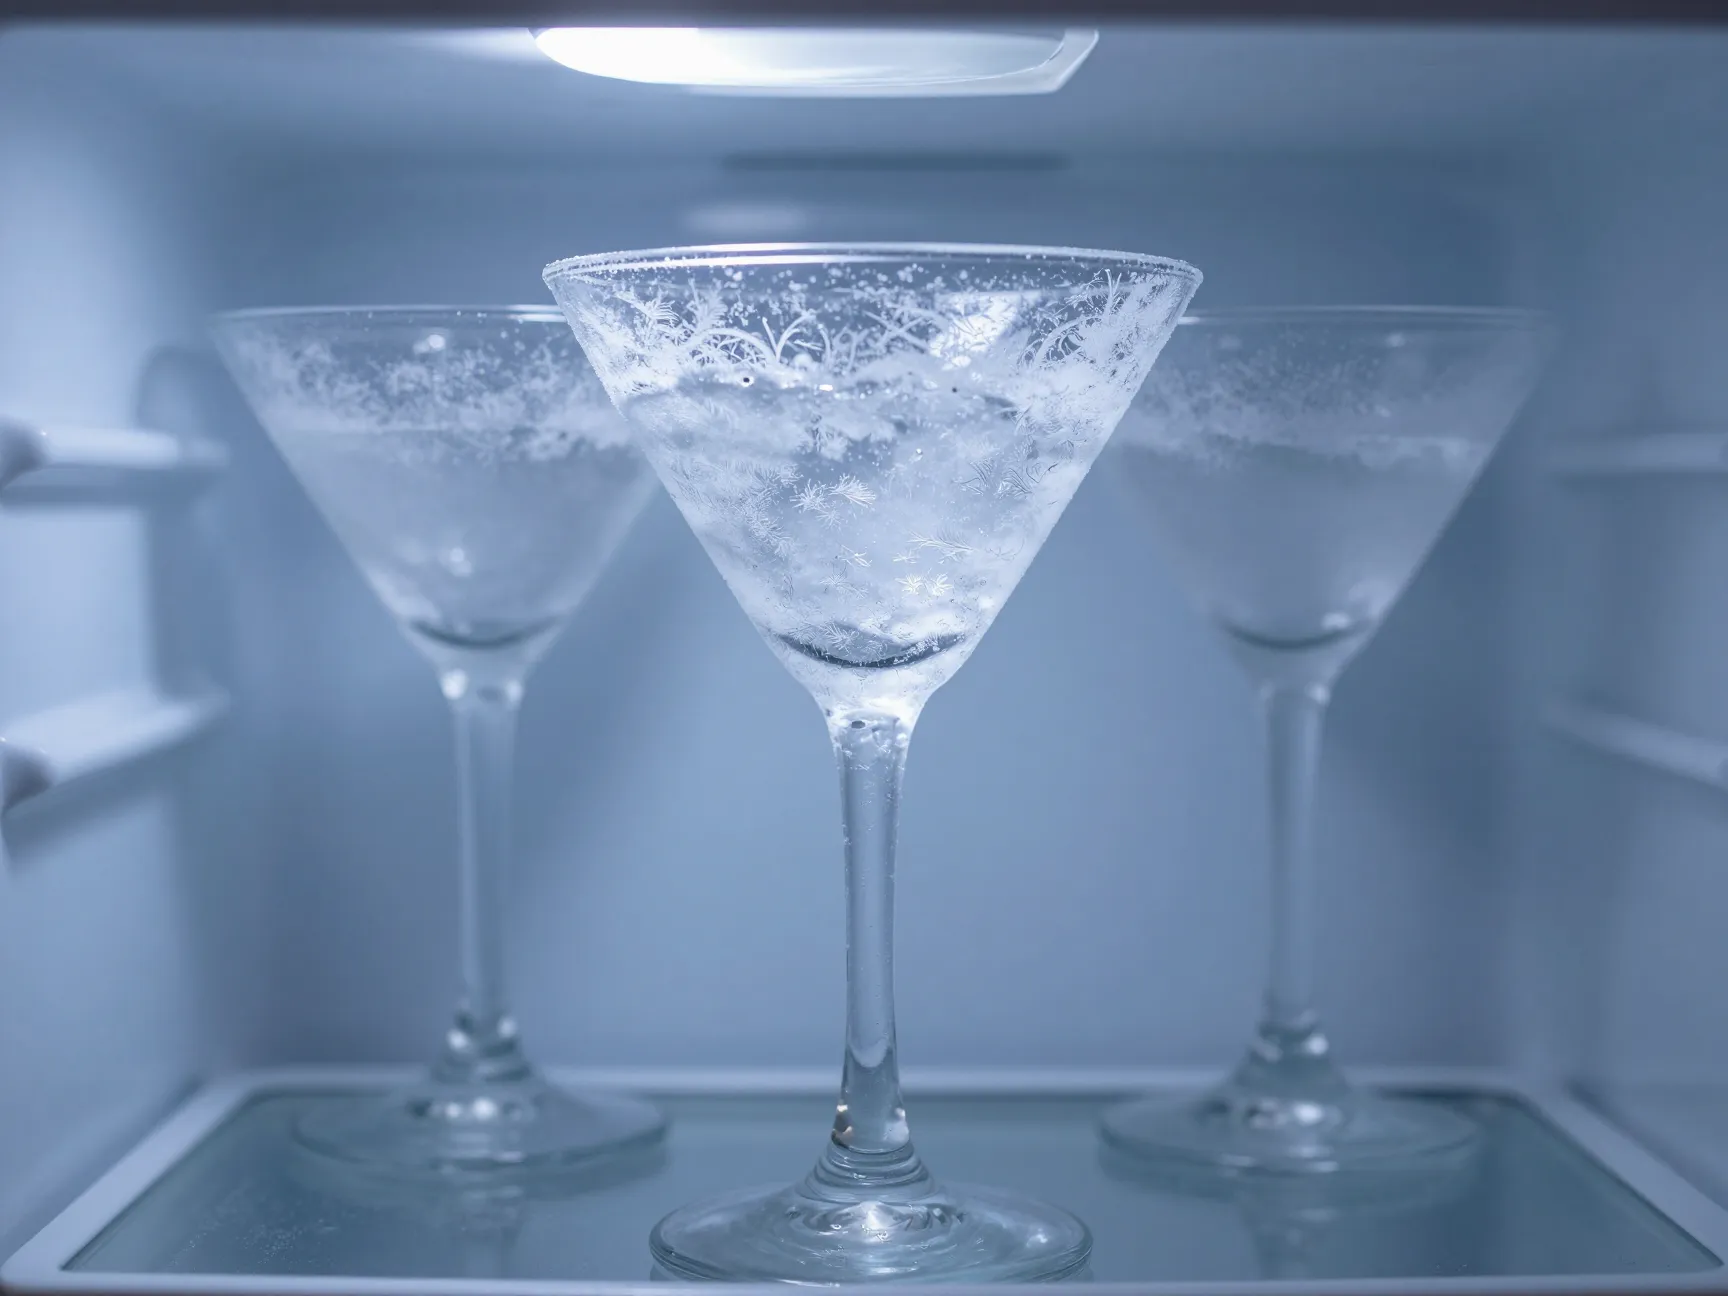
A warm glass is the enemy of a great espresso martini. When you pour a cold, frothy cocktail into a room-temperature glass, two things happen: the drink warms up quickly, and the foam begins to collapse almost immediately. [3]
How to pre-chill your glass:
- Place your martini glass or coupe glass in the freezer for 10–15 minutes before you plan to serve the drink
- If you’re short on time, fill the glass with ice water for 2–3 minutes, then discard the water and dry lightly before pouring
- The glass should feel noticeably cold when you pick it up [6]
A properly chilled glass keeps the drink at the ideal serving temperature longer and helps the foam layer stay intact, giving you that picture-perfect presentation. [3]
4. Fill Your Shaker with Ice and Add Ingredients in the Correct Order
Now you’re ready to build the drink. The order in which you add ingredients to the shaker matters — it affects how well everything integrates and ensures the most accurate measurements. [2]
The correct order:
- Fill your cocktail shaker two-thirds full with fresh ice
- Add 1.5–2 oz of vodka
- Add 0.5–1 oz of coffee liqueur (Kahlúa is the classic choice)
- Add 0.5 oz of simple syrup (adjust based on your sweetness preference)
- Add your cooled 1 oz espresso shot last [4]
Adding the espresso last minimizes the time it spends in contact with the ice before shaking, which helps preserve its flavor compounds and crema oils. [2]
💡 Why this order? Alcohol first means your measurements are most accurate when the shaker is empty. The espresso goes in last so its delicate oils don’t get absorbed by the ice before shaking begins.
5. Seal the Shaker Properly Before Shaking
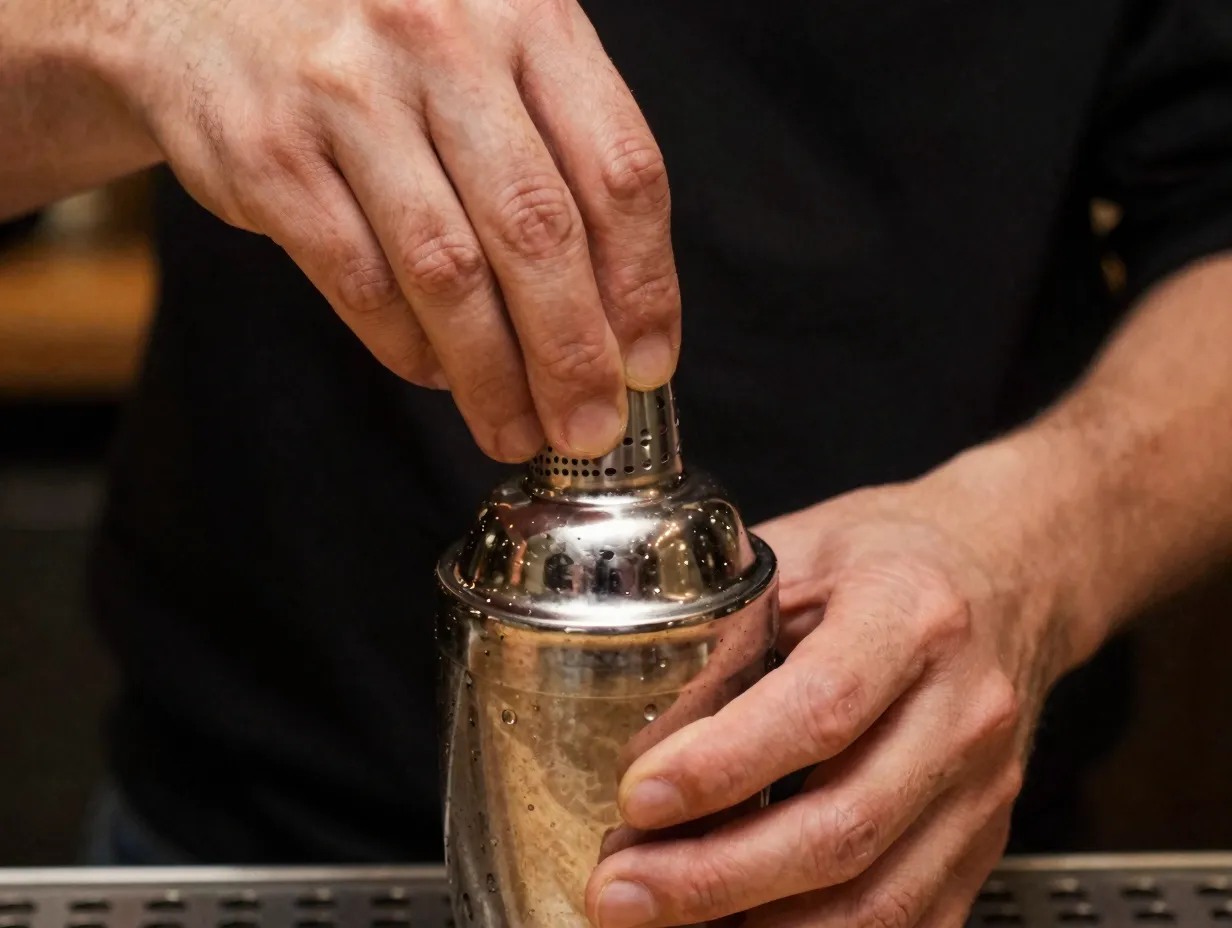
This step sounds obvious, but a poorly sealed shaker is a recipe for a sticky, coffee-covered kitchen — and a ruined cocktail. Beyond the mess, a loose lid means air escapes during shaking, which directly reduces the foam formation you’re working so hard to achieve. [6]
How to seal correctly:
- Place the lid firmly on top of the shaker body
- Press down with the heel of your palm until you hear or feel it click into place
- Give it a gentle test tap before you start shaking
- For a Boston shaker (two-piece), press the tin and glass together at a slight angle, then tap the base of the tin firmly
A proper seal maintains internal pressure during the shake, which is critical for aerating the coffee oils and building that thick foam layer. [6]
6. Shake Vigorously for 10–20 Seconds
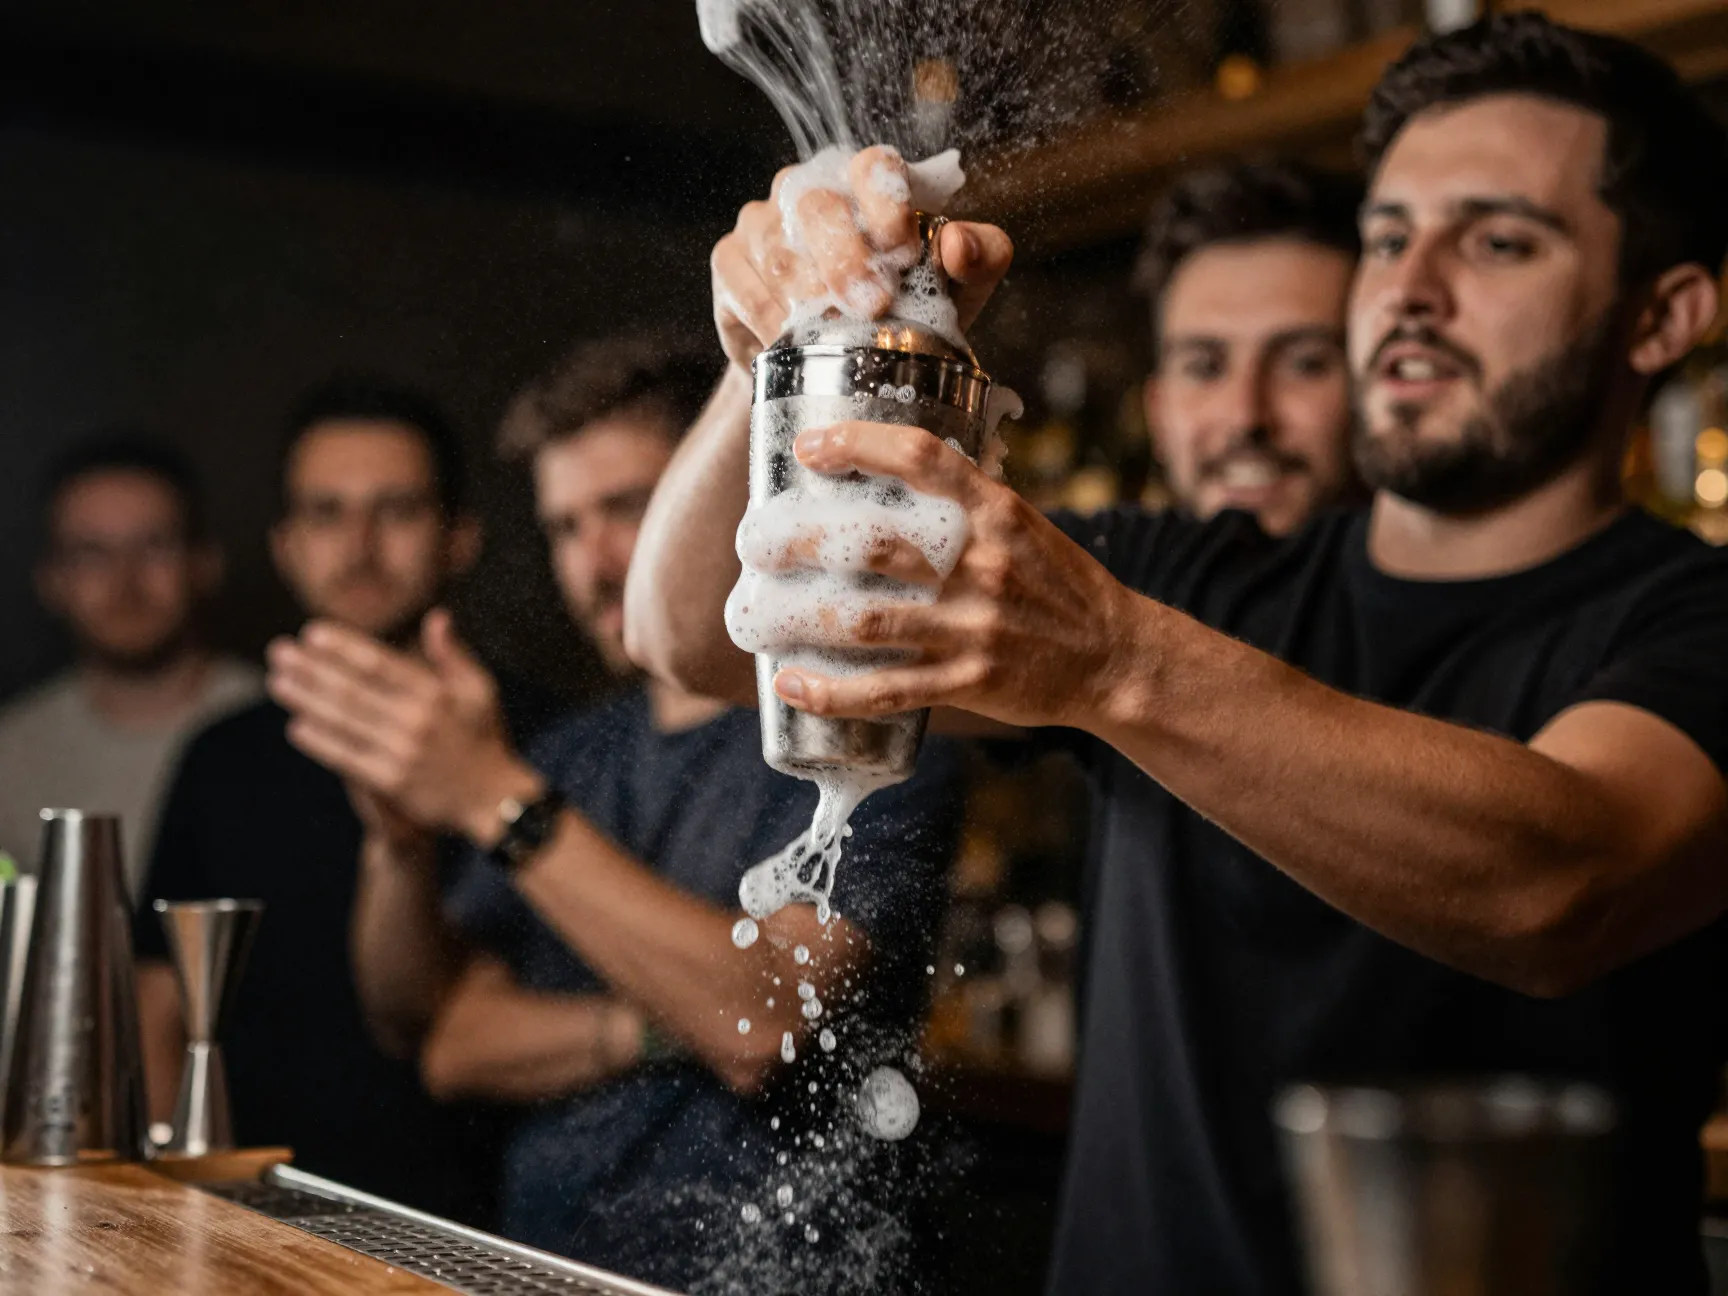
This is the most physically demanding step — and the most important one for texture. Vigorous shaking is what transforms a simple mixture of ingredients into a smooth, emulsified cocktail with a thick, creamy foam on top. [5]
The technique:
- Hold the shaker with both hands — one on each end
- Shake hard and fast in a back-and-forth motion
- Shake for a minimum of 10–12 seconds, ideally up to 20 seconds [6]
- You’ll feel the shaker get very cold — that’s a good sign
- Don’t be shy about it; a half-hearted shake produces a thin, disappointing foam [5]
“The shake is where the magic happens. Those 15 seconds are the difference between a flat and a proper espresso martini with a foam you could float a coin on.” [6]
What happens during the shake:
- Ice rapidly chills and dilutes the drink to the perfect consistency
- Vigorous agitation emulsifies the coffee oils from the espresso crema
- Air is incorporated into the liquid, creating the foam layer
- All four ingredients fully integrate into a cohesive, balanced cocktail [1]
7. Double-Strain Into Your Chilled Glass
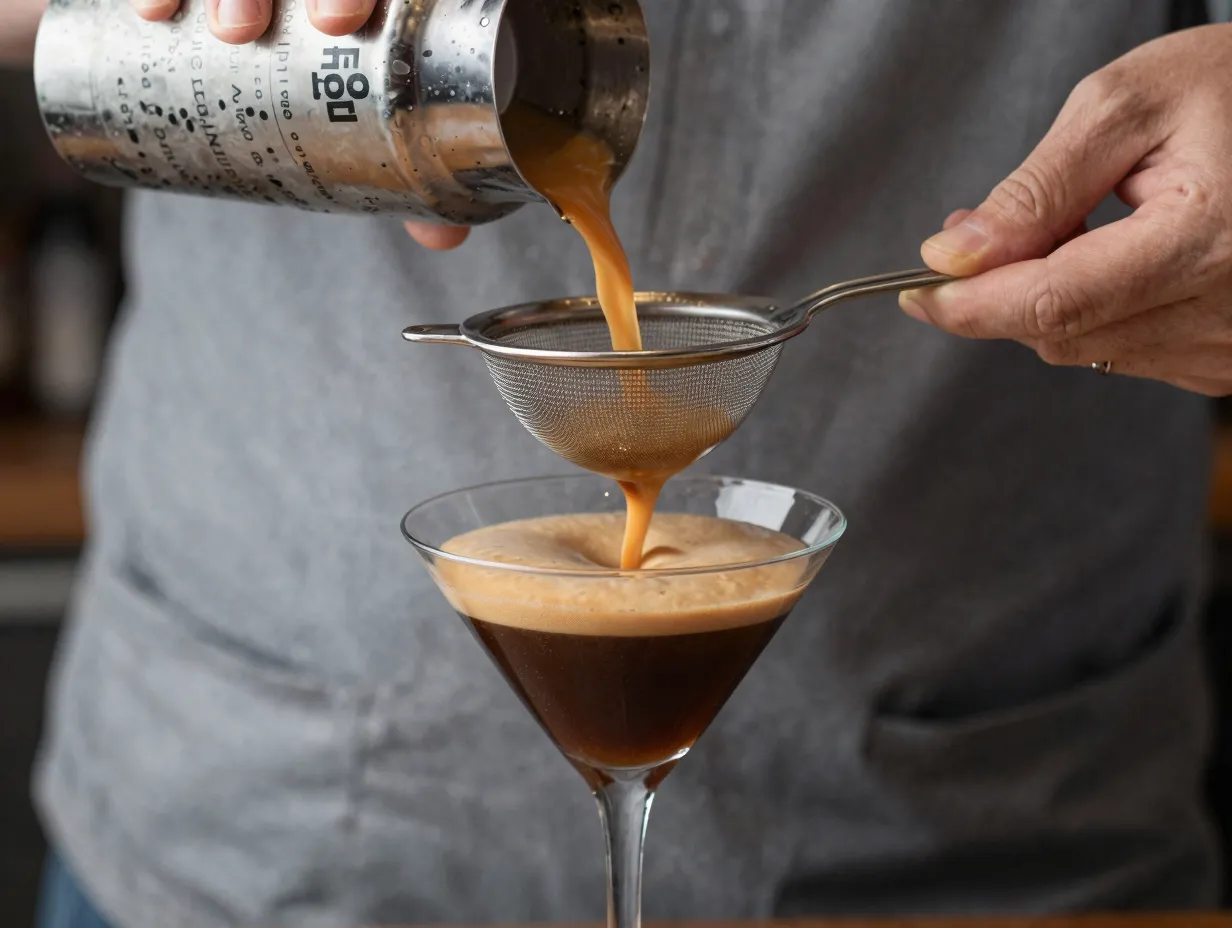
How you pour the drink into the glass determines the final texture and presentation. Double-straining — using both the built-in strainer of your cocktail shaker AND a fine mesh strainer held over the glass — catches any ice chips, coffee grounds, or large air bubbles that would otherwise disrupt the smooth foam layer. [3]
How to double-strain:
- Hold your fine mesh strainer over the pre-chilled glass
- Pour the cocktail through both the shaker strainer and the fine mesh strainer simultaneously
- Pour in a slow, steady stream to preserve the foam
- Stop pouring when you see mostly foam coming through — you want a clean foam layer on top, not a bubbly mess [5]
Some bartenders prefer to skip the fine strainer for a slightly creamier, thicker texture. [3] Both approaches are valid — it comes down to personal preference and the texture you’re going for.
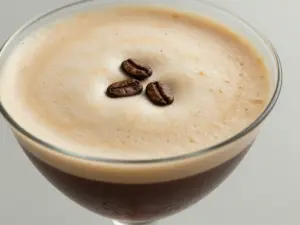
The result: A beautifully dark cocktail with a thick, uniform foam layer sitting on top, ready for the finishing touch.
8. Garnish with Three Coffee Beans in Petal Formation
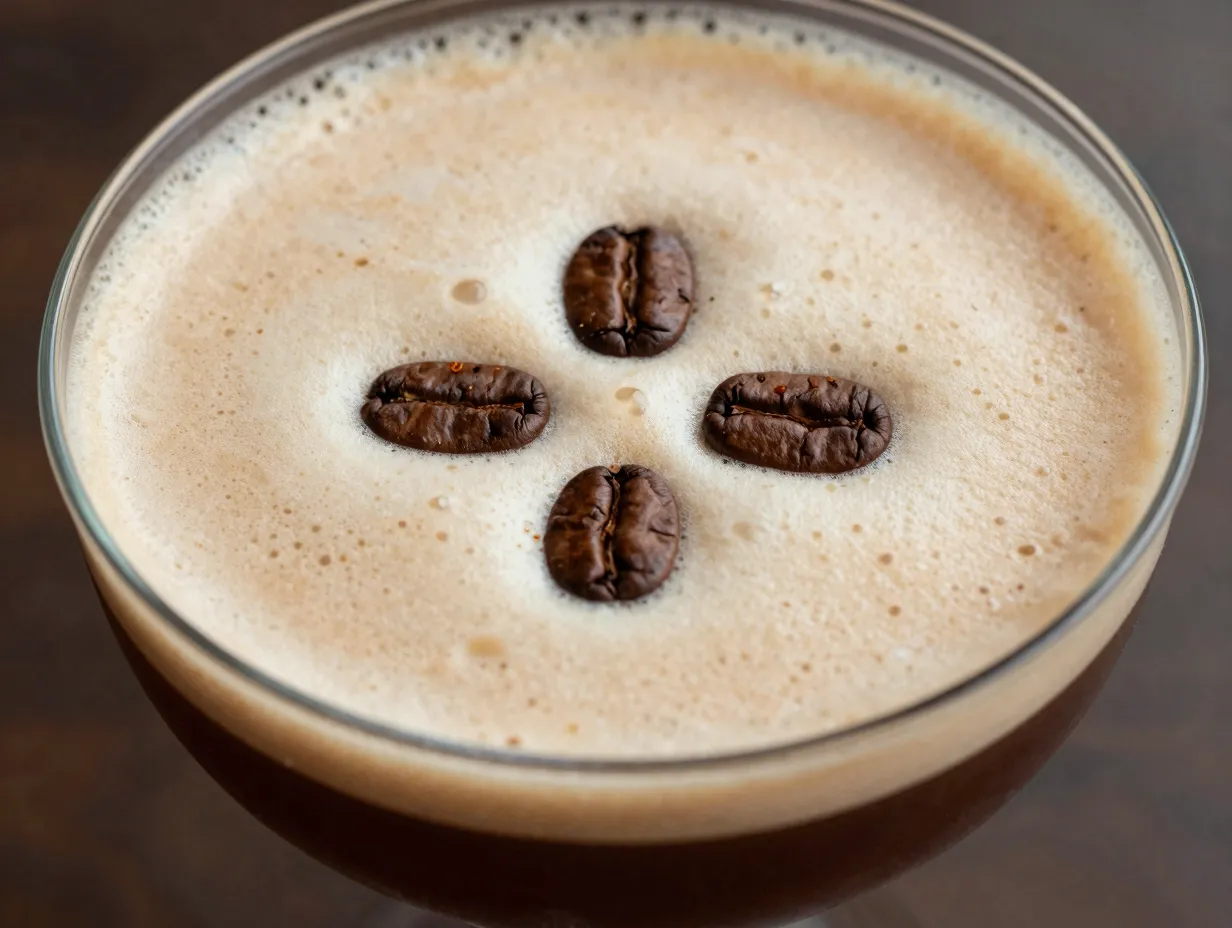
The final step in the 8 Essential Steps to the Perfect Espresso Martini Drink Recipe is the one that transforms a good drink into a great-looking one. The traditional garnish is three whole coffee beans placed on the foam in a triangular “petal” formation. [2]
This garnish has a name: con la mosca, which is Italian for “with the fly.” The three beans traditionally represent health, wealth, and happiness — a charming bit of cocktail folklore that adds meaning to the presentation. [3]
How to garnish:
- Gently place three coffee beans on the surface of the foam
- Arrange them in a triangular pattern, equally spaced
- Press them very lightly so they rest on top of the foam without sinking
- Serve immediately [2]
Why it matters beyond looks:
- The coffee beans release aromatic oils as the drink is consumed
- Each sip past the beans delivers a subtle burst of coffee fragrance
- It signals to your guest that this drink was made with care and intention [3]
Common Mistakes to Avoid
Even with the best intentions, these errors can derail your espresso martini:
| ❌ Mistake | ✅ Fix |
|---|---|
| Using hot espresso directly | Cool it for 3–5 minutes first [3] |
| Shaking too gently or briefly | Shake hard for 10–20 seconds [6] |
| Skipping glass pre-chilling | Freeze glass 10–15 minutes ahead [3] |
| Using stale or instant coffee | Always use fresh espresso with crema [1] |
| Overfilling the shaker with ice | Two-thirds full is the sweet spot [4] |
| Pouring too fast | Slow, steady pour preserves the foam [5] |
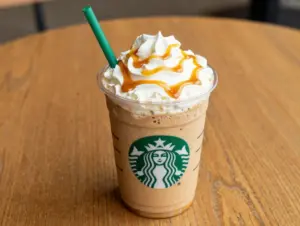
Variations Worth Trying in 2026
Once you’ve mastered the classic recipe, these popular variations are worth exploring:
🍦 Martini
Swap regular vodka for vanilla vodka and add a splash of vanilla simple syrup. Richer, dessert-forward, and crowd-pleasing. [7]
🥥 Coconut Espresso Martini
Replace simple syrup with coconut cream for a tropical twist. The coconut fat also enhances the foam layer.
🌶️ Spiced Espresso Martini
Add a small pinch of cayenne or a cinnamon stick-infused simple syrup for a warming, complex flavor profile. [7]
🍫 Martini
Add 0.5 oz of crème de cacao alongside the Kahlúa. Garnish with a chocolate rim and three coffee beans.
Equipment Checklist
You don’t need a professional bar setup to execute this recipe perfectly. Here’s what you actually need:
- ✅ Cocktail shaker (cobbler or Boston style)
- ✅ Jigger for accurate measurements
- ✅ Fine mesh strainer for double-straining
- ✅ Espresso machine (or Moka pot as a substitute)
- ✅ Coupe or martini glass
- ✅ Freezer space for glass pre-chilling
- ✅ Fresh ice (not old, flavor-absorbing freezer ice)
A Quick Reference: The Full Recipe at a Glance
Here’s the complete recipe condensed for quick reference:
Espresso Martini — Classic Recipe (Serves 1)
- 1.5–2 oz vodka
- 0.5–1 oz Kahlúa or coffee liqueur
- 1 oz fresh espresso (cooled)
- 0.5 oz simple syrup
Steps:
- Pull fresh espresso and cool for 3–5 minutes
- Pre-chill your coupe or martini glass for 10–15 minutes
- Fill shaker two-thirds with ice
- Add vodka, coffee liqueur, simple syrup, then cooled espresso
- Seal shaker firmly
- Shake vigorously for 10–20 seconds
- Double-strain slowly into chilled glass
- Garnish with three coffee beans in petal formation
Serve immediately. ☕🍸
Conclusion
Mastering the 8 Essential Steps to the Perfect Espresso Martini Drink Recipe is genuinely achievable for any home bartender willing to pay attention to the details. The difference between a forgettable coffee cocktail and a show-stopping espresso martini comes down to eight specific, learnable decisions: fresh espresso with crema, cooling that espresso before shaking, pre-chilling your glass, correct ingredient order, a properly sealed shaker, a vigorous 10–20 second shake, careful double-straining, and that final three-bean garnish.
Your actionable next steps:
- This week: Pull a test espresso shot and practice the cooling technique before you mix your first cocktail.
- Before your next gathering: Put your glasses in the freezer 15 minutes before guests arrive — this single habit will elevate every drink you serve.
- Experiment: Once you’ve nailed the classic, try one of the 2026 variations (vanilla, coconut, or spiced) to expand your repertoire.
- Invest in a fine mesh strainer if you don’t already own one — it’s a $10 tool that makes a visible difference in foam quality.
The espresso martini rewards precision. Follow these eight steps with care, and you’ll be producing café-quality cocktails from your own kitchen. Cheers. 🫘
References
[1] Espresso Martini – https://preppykitchen.com/espresso-martini/
[2] Your Guide To The Perfect Espresso Martini At Home – https://lacremacoffeecompany.com/blogs/coffee-college/your-guide-to-the-perfect-espresso-martini-at-home
[3] Espresso Martini – https://www.tayportdistillery.com/blogs/cocktail-recipes/espresso-martini
[4] How To Make The Perfect Espresso Martini At Home – https://javahouse.com/blogs/whats-new-at-java-house/how-to-make-the-perfect-espresso-martini-at-home
[5] Espresso Martini – https://www.delish.com/cooking/a36356671/espresso-martini/
[6] Watch – https://www.youtube.com/watch?v=7RYAR9FfQ90
[7] The Ultimate Espresso Martini – https://spiritswithsmoke.com/blogs/recipes/the-ultimate-espresso-martini