How Do You Make an Espresso? 8 Steps to the Perfect Home Shot
Only 14% of attempts produce a shot that a trained barista would call “properly extracted” — yet the process itself involves just eight repeatable steps. If your home espresso tastes sour, bitter, or flat, the fix is almost always one small variable hiding in plain sight. This guide on How Do You Make an Espresso? 8 Steps to the Perfect Home Shot breaks down every step with precision so you can pull café-quality espresso from your own kitchen, starting today.
Disclosure: This post contains affiliate links. As an Amazon Associate, we earn from qualifying purchases, and at no extra cost to you.

The good news? You don’t need years of . You need the right sequence, the right measurements, and a clear understanding of why each step matters. Whether you’re a curious beginner or someone who’s been pulling mediocre shots for months, this step-by-step walkthrough will change what ends up in your cup.
Key Takeaways
- ☕ Dose precisely: Use 18–20 grams of ground coffee for a double shot and aim for a 1:2 coffee-to-.
- ⏱️ Time your extraction: The ideal brew window is 25–30 seconds — sour means too fast, bitter means too slow.
- 🌡️ Preheat everything: Your machine needs 15–20 minutes to reach optimal brewing temperature.
- 🧂 Grind like table salt: Espresso grind should be fine and consistent — not powdery, not chunky.
- ⚖️ Tamp with ~30 lbs of pressure: Even, level tamping prevents channeling and ensures uniform extraction.
Why Most Home Espresso Falls Short
Before diving into the steps, it helps to understand why home espresso so often disappoints. According to La Marzocco, there are six main extraction variables that control shot quality: pressure, temperature, coffee dose, tamping, grind size, and liquid yield ratio [8]. Most home brewers unknowingly neglect at least two or three of these on every single shot.
The result? A shot that’s either sour and thin (under-extracted) or bitter and harsh (over-extracted) [3]. Neither is acceptable when you know what a balanced espresso should taste like — sweet, complex, with a thick hazelnut crema on top.
The framework below addresses all six variables in the order they actually matter during the brewing process.
How Do You Make an Espresso? 8 Steps to the Perfect Home Shot — The Complete Framework
💡 Pull quote: “Espresso is not a bean or a roast — it’s a brewing method. Master the method, and any quality coffee can shine.”
Here are the 8 steps, in exact order, to pull a perfect espresso shot at home.
1. Preheat Your Espresso Machine (Don’t Skip This)
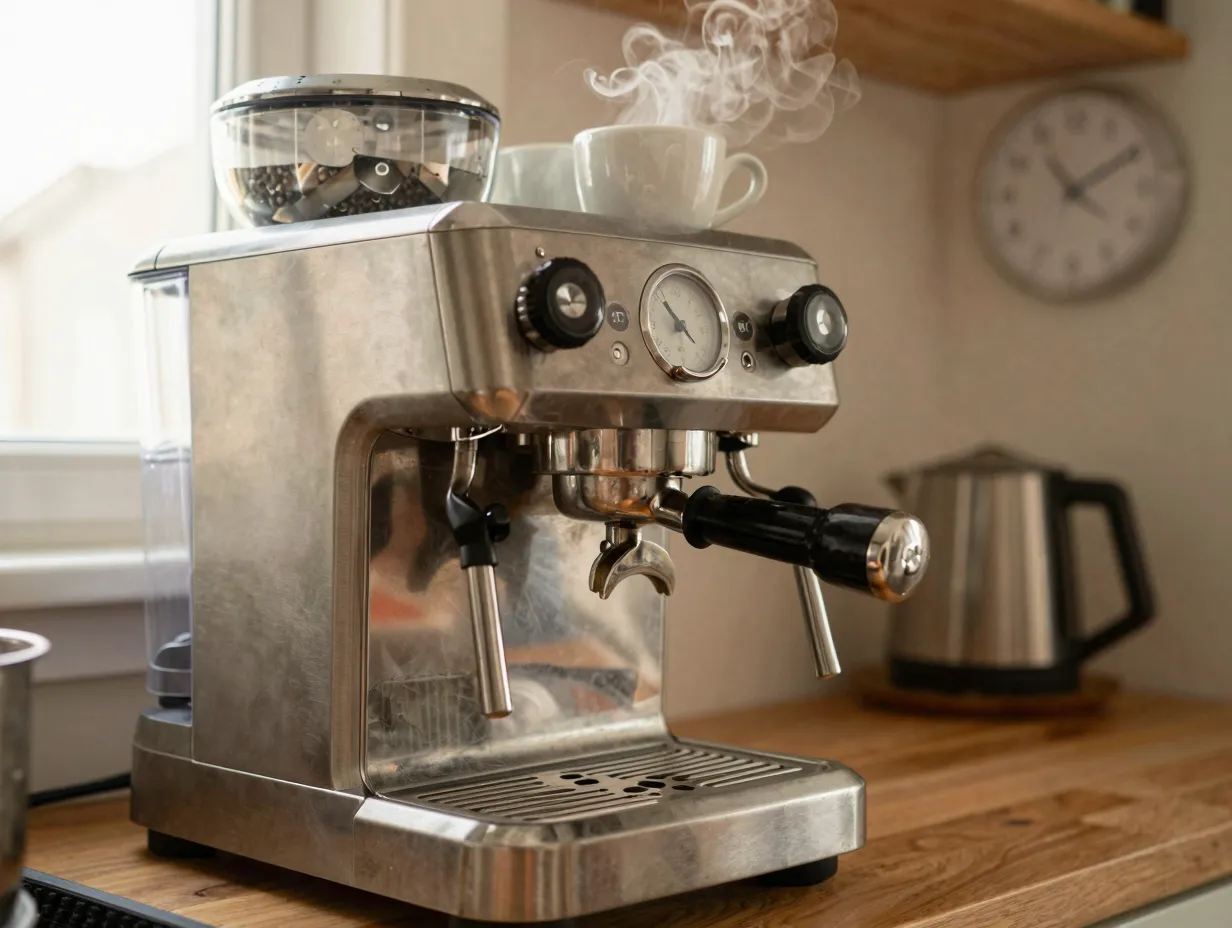
Time required: 15–20 minutes
Most people turn on their machine and start brewing within 2–3 minutes. That’s a mistake. require 15–20 minutes of preheating before they reach the stable internal temperature needed for optimal extraction [1]. Brewing too early means inconsistent water temperature, which directly weakens your shot’s flavor and crema development.
What to do:
- Turn your machine on and let it fully heat up
- Place your portafilter in the group head during warm-up — this heats the metal, which matters
- Place your demitasse cups on top of the machine to warm them (cold cups kill crema fast)
🔑 Pro tip: If your machine has a pressure gauge, wait until it stabilizes before pulling any shot.
2. Weigh and Grind Your Coffee Dose
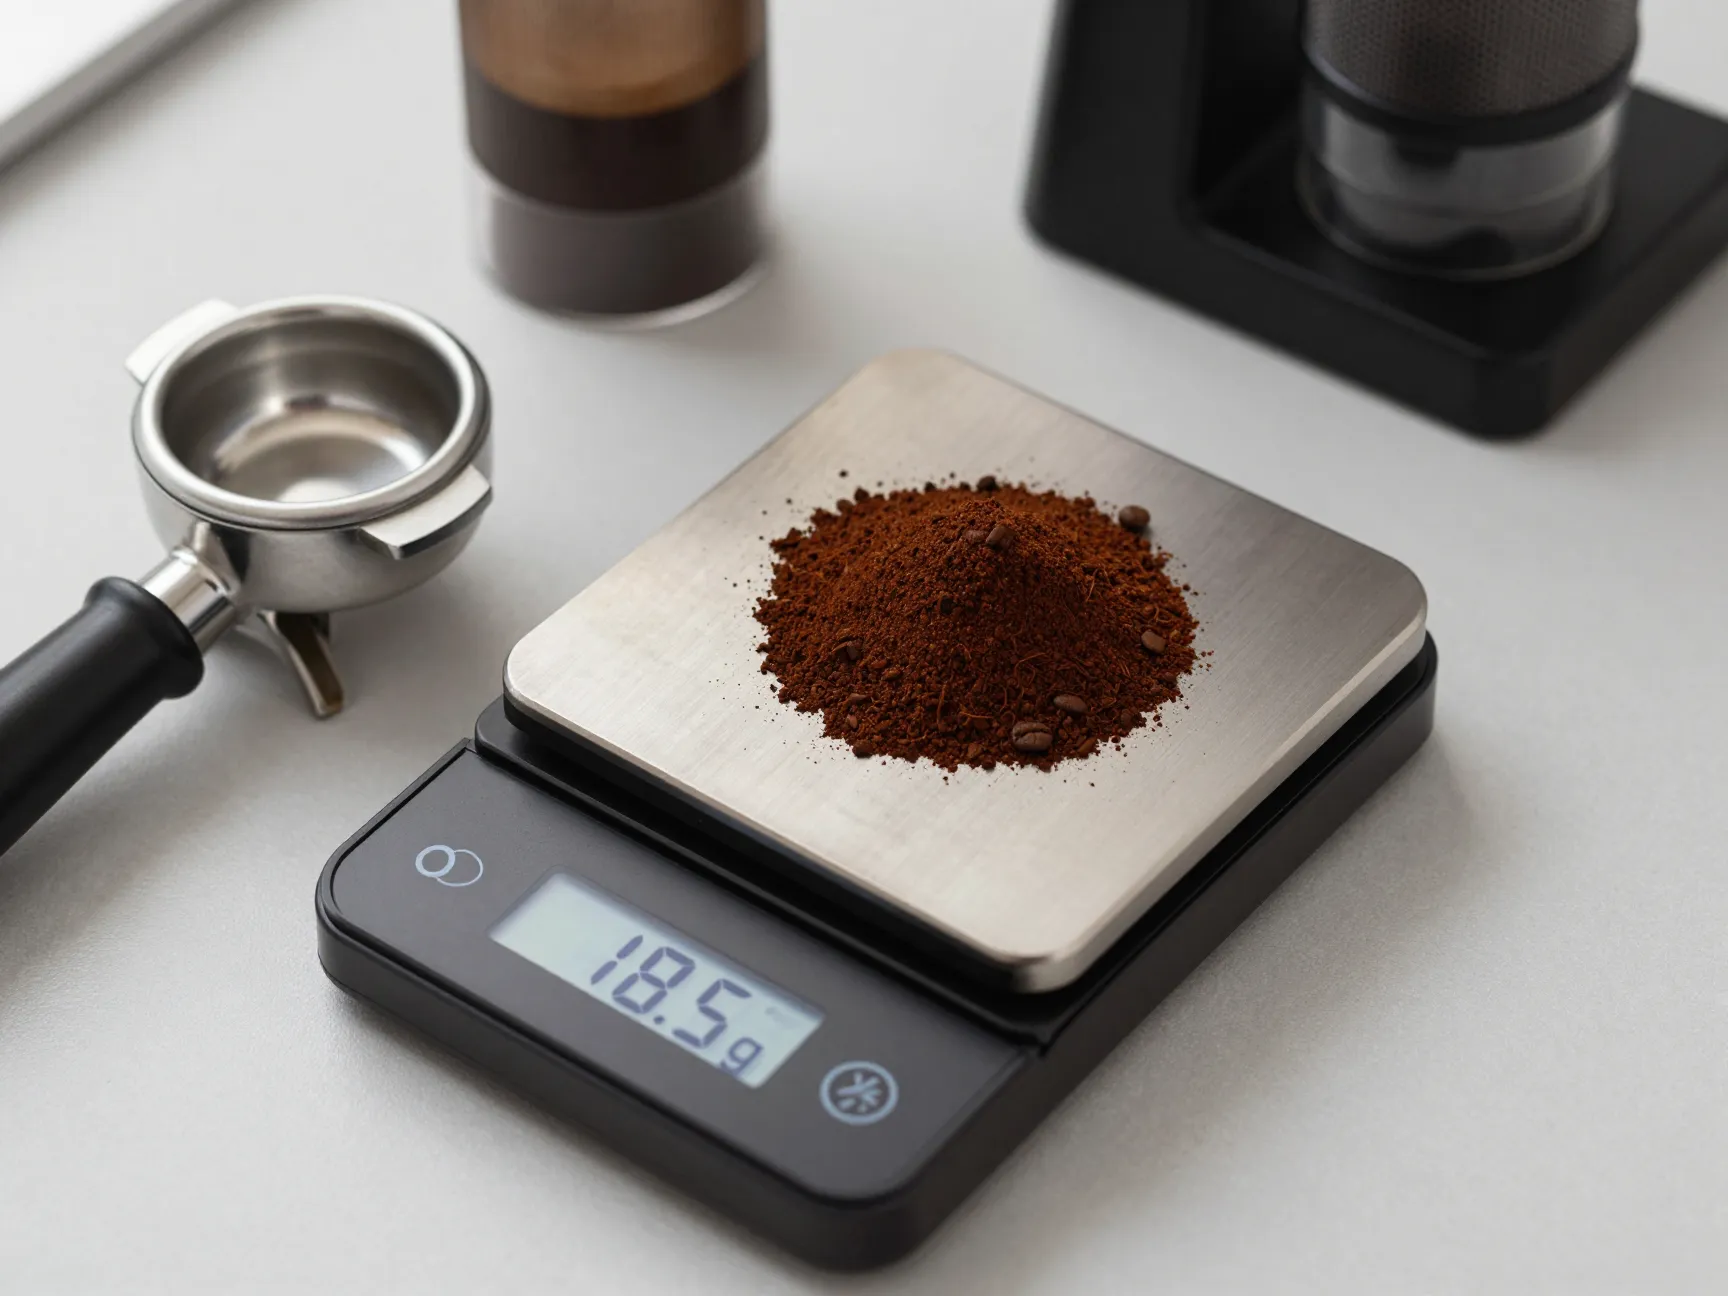
Target dose: 18–20 grams for a double shot | 8–10 grams for a single shot
Precision starts here. A standard double espresso shot uses 18–20 grams of freshly ground coffee, following a 1:2 coffee-to-water ratio [1][9]. That means 18 grams of coffee should yield approximately 36 grams of liquid espresso in the cup.
Use a digital scale accurate to 0.1 grams. Eyeballing your dose is one of the most common reasons home shots are inconsistent.
| Shot Type | Coffee Dose | Target Yield | Brew Time |
|---|---|---|---|
| Single | 8–10g | 16–20g | 25–30 sec |
| Double | 18–20g | 36–40g | 25–30 sec |
| Ristretto | 14–18g | 14–18g | 15–20 sec |
Grind fresh, every time. Pre-ground coffee loses volatile aromatics within minutes of grinding. For espresso, freshness isn’t optional — it’s the difference between a flat shot and a vibrant one [6].
3. Dial In Your Grind Size
Target texture: Fine, like table salt — not powdery, not coarse
Grind size is the single most powerful adjustment you can make to fix a bad shot. For espresso, the grind must resemble table salt in texture — fine and consistent throughout [1]. Too coarse and water rushes through too fast (sour, weak shot). Too fine and water can’t push through at all (bitter, over-extracted shot) [3].
Quick grind size troubleshooting:
- 🔴 Shot pulls in under 20 seconds → Grind finer
- 🟡 Shot pulls in 25–30 seconds → You’re in the zone ✅
- 🔴 Shot barely drips or takes over 35 seconds → Grind coarser
Use a burr grinder, not a blade grinder. Blade grinders create uneven particle sizes that make consistent extraction nearly impossible. A quality burr grinder is the single best equipment investment a home can make [5].
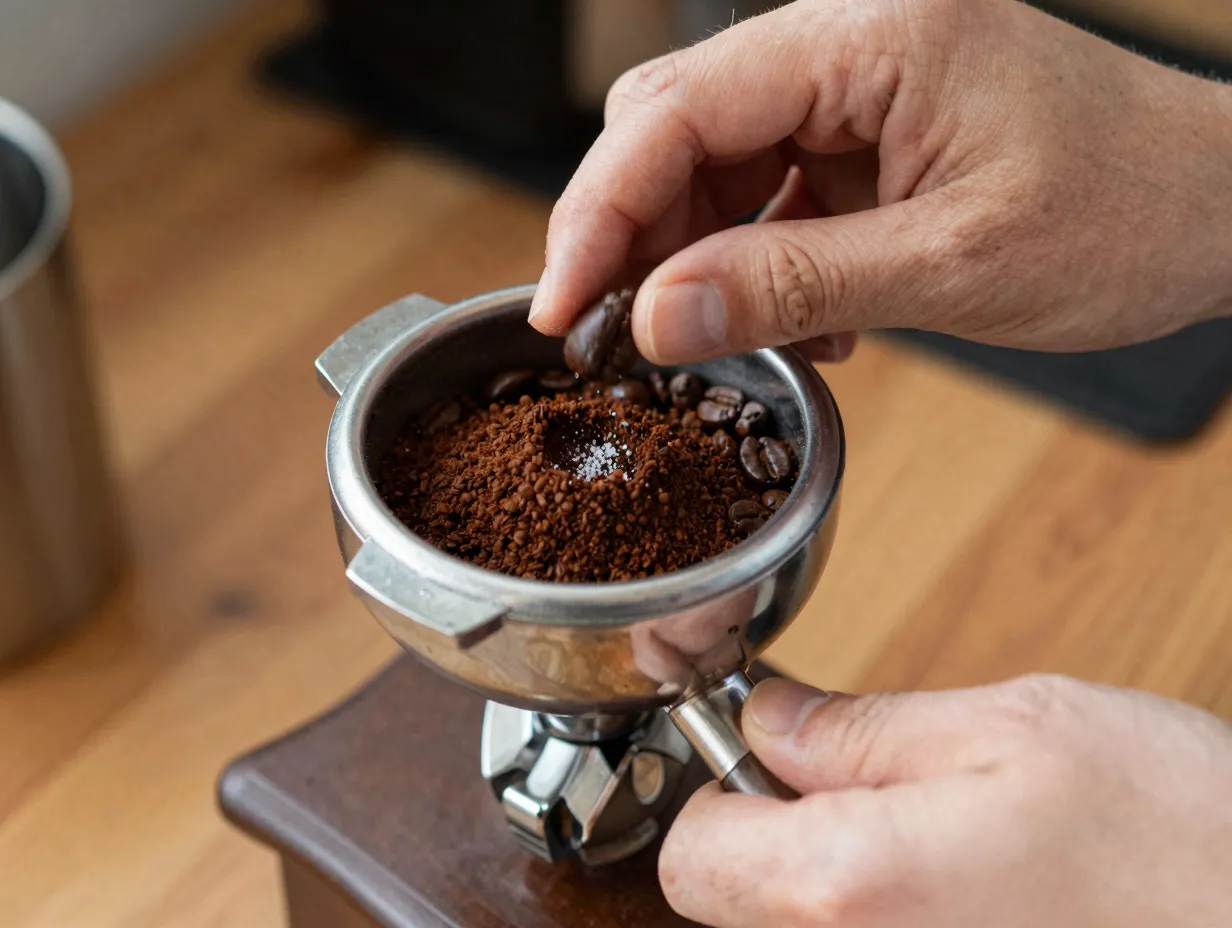
4. Distribute the Grounds Evenly (WDT Technique)
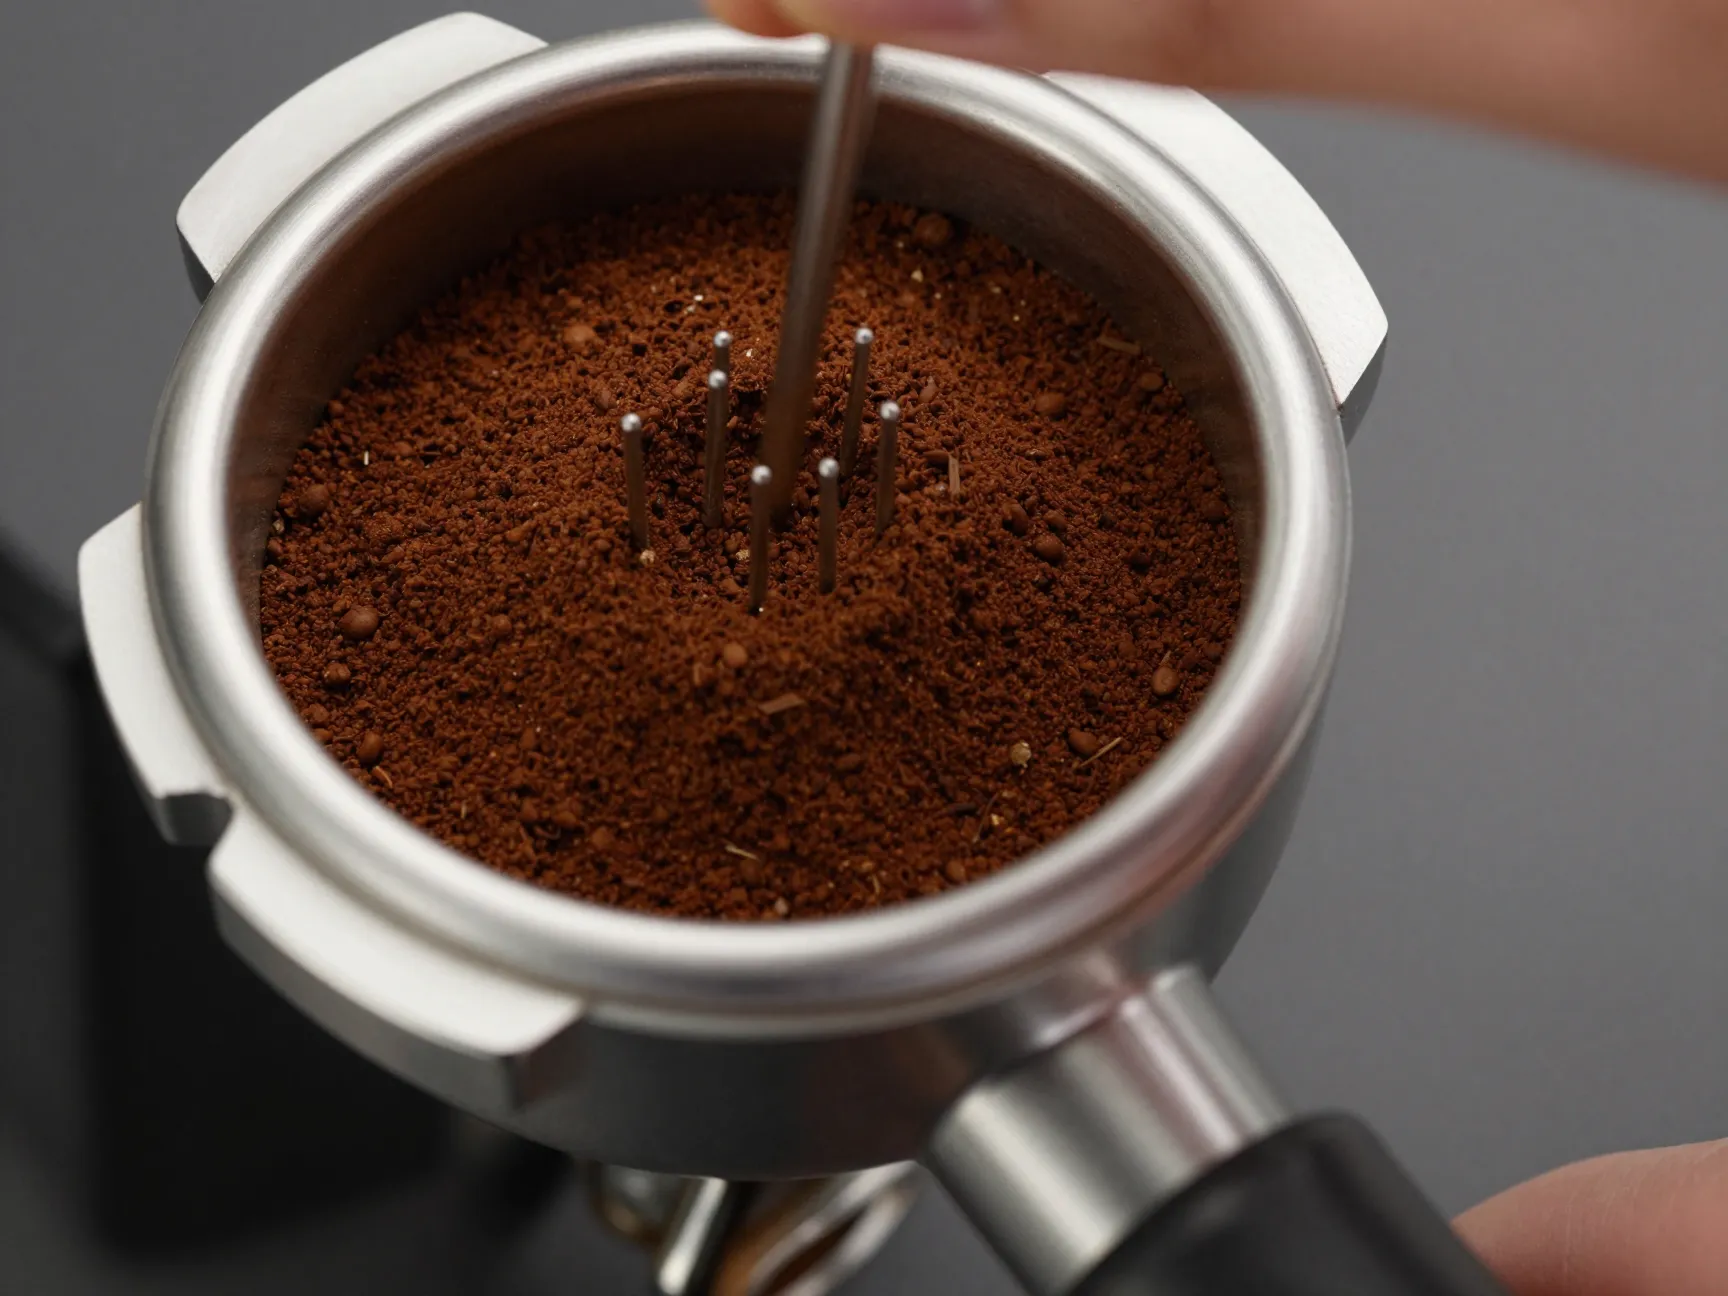
Tool needed: WDT tool or a fine needle/toothpick
This step is underrated and often skipped entirely — which explains a lot of bad shots. After dosing your grounds into the portafilter basket, they tend to clump together unevenly. These clumps create channels — paths of least resistance where water rushes through, bypassing other grounds entirely.
The solution is the Weiss Distribution Technique (WDT): use a thin needle or specialized WDT tool to stir and distribute the grounds in a circular motion before tamping [4]. This breaks up clumps and creates a uniform coffee bed.
Why it matters: Channeling is one of the top causes of under-extraction. Even if your dose, grind, and tamp are perfect, clumped grounds will ruin the shot [4].
Steps for WDT:
- Dose grounds into portafilter
- Insert WDT tool and stir in small circular motions
- Work from the outside edge inward
- Level the surface gently before moving to tamping
5. Tamp with Consistent, Even Pressure
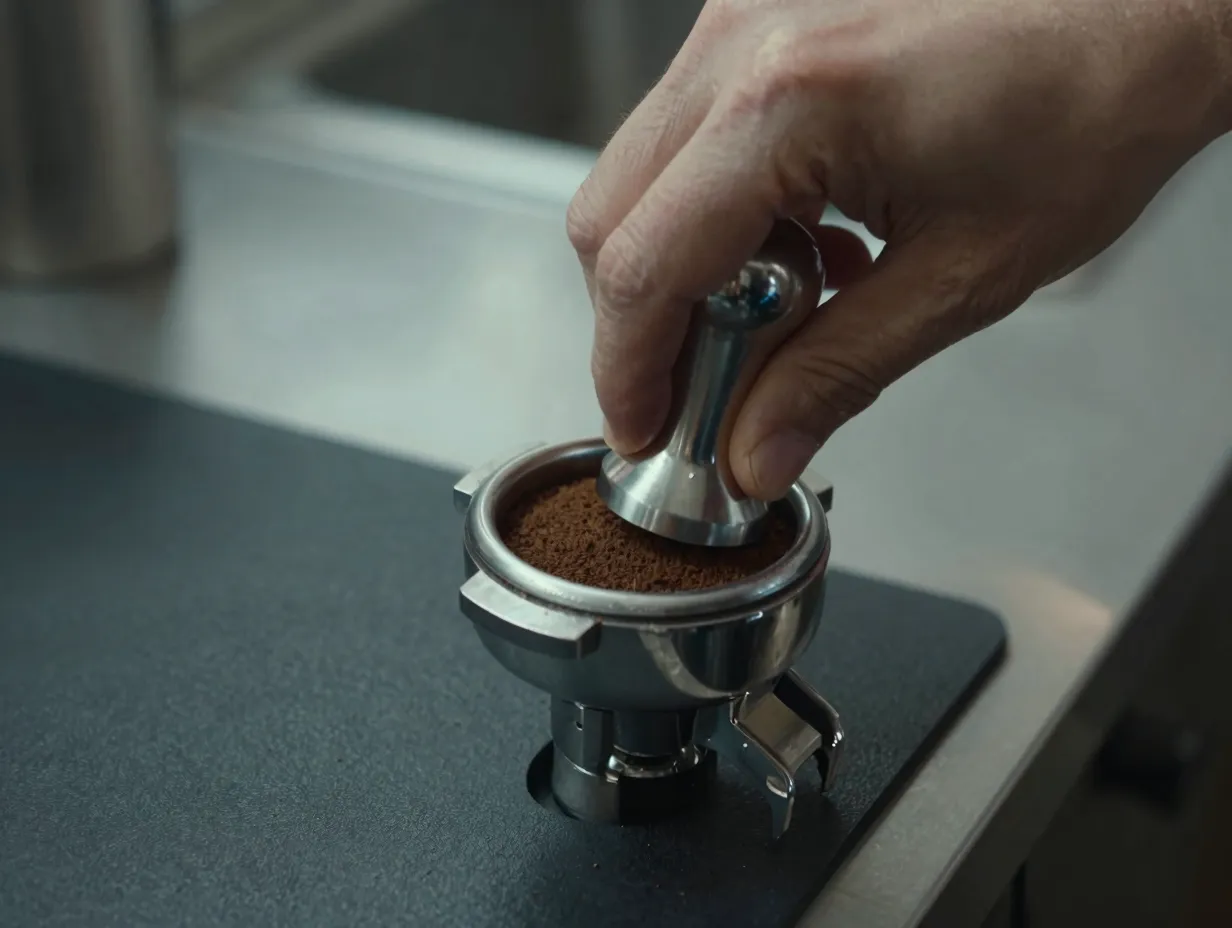
Target pressure: Approximately 30 pounds
Tamping compresses the into a dense, even puck that forces water to extract evenly across the entire surface. The standard target is approximately 30 pounds of pressure — firm, but not a feat of strength [4].
More important than the exact pressure is consistency and levelness. An angled tamp creates a thicker section on one side, which causes water to channel through the thinner side first [4].
How to tamp correctly:
- Place the portafilter on a flat, stable surface (or use a tamping mat)
- Position your elbow at 90 degrees
- Press straight down with your body weight, not just your wrist
- Give one firm, smooth press — no twisting or “polishing” needed
- The puck surface should be smooth and level
⚠️ Common mistake: Tamping too hard doesn’t improve extraction — it can actually over-compress the puck and slow water flow to a crawl.
6. Purge the Group Head Before Locking In
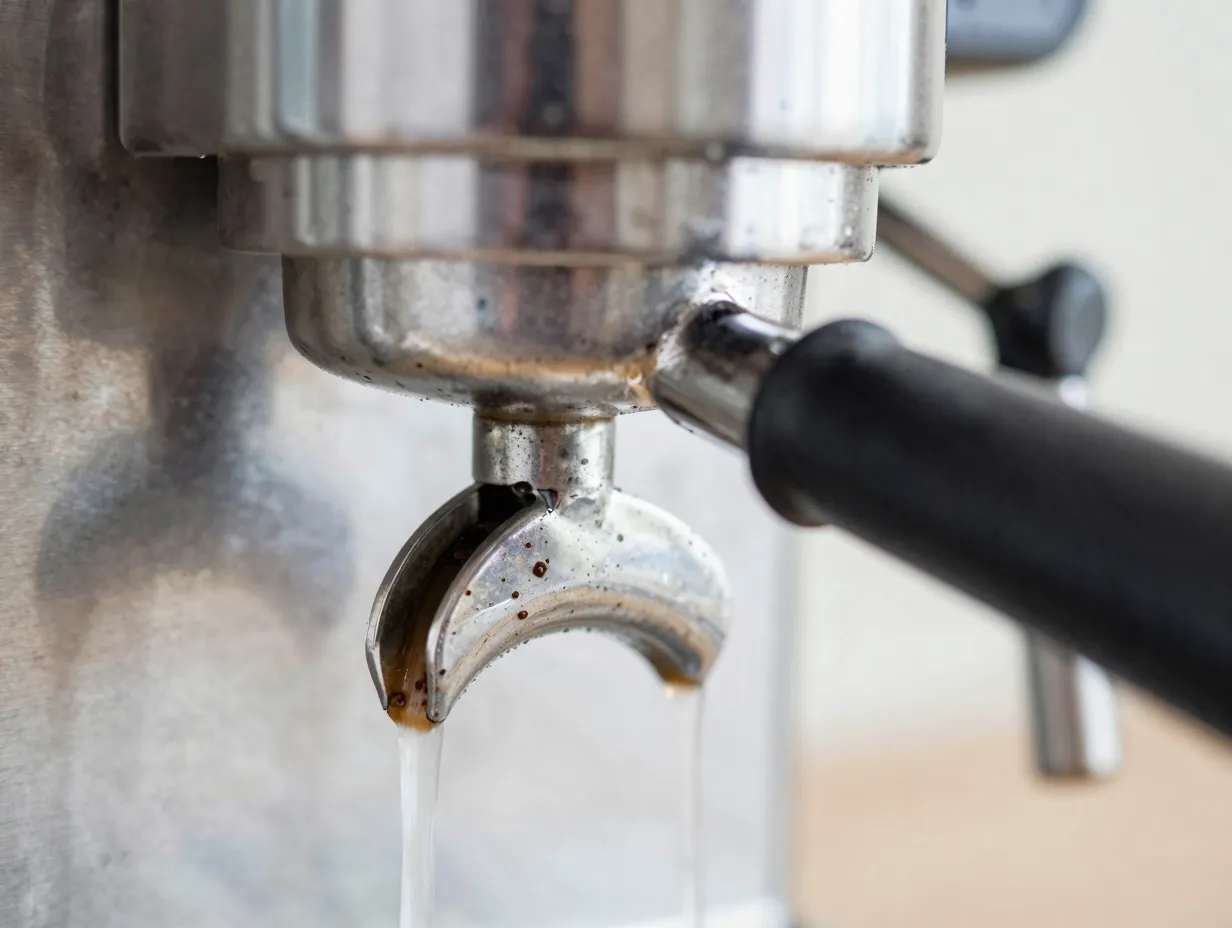
Time: 2–3 seconds of water flush
Before locking your portafilter into the machine, purge the group head by running a short burst of water through it [2]. This serves two purposes:
- Removes residual coffee grounds left from the previous shot
- Stabilizes water temperature at the group head for consistent extraction
This step takes literally 2–3 seconds and is skipped by most home brewers. Professional baristas do it before every single shot — and it shows in the consistency of their results.
How to purge:
- With portafilter removed, activate the brew button for 2–3 seconds
- You’ll see a small burst of water flush through
- Wipe the group head gasket clean with a damp cloth
- Lock in the portafilter immediately and start brewing
7. Pull the Shot and Monitor Your Extraction
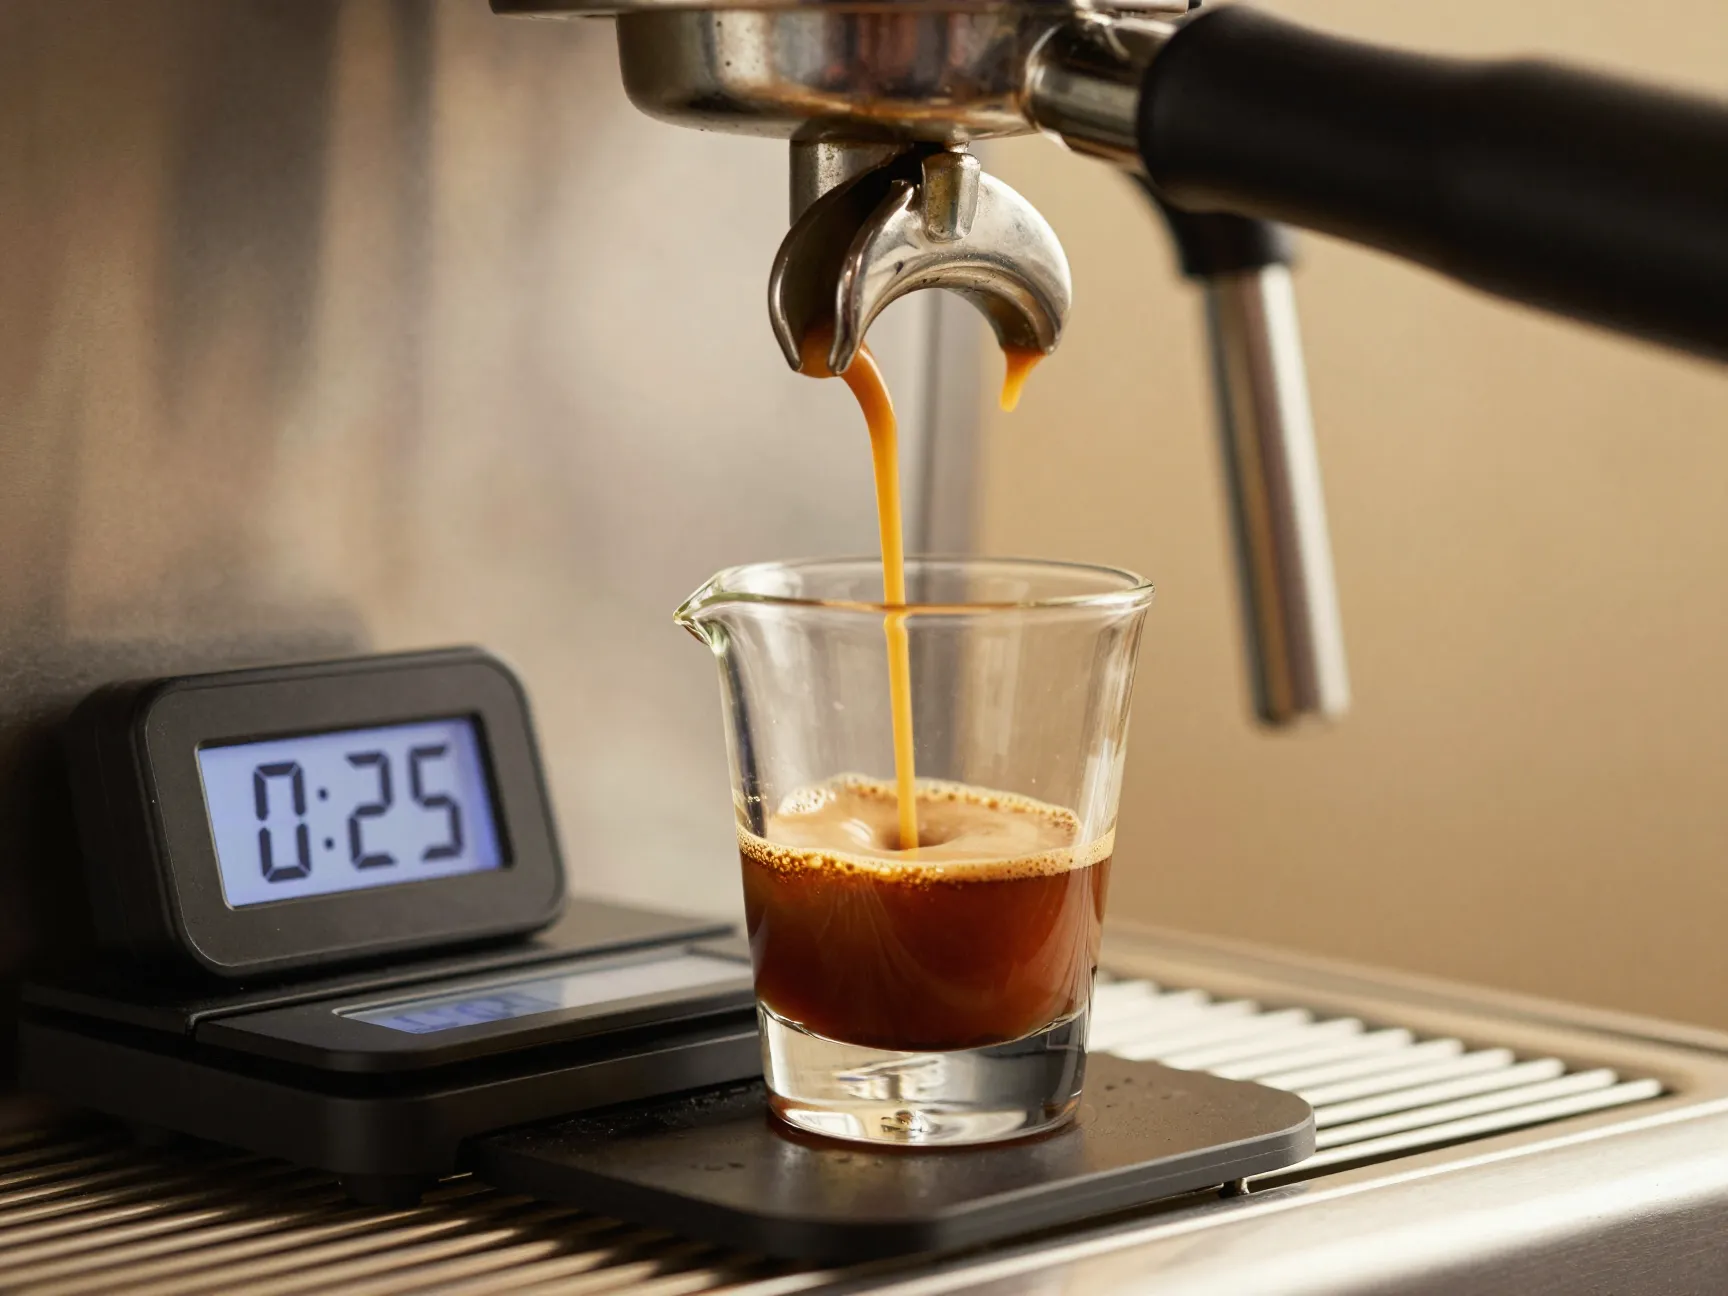
Target brew time: 25–30 seconds | Target yield: 1.5–2 oz (30–40 grams)
This is the moment of truth. Lock in your portafilter, place your scale and shot glass underneath, tare the scale to zero, and start brewing. Watch both your timer and the stream carefully [3][6].
What a perfect extraction looks like:
- First 5–8 seconds: Dark, syrupy drips appear (this is the “pre-infusion” phase on many machines)
- Seconds 8–20: A steady, mouse-tail-thin stream of dark amber espresso flows
- Seconds 20–28: The stream lightens slightly to a golden-hazelnut color
- Stop at 25–30 seconds or when your scale reads 36–40 grams [6]
💡 Key signal: When the stream turns light blonde, extraction is complete. Continuing past this point extracts bitter, harsh compounds [3].
The crema check: A well-pulled double shot should have a thick, reddish-brown crema on top that holds for 1–2 minutes. Thin, pale crema usually signals under-extraction or stale coffee.
8. Evaluate, Adjust, and Repeat
The most important step most people never do
Pulling a perfect espresso shot is a calibration process, not a one-time event. After every shot, you should taste it critically and make one adjustment at a time based on what you find [8].
Espresso troubleshooting table:
| What You Taste | Likely Cause | Fix |
|---|---|---|
| Sour, sharp, thin | Under-extracted (too fast) | Grind finer or increase dose |
| Bitter, harsh, dry | Over-extracted (too slow) | Grind coarser or reduce dose |
| Weak, watery | Under-dosed | Increase coffee dose by 1–2g |
| Flat, no crema | Stale coffee | Use fresher beans |
| Uneven stream | Channeling | Improve WDT and tamping level |
The golden rule of espresso dialing: Change one variable at a time. If you change grind size AND dose simultaneously, you won’t know which fix actually worked [8].
Keep a simple shot log — even just a phone note — recording your dose, yield, time, and tasting notes. Within a week of consistent logging, you’ll understand your machine and grinder intimately.
How Do You Make an Espresso? 8 Steps to the Perfect Home Shot — Quick Reference Summary
Here’s the complete process at a glance:
- Preheat machine — 15–20 minutes, portafilter in group head
- Weigh and grind — 18–20g for double, fresh burr-ground
- Dial in grind size — fine like table salt, adjust by shot time
- Distribute grounds (WDT) — eliminate clumps before tamping
- Tamp evenly — ~30 lbs, level and consistent
- Purge group head — 2–3 second flush before locking in
- Pull the shot — 25–30 seconds, 36–40g yield
- Evaluate and adjust — one variable at a time, keep a log
Essential Equipment Checklist ☕
You don’t need the most expensive setup to pull great espresso. Here’s what actually matters:
- ✅ Espresso machine with at least 9 bars of pressure
- ✅ Burr grinder (conical or flat) — non-negotiable for consistency
- ✅ Digital scale accurate to 0.1g
- ✅ Tamper sized to your portafilter basket (typically 58mm)
- ✅ WDT tool (or DIY with needles in a wine cork)
- ✅ Shot timer (your phone works perfectly)
- ✅ Demitasse cups (warm them on top of the machine)
Common Espresso Myths — Busted
Myth 1: “More pressure = better espresso”
False. Standard espresso is brewed at 9 bars. Going higher doesn’t improve flavor — it often makes it worse by over-extracting bitter compounds [5].
Myth 2: “Espresso needs a dark roast”
Not true. Espresso is a brewing method, not a roast level. Light and medium roasts can produce outstanding espresso — often with more complexity and sweetness than dark roasts.
Myth 3: “Tamping harder gives better crema”
Crema comes from freshness and proper extraction, not tamping force. Over-tamping can actually restrict flow and cause over-extraction [4].
Myth 4: “You need an expensive machine to make good espresso”
A mid-range machine ($300–$600) paired with a quality burr grinder will outperform an expensive machine with a cheap blade grinder every single time [7].
The Science Behind the Perfect Shot
Understanding why each step works helps you troubleshoot faster. Espresso extraction is essentially a high-pressure hot water infusion — 9 bars of pressure forces water at approximately 200°F (93°C) through a compressed puck of finely ground coffee in under 30 seconds.
During those 25–30 seconds, water dissolves soluble compounds from the coffee in a specific sequence:
- First: Acids and fruity compounds (bright, lively flavors)
- Middle: Sugars and Maillard compounds (sweetness, caramel, body)
- Last: Bitter phenolic compounds (harsh, dry finish)
A properly timed extraction captures the first two phases fully while stopping before the third dominates. This is exactly why brew time is the most immediate diagnostic tool you have — it tells you whether you’re capturing the right compounds [3][6].
Conclusion: Your Path to the Perfect Home Shot
Mastering How Do You Make an Espresso? 8 Steps to the Perfect Home Shot is genuinely achievable for any home brewer willing to be systematic about it. The process isn’t complicated — it’s just precise. Every step in this guide exists for a specific reason, and skipping even one (especially preheating, WDT, or group head purging) will show up in your cup.
Your actionable next steps:
- This week: Pull three shots using this exact sequence and time each one. Compare your results to the 25–30 second target.
- This week: Start a simple shot log. Note dose, yield, time, and one tasting word (sour, bitter, balanced, etc.).
- Next week: Make one grind adjustment based on your log and pull three more shots. Notice the difference.
- Ongoing: Once you’re consistently hitting 25–30 seconds with a balanced taste, experiment with different single-origin beans to discover how much flavor variety a well-pulled shot can reveal.
The gap between a mediocre home shot and a café-quality one is smaller than most people think. It’s measured in grams, seconds, and the willingness to pay attention. Start with Step 1 today — preheat that machine — and the rest will follow.
References
[1] How To Make Espresso At Home A Complete Guide – https://www.arbourcoffeeco.com/blog/how-to-make-espresso-at-home-a-complete-guide
[2] How To Make Espresso – https://enjoyjava.com/how-to-make-espresso/
[3] Barista Basics How To Make An Espresso In 14 Steps – https://perfectdailygrind.com/2018/01/barista-basics-how-to-make-an-espresso-in-14-steps/
[4] Espresso Brew Guide – https://coffeebros.com/pages/espresso-brew-guide
[5] Espresso How To – https://coffeegeek.com/guides/howtos/espresso-how-to/
[6] Ultimate Brew Guide For Espresso – https://driftaway.coffee/ultimate-brew-guide-for-espresso/
[7] How To Make Espresso – https://www.breville.com/us/en/blog/coffee-and-espresso/how-to-make-espresso.html
[8] The Essential Guide To Mastering Espresso At Home – https://home.lamarzoccousa.com/the-essential-guide-to-mastering-espresso-at-home/
[9] How To Make The Perfect Espresso A Guide To Crafting A Bold And Balanced Shot – https://www.catholiccoffee.com/blogs/catholic-coffee-blog/how-to-make-the-perfect-espresso-a-guide-to-crafting-a-bold-and-balanced-shot