9 Barista Secrets on How to Make an Espresso Coffee Like a Pro
Only 1 in 5 home is extracted correctly — the rest are either bitter, sour, or flat. That gap between a mediocre pull and a café-quality cup almost always comes down to technique, not equipment. If you have been chasing that perfect, syrupy, crema-topped shot and keep falling short, you are in the right place. This guide breaks down the 9 barista secrets on how to make an espresso coffee like a pro, covering every variable that separates a forgettable shot from an extraordinary one.
Disclosure: This post contains affiliate links. As an Amazon Associate, we earn from qualifying purchases, and at no extra cost to you.

Whether you are a weekend coffee enthusiast or someone who pulls shots every morning, these professional techniques will transform your espresso routine in 2026 and beyond.
Key Takeaways ☕
- Dose precisely: 18–20 grams of ground coffee is the professional standard for a balanced espresso shot [1]
- Time your extraction: A 25–30 second pull is the target window for full flavor development [1]
- Grind quality matters as much as your machine: A quality burr grinder is non-negotiable for consistent results [1]
- Temperature control is critical: Brew water should stay between 90–96°C (194–205°F) for even extraction [2]
- Small adjustments make big differences: , dose, and tamp pressure all interact — changing one affects the others
Why Most Home Espresso Falls Short (And How to Fix It)
Before diving into the 9 barista secrets on how to make an espresso coffee like a pro, it helps to understand why most home shots fail. Espresso is a pressure-driven brewing method that amplifies every mistake. A slightly uneven tamp, a stale bean, or water that is two degrees too hot will show up immediately in the cup.
Professional baristas do not rely on guesswork. They rely on repeatable, measurable processes. The secrets below are not magic tricks — they are disciplined habits that any home brewer can adopt.
The 9 Barista Secrets on How to Make an Espresso Coffee Like a Pro
1. Start With the Right Dose Every Single Time
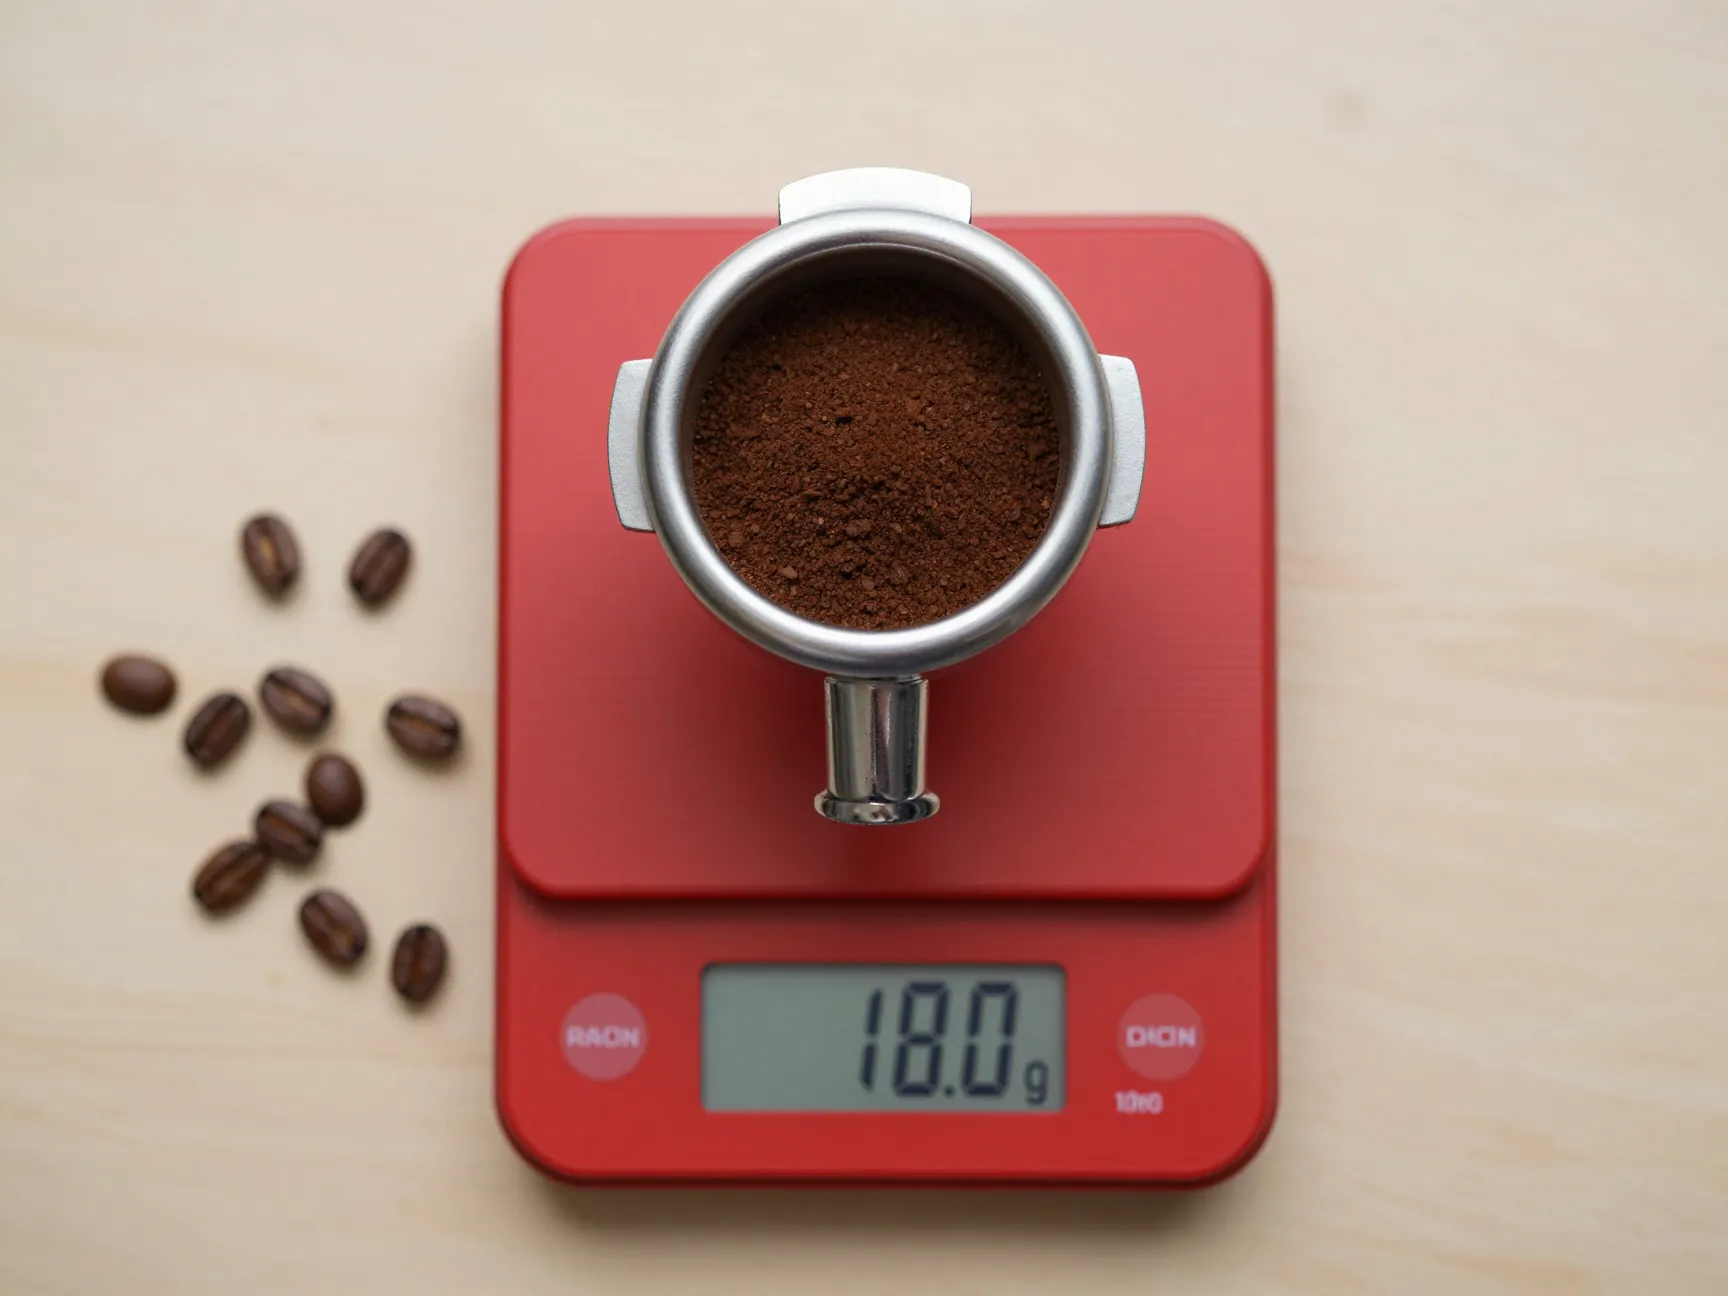
The foundation of every great espresso is the coffee dose. Professional baristas consistently use 18–20 grams of ground coffee for a standard double espresso basket [1]. This range is not arbitrary — it is the sweet spot where the coffee bed has enough resistance to slow water flow and build proper pressure without choking the machine.
Why dose matters:
| Dose | Result |
|---|---|
| Under 15g | Weak, watery, under-extracted |
| 16–17g | Acceptable but inconsistent |
| 18–20g | Balanced, professional standard |
| Over 22g | Over-packed, can choke machine |
💡 Pro Tip: Always weigh your dose before grinding. Never eyeball it. Even a 1-gram difference can shift the flavor profile noticeably.
Use a precision scale with at least 0.1g resolution [2]. This level of accuracy allows you to replicate your best shots and troubleshoot your worst ones. Think of your scale as your most important piece of — more important than the machine itself.
2. Invest in a Quality Burr Grinder (It Is Not Optional)
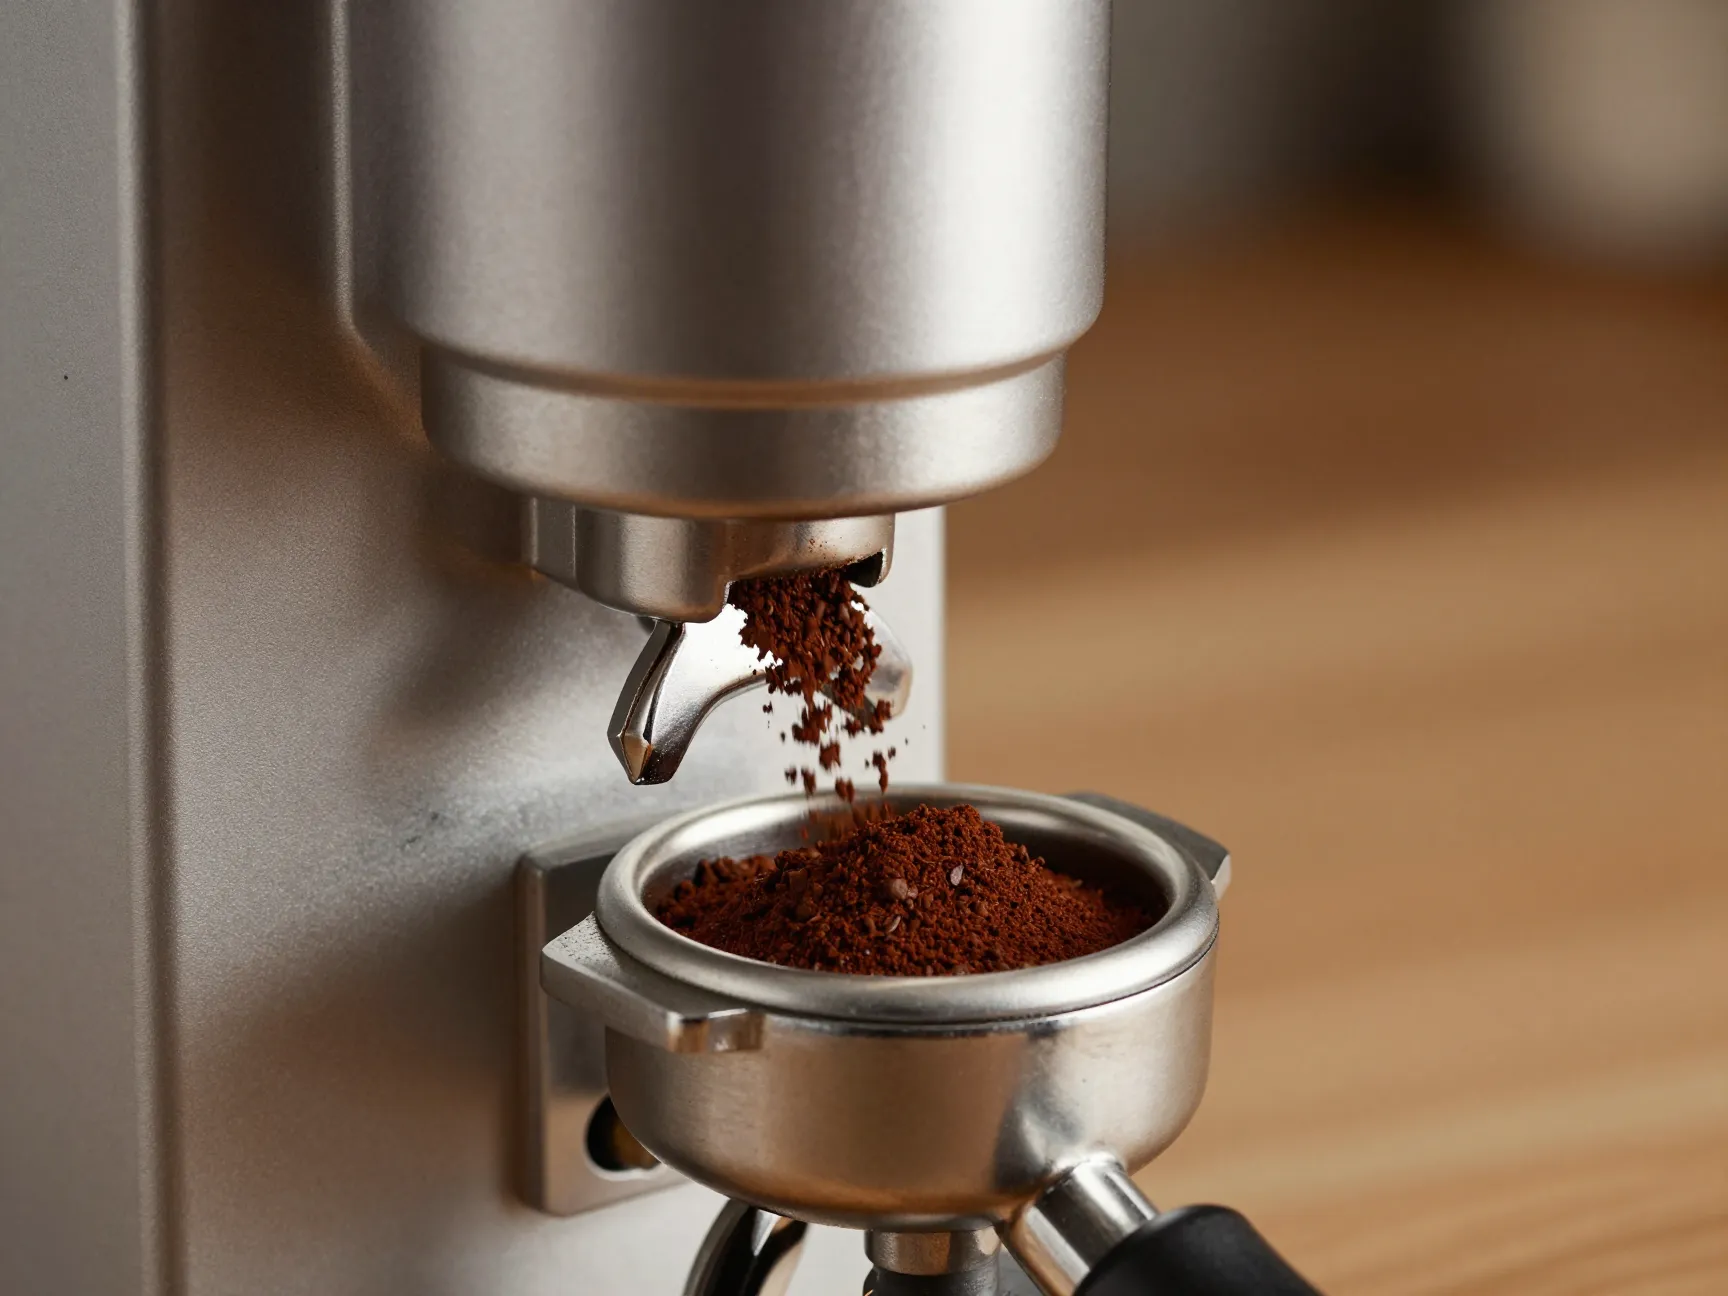
Here is a truth that many beginners resist: your grinder matters as much as your [1]. A blade grinder produces inconsistent particle sizes that lead to uneven extraction — some coffee over-extracts while other particles under-extract, creating a muddy, bitter mess.
A quality burr grinder — whether flat burr or conical burr — produces uniform particle sizes. This uniformity controls how soluble elements are extracted from the coffee, giving you a cleaner, more balanced shot [1].
What to look for in a burr grinder:
- Stepped or stepless grind adjustment for fine-tuning
- Minimal grind retention (less stale coffee between shots)
- Consistent burr alignment from the manufacturer
- Easy cleaning access
You do not need to spend thousands. Mid-range burr grinders in the $150–$400 range offer excellent consistency for home use. The investment pays off in every single shot you pull.
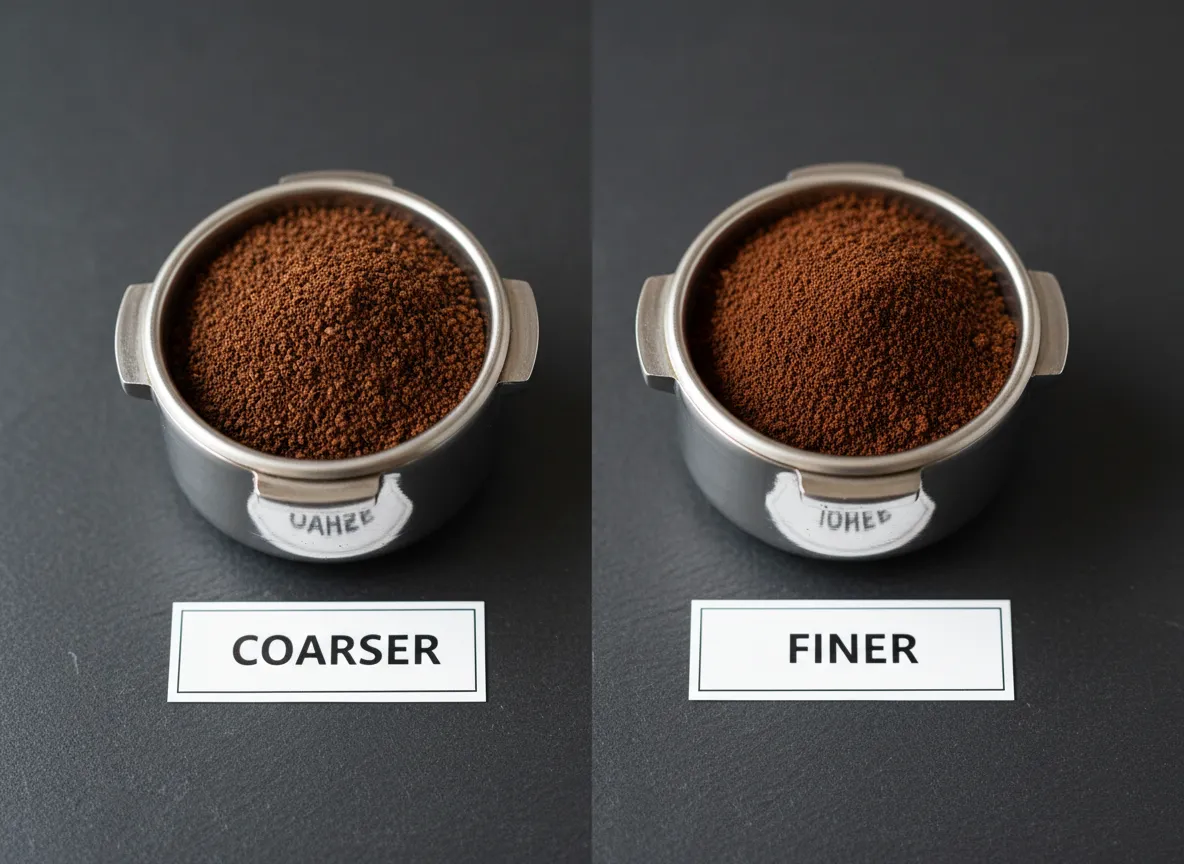
3. Dial In Your Grind Size Before Anything Else
Even with a great burr grinder, the grind size setting needs to be calibrated to your specific coffee, dose, and machine. This process is called “dialing in,” and it is one of the most important skills in the 9 barista secrets on how to make an espresso coffee like a pro.
The rule is simple [2]:
- ⏱️ Shot pulls in under 25 seconds? Grind finer to slow extraction
- ⏱️ Shot pulls in over 30 seconds? Grind coarser to speed up extraction
- ✅ Shot pulls in 25–30 seconds? You are in the zone
Why this works: Finer grounds create more surface area and more resistance. Coarser grounds let water pass through faster. Adjusting grind size is the most powerful lever you have for controlling extraction speed and flavor.
🎯 Pull Quote: “Dialing in is not a one-time task. Every new bag of coffee — even the same roast — may need a fresh adjustment.”
Change only one variable at a time when dialing in. If you adjust grind size AND dose simultaneously, you will not know which change caused the improvement.
4. Control Your Water Temperature With Precision
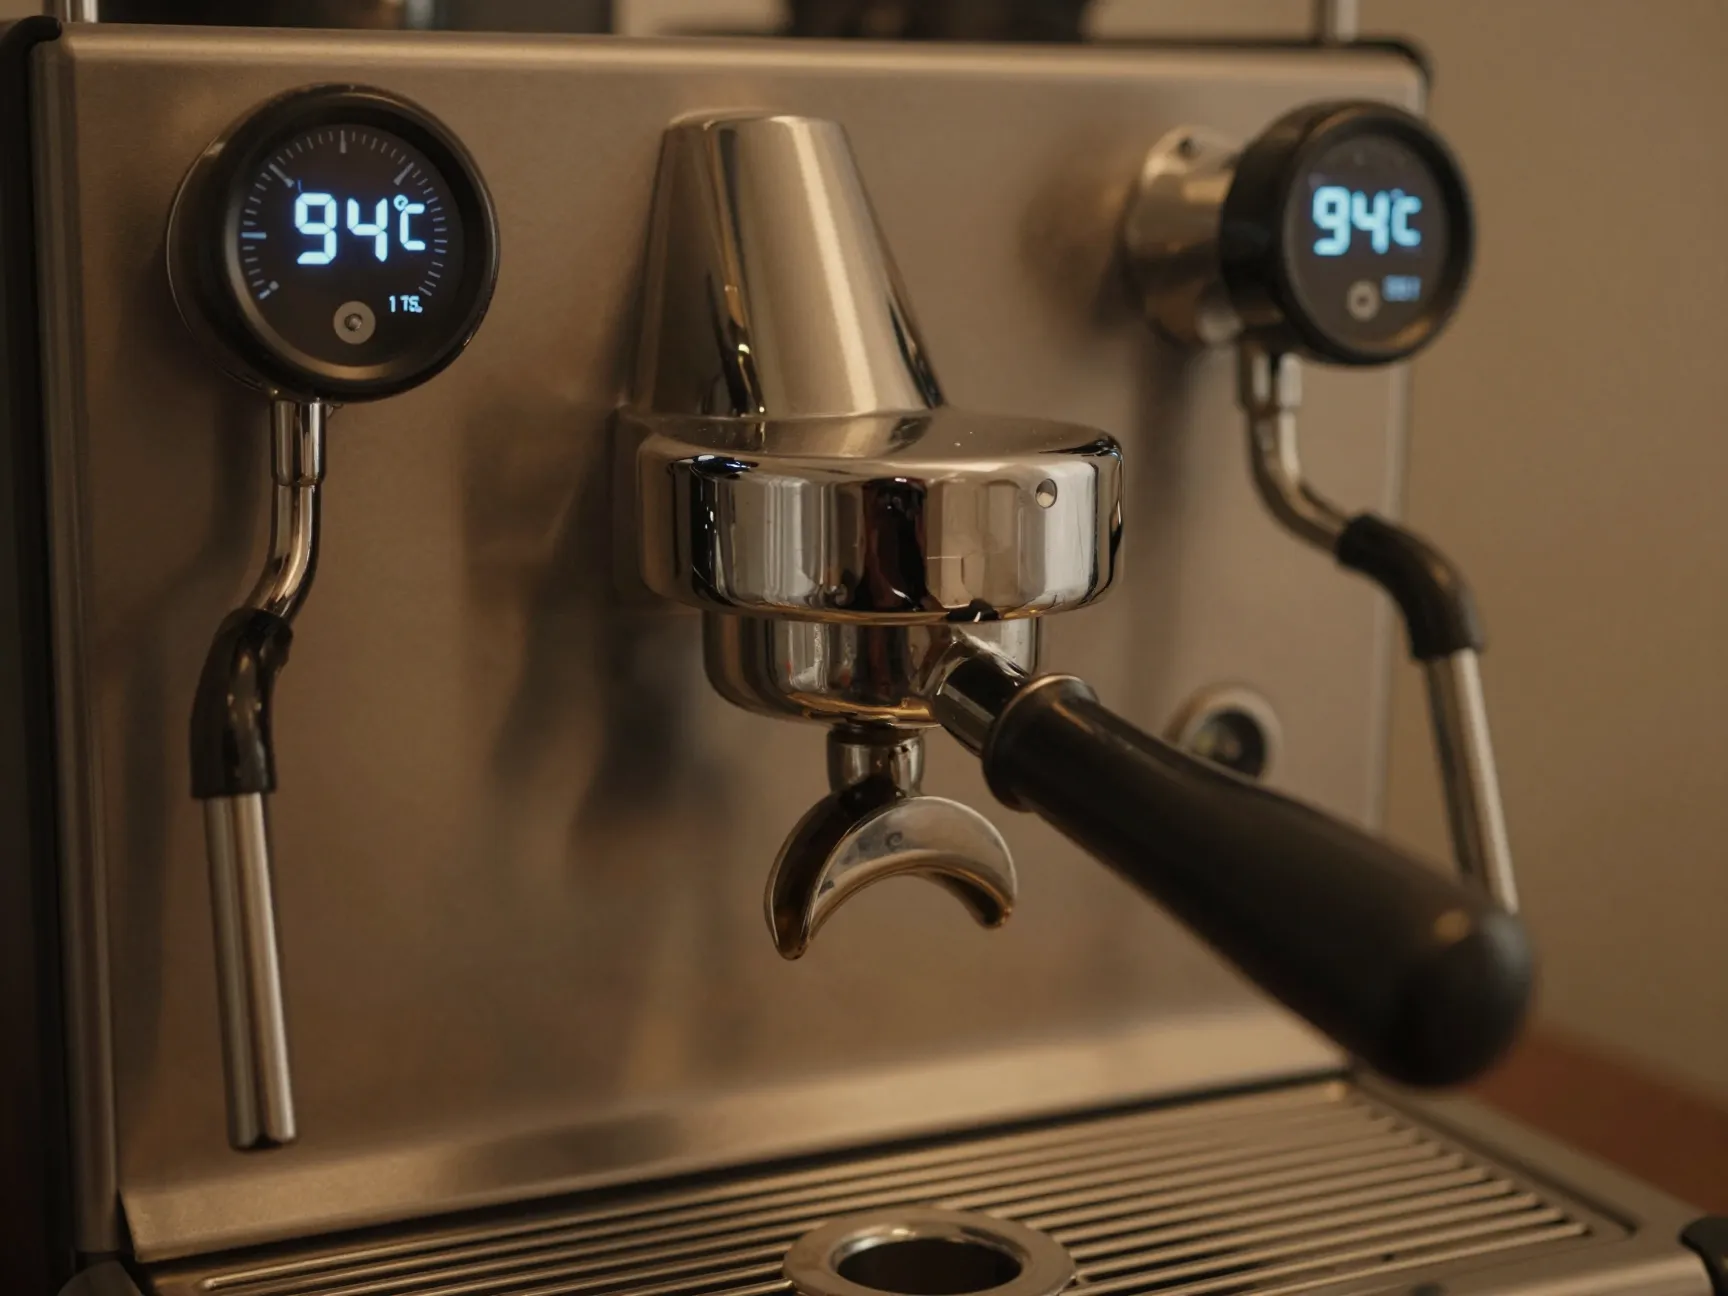
Water temperature is one of the most underestimated variables in home espresso. The professional target is 90–96°C (194–205°F) [2]. Within that range, the exact temperature you choose depends on your coffee’s roast level:
| Roast Level | Recommended Temperature |
|---|---|
| Light roast | 94–96°C (201–205°F) |
| Medium roast | 92–94°C (198–201°F) |
| Dark roast | 90–92°C (194–198°F) |
Why does this matter? Higher temperatures extract more compounds from coffee. Light roasts are denser and need more heat to unlock their complex flavors. Dark roasts are more soluble and can turn bitter quickly at high temperatures.
Fluctuations in brew temperature cause uneven extraction [2]. This is why professional machines use PID (Proportional-Integral-Derivative) controllers to maintain stable temperature throughout the shot. If your home machine lacks a PID, allow it to fully warm up — at least 20–30 minutes — before pulling shots.
5. Master the Art of Consistent Tamping
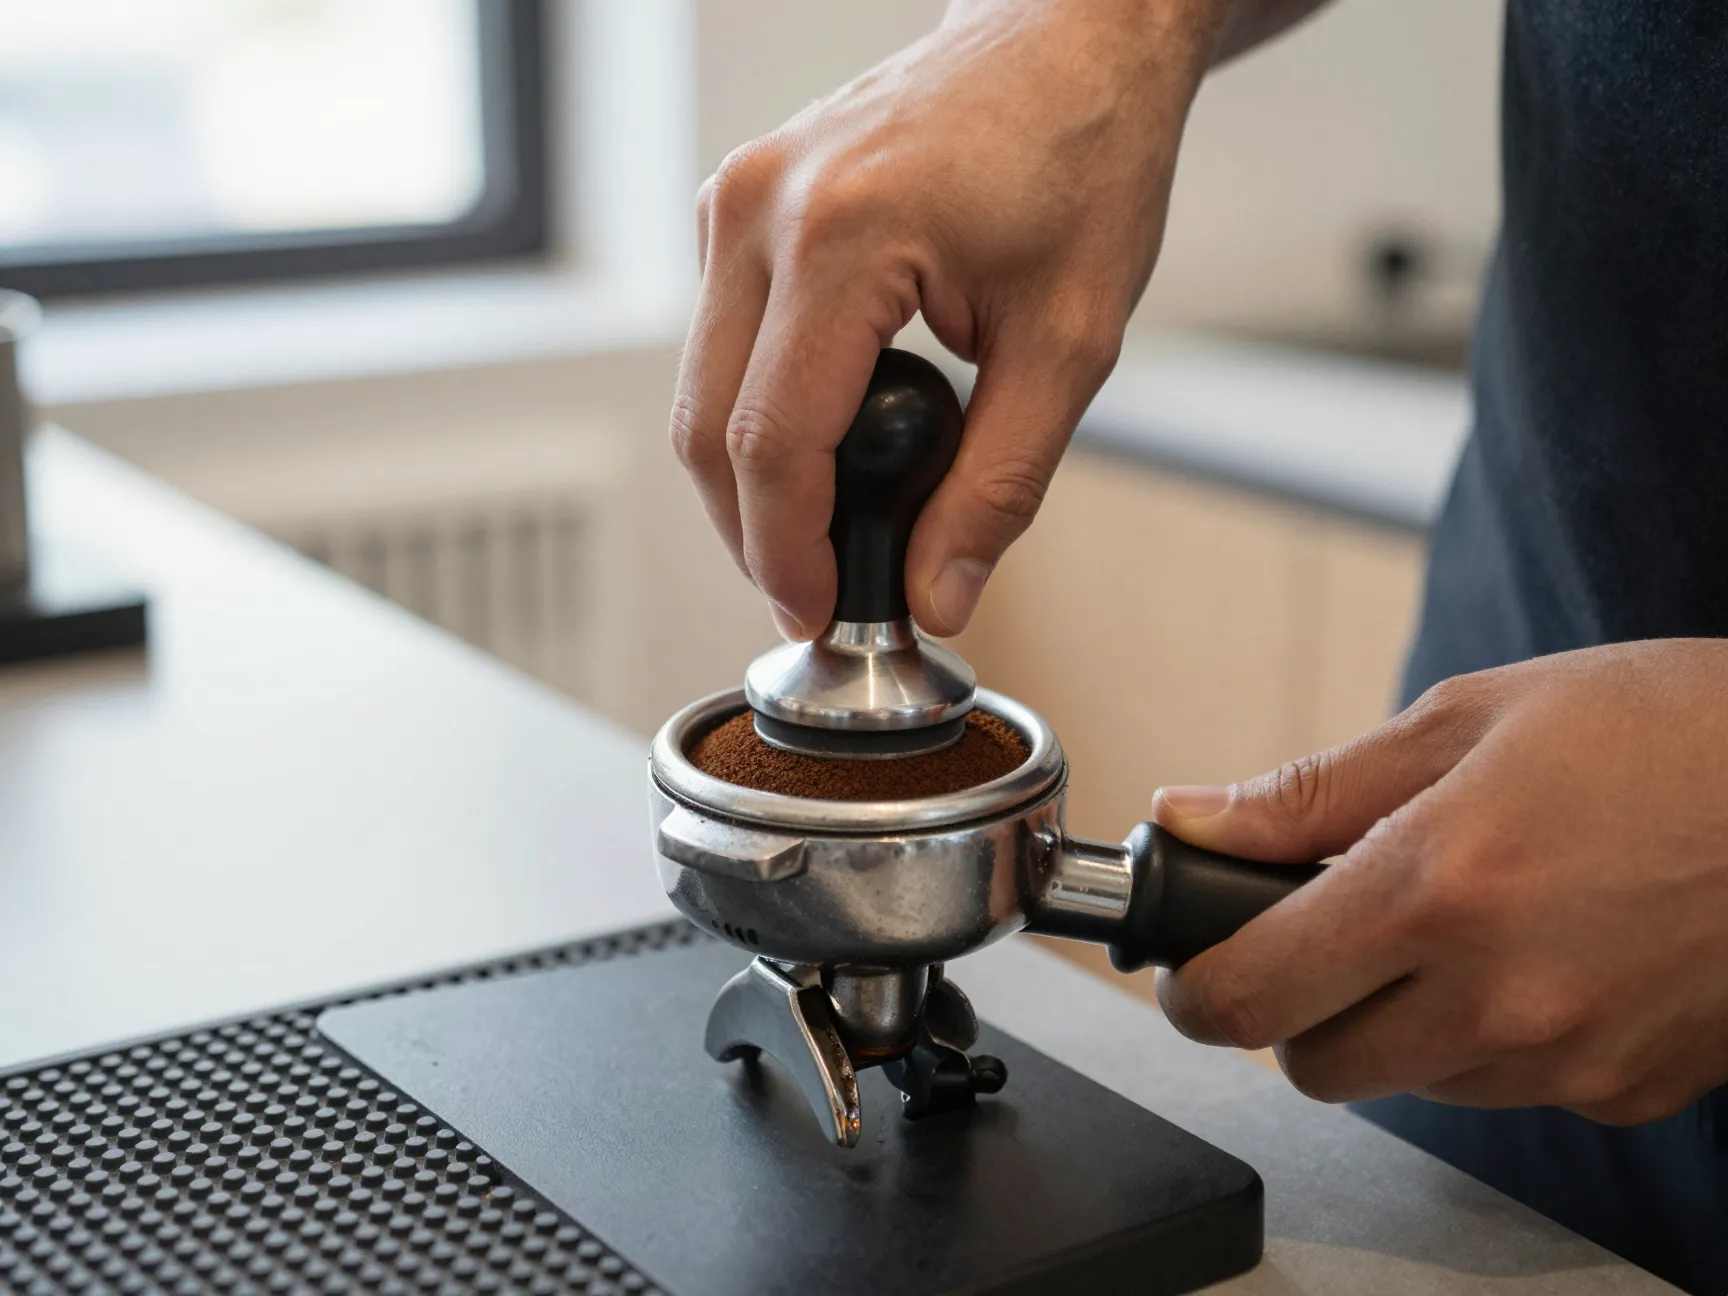
Tamping is the act of compressing the ground coffee in the portafilter basket before brewing. Done correctly, it creates a uniform, dense puck that forces water to extract evenly across every particle. Done poorly, it creates channels — paths of least resistance where water rushes through without extracting properly.
The professional technique involves horizontal tamping with firm, consistent pressure [1]. Here is the step-by-step process:
- Level the grounds first — Use a distribution tool or your finger to create an even surface before tamping
- Position the tamper flat — The tamper base must be perfectly parallel to the basket rim
- Apply steady downward pressure — Aim for approximately 15–20 kg (33–44 lbs) of pressure
- Finish with a clean lift — Do not twist or rock the tamper on the way out
- Inspect the puck — It should be level, smooth, and show no cracks
⚠️ Common Mistake: Tamping at an angle is one of the leading causes of channeling. Invest in a tamping station or mat to keep your portafilter stable during tamping.
A calibrated tamper — one that clicks when you reach a set pressure — can help beginners develop consistent technique before moving to a standard tamper.
6. Prevent Channeling With Proper Puck Preparation
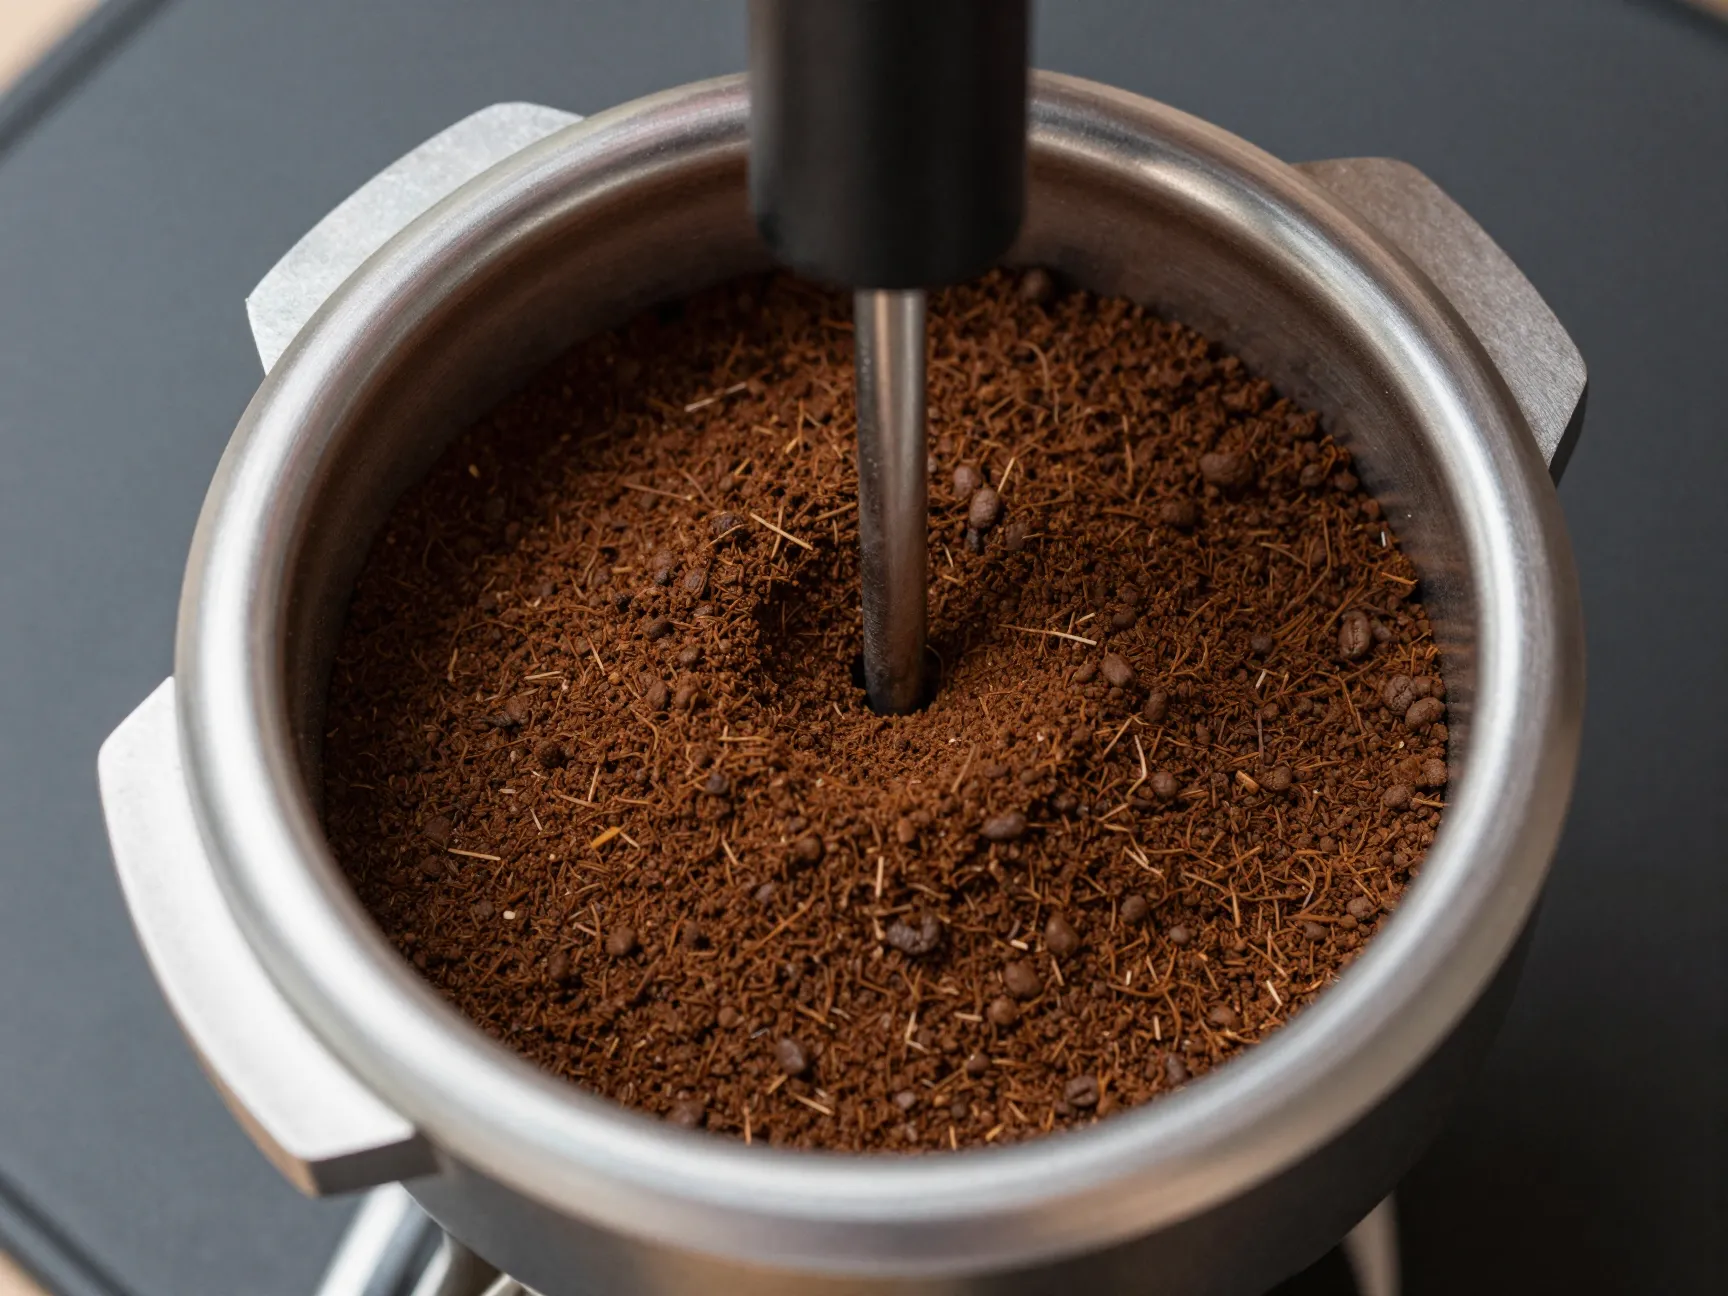
Channeling is the silent killer of espresso quality. It happens when water finds a weak point in the coffee puck and flows through that path instead of permeating the entire bed evenly [2]. The result is a shot that is simultaneously over-extracted in some areas and under-extracted in others — producing a harsh, unbalanced flavor.
A quality burr grinder significantly reduces channeling risk by producing uniform grounds [2]. But grinder quality alone is not enough. Puck preparation matters equally.
Anti-channeling checklist:
- ✅ Distribute grounds evenly before tamping (use a WDT tool or distribution tool)
- ✅ Tamp horizontally and level
- ✅ Check the basket for coffee clumps before tamping
- ✅ Use a clean, dry portafilter basket
- ✅ Avoid overfilling the basket beyond its rated capacity
Some baristas also use a puck screen — a thin metal disc placed on top of the coffee puck before brewing. This helps distribute water pressure evenly across the entire puck surface and further reduces channeling.
7. Target the 25–30 Second Extraction Window
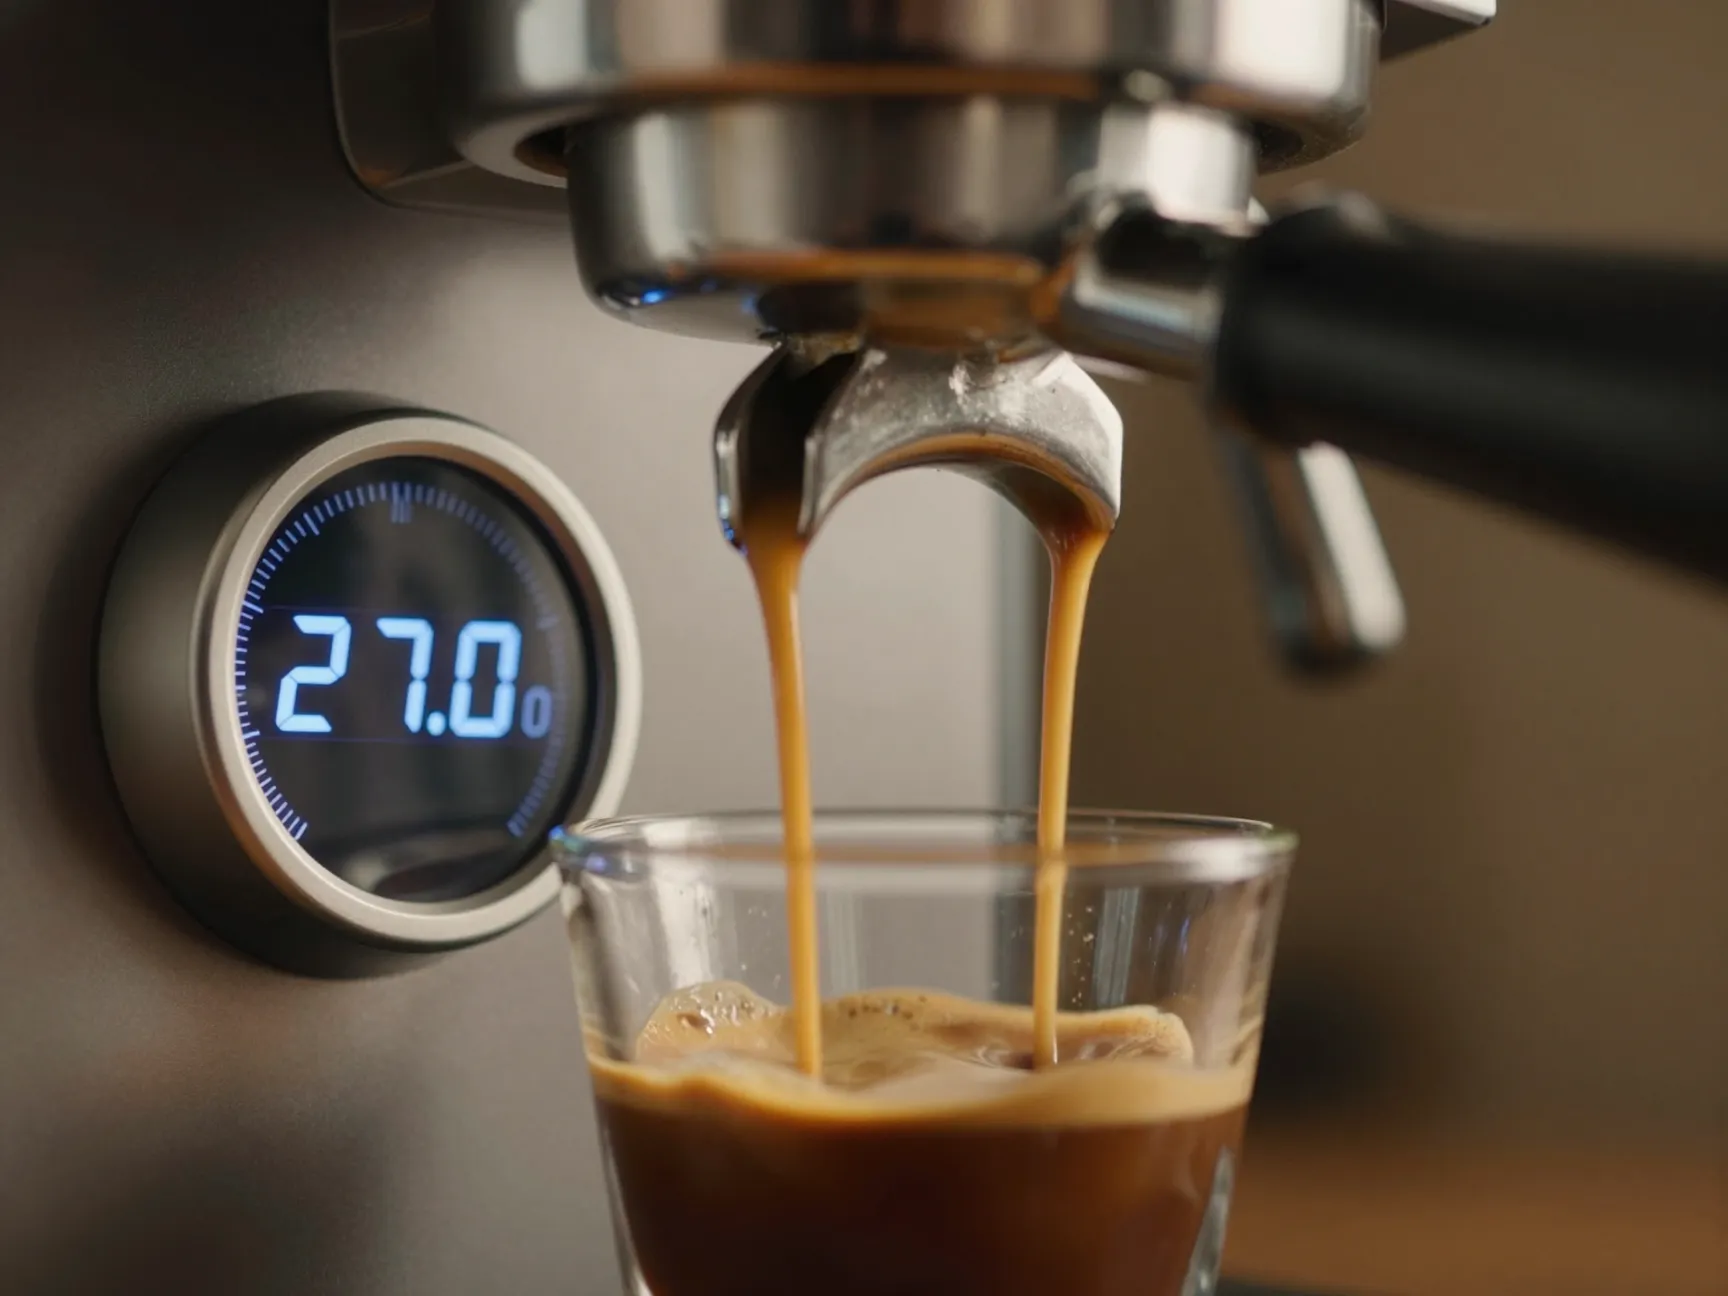
Extraction time is your real-time feedback mechanism. The 25–30 second window is the professional standard for pulling a balanced espresso shot [1]. This duration allows the 9-bar pressure to build fully and extract the right balance of acids, sugars, and bitter compounds from the coffee.
What your extraction time tells you:
| Extraction Time | Flavor Profile | Action |
|---|---|---|
| Under 20 seconds | Sour, thin, under-extracted | Grind finer |
| 20–25 seconds | Slightly sharp, lacks body | Grind slightly finer |
| 25–30 seconds | Balanced, sweet, full-bodied | ✅ Perfect zone |
| 30–35 seconds | Slightly bitter | Grind slightly coarser |
| Over 35 seconds | Harsh, over-extracted | Grind coarser |
Start your timer the moment you engage the pump, not when the first drops appear. Track both the pre-infusion phase (if your machine has one) and the full extraction time.
💡 Pro Tip: Use a dedicated shot timer or a simple stopwatch. Many baristas use their phone timer. Consistency in timing is more important than the exact second — aim to hit the same time on every shot.
8. Use Fresh, Properly Rested Coffee Beans

No amount of technique can save stale coffee. This is a secret that many home baristas overlook: the freshness and rest period of your beans directly impact extraction quality.
Here is what professional baristas know about coffee freshness:
The ideal bean timeline:
- Roasted: Day 0
- Off-gassing period: Days 1–5 (CO₂ releases; too gassy for good espresso)
- Peak espresso window: Days 5–21 post-roast
- Acceptable range: Up to 30 days post-roast
- Stale threshold: Beyond 45 days (flavor degrades significantly)
Freshly roasted beans release CO₂ gas, which interferes with water contact during extraction and creates an uneven, bubbly puck. Beans that are too old have lost their volatile aromatic compounds, resulting in flat, lifeless shots.
Storage tips:
- Store beans in an airtight container away from light, heat, and moisture
- Never freeze beans repeatedly (freeze once, thaw once)
- Buy in smaller quantities more frequently rather than large bags that sit for weeks
- Look for a roast date on the bag — not just a “best by” date
9. Taste, Adjust, and Build Your Espresso Recipe
The final secret — and arguably the most important — is developing a systematic tasting practice. Professional baristas do not pull one shot and move on. They taste, evaluate, adjust, and document.
Building your personal means tracking:
- Dose: Grams of ground coffee in
- Yield: Grams of liquid espresso out
- Time: Seconds from pump start to finish
- Temperature: Brew water temperature
- Grind setting: Specific setting on your grinder
- Tasting notes: What you actually taste in the cup
The brew ratio — the relationship between dose and yield — is a key professional metric. A standard espresso ratio is 1:2 (e.g., 18g in, 36g out). use a 1:1.5 ratio for a more concentrated, sweeter result. Lungo shots use a 1:3 ratio for a longer, lighter pull.
🎯 Pull Quote: “Your is a living document. The best baristas treat every shot as data — not just a drink.”
Keep a simple notebook or a notes app entry for each dialing-in session. Record what worked, what did not, and what you changed. Over time, you will build an intuitive understanding of how each variable affects your cup.
Quick Reference: Espresso Variables at a Glance
| Variable | Professional Target | Common Mistake |
|---|---|---|
| Dose | 18–20g | Eyeballing, inconsistent |
| Grind | Calibrated to 25–30s pull | Never adjusting after initial setup |
| Water temp | 90–96°C (194–205°F) | Machine not fully warmed up |
| Extraction time | 25–30 seconds | Not timing shots |
| Tamp pressure | ~15–20 kg, level | Angled or inconsistent tamping |
| Bean freshness | 5–21 days post-roast | Using beans past 45 days |
| Brew ratio | 1:2 (dose:yield) | Not weighing the output |
Frequently Asked Questions
Q: How do I know if my espresso is over or under-extracted?
Under-extracted espresso tastes sour, sharp, and thin. Over-extracted espresso tastes bitter, harsh, and dry. A well-extracted shot has a balanced sweetness with pleasant acidity and a lingering, complex finish.
Q: Does really matter that much?
Yes — but consistency matters more than the exact pressure. The key is applying the same level of pressure every time and keeping the tamper perfectly level. An angled tamp creates uneven density in the puck, which leads to channeling.
Q: Can I make great espresso without a PID temperature controller?
Yes, but it requires patience. Allow your machine to heat up fully (20–30 minutes minimum), and consider a temperature surfing technique if your machine allows manual control of the steam boiler. A thermometer strip on the can also help you monitor stability.
Q: What is the best water to use for espresso?
Use filtered water with moderate mineral content. Distilled water lacks the minerals needed for proper extraction. Very hard water causes scale buildup and can affect flavor. Many baristas use a simple Brita filter or specialty espresso water products.
Conclusion: Your Path to Pro-Level Espresso Starts Today
Mastering espresso is a journey, not a destination — but it is a journey with a very clear map. The 9 barista secrets on how to make an espresso coffee like a pro outlined in this guide give you every tool you need to pull consistently excellent shots in 2026.
Here is your action plan to get started:
- This week: Buy a precision scale with 0.1g resolution and start weighing every dose
- This month: Upgrade to a quality burr grinder if you are still using a blade grinder
- Every session: Time your shots, taste critically, and adjust one variable at a time
- Ongoing: Keep a simple recipe log to track what works and build your personal espresso profile
The difference between a mediocre shot and a professional one is not a $5,000 machine — it is the discipline to measure, adjust, and repeat. Start with Secret #1 (dose) and Secret #7 (extraction time), and you will notice an immediate improvement in your cup.
Great espresso is not reserved for cafés. With the right knowledge and a commitment to consistency, it belongs in your kitchen too. ☕
References
[1] Making Delicious Espresso With Your 9barista – https://9barista.com/a/knowledge-base/brewing-advice/making-delicious-espresso-with-your-9barista
[2] Espresso Top Tips How To Make Perfect Espresso At Home – https://9barista.com/blogs/the-ninth-bar/espresso-top-tips-how-to-make-perfect-espresso-at-home
[3] Watch – https://www.youtube.com/watch?v=8m_-6yXAWVg
[4] Watch – https://www.youtube.com/watch?v=uX4wwCdHhVQ
[5] 1108 Video Of Me Making Espresso With The 9barista – https://coffeetime.freeflarum.com/blog/1108-video-of-me-making-espresso-with-the-9barista
[6] Watch – https://www.youtube.com/watch?v=mkfsAGz3cIw
[7] Why 9 Bar T22815 10 – https://www.home-barista.com/tips/why-9-bar-t22815-10.html