8 Essential Tips for Home Coffee Roasting to Unlock Unbeatable Flavor
Nearly 70% of enthusiasts who switch to roasting their own beans report a dramatic improvement in within their first three roasts — yet most never attempt it because they assume it requires expensive equipment or professional training. The truth is far more accessible. Mastering the 8 Essential Tips for Roasting to Unlock Unbeatable Flavor is within reach for anyone willing to pay attention to a few critical details, from bean selection to the patience of a proper rest period.
Disclosure: This post contains affiliate links. As an Amazon Associate, we earn from qualifying purchases, and at no extra cost to you.
In 2026, home roasting has never been more popular — or more rewarding. Whether you’re using a cast iron skillet, a popcorn popper, or a dedicated drum roaster, the principles that separate a flat, forgettable cup from a vibrant, complex one are the same. This guide walks you through each of those principles clearly and practically.
Key Takeaways
- 🫘 Bean quality is non-negotiable — even the best technique can’t rescue poor green coffee.
- 🌡️ (350°F–480°F) and consistent thermometry are the backbone of repeatable, high-quality roasts.
- 💨 Ventilation and constant stirring protect both your health and your flavor development.
- ❄️ Rapid cooling immediately after roasting locks in the flavor profile you worked hard to build.
- ⏳ Patience pays off — waiting 7 days minimum (ideally 2–3 weeks) before brewing produces a noticeably superior cup.
The Foundation: Getting Your Setup and Beans Right
Before we dive into the full list of the 8 Essential Tips for Home Coffee Roasting to Unlock Unbeatable Flavor, it’s worth understanding why these tips matter. Coffee roasting is a chemical transformation. Green beans contain hundreds of precursor compounds — chlorogenic acids, sugars, — that only develop their full aromatic potential when exposed to precise heat over a controlled timeline. Every decision you make, from the beans you buy to how you cool them, either supports or undermines that transformation.
Let’s start with the fundamentals.
1. Start With Quality Green Coffee Beans
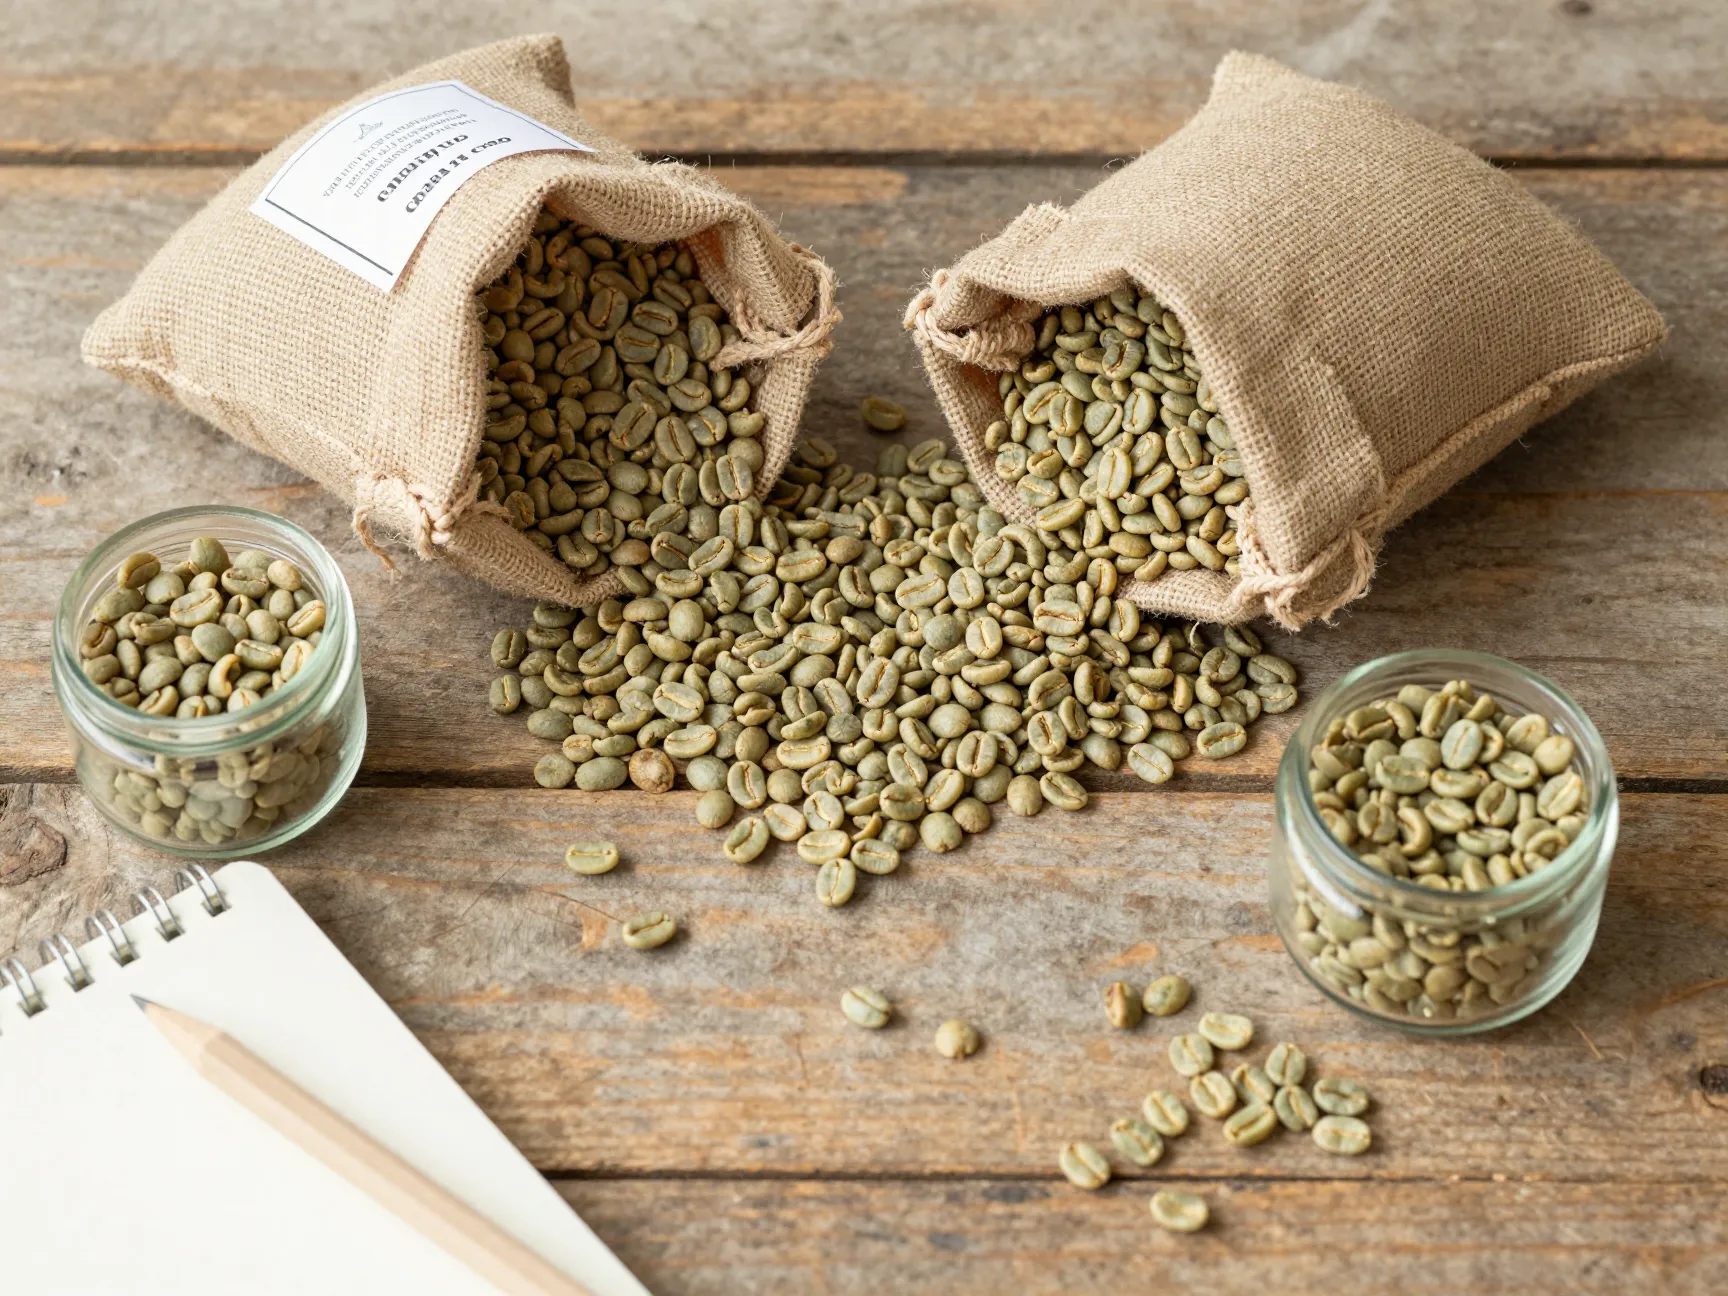
No tip on this list matters more than this one. Green bean quality is the ceiling of your final cup. You cannot roast your way to excellence if the raw material is mediocre — defective, poorly processed, or old beans will produce flat, harsh, or off-tasting coffee no matter how skillfully you roast them. [5]
What to look for when sourcing green beans:
| Factor | What to Check |
|---|---|
| Origin | Single-origin beans offer cleaner, more traceable flavor profiles |
| Processing method | Washed, natural, or honey — each affects sweetness and body |
| Harvest date | Fresher crop years (within 12 months) retain more volatile aromatics |
| Defect rate | Fewer defects = more consistent roast development |
| Supplier reputation | Buy from specialty green coffee importers or trusted roasters |
💡 Pro tip: Reputable suppliers like Sweet Maria’s, Coffee Bean Corral, or Burman Coffee Traders offer detailed and processing information for their green beans — use these to match beans to your preferred roast level. [9]
Think of green beans the way a chef thinks about fresh produce. A Michelin-starred technique applied to wilted vegetables still produces a disappointing dish. The same logic applies here.
2. Master Temperature Control Between 350°F and 480°F

Temperature is the single most powerful variable in coffee roasting. Too low, and your beans bake rather than roast — producing grassy, underdeveloped flavors. Too high, too fast, and you scorch the exterior while leaving the interior underdeveloped. The sweet spot for most home roasting methods sits between 350°F and 480°F (177°C–249°C). [2]
Here’s a simplified breakdown of what happens at each temperature stage:
- 350°F–375°F (177°C–190°C): Drying phase — moisture evaporates, beans turn yellow-green
- 375°F–410°F (190°C–210°C): Maillard reaction begins — browning starts, grassy aromas give way to bread-like notes
- 410°F–430°F (210°C–221°C): First crack — beans audibly pop, light to medium roast territory
- 430°F–460°F (221°C–238°C): Development phase — sugars caramelize, body increases
- 460°F–480°F (238°C–249°C): Second crack territory — dark roast, oils migrate to surface
“Temperature directly influences roasting speed and quality; precise temperature management is essential for consistent results.” — Cooper’s Coffee Co. [2]
Practical takeaway: If you’re using a stovetop or oven method, invest in an infrared thermometer or a probe thermometer rated for high heat. Guessing temperature is the fastest way to ruin an otherwise promising batch.
3. Implement Accurate and Reproducible Thermometry
This tip builds directly on tip #2 — but it deserves its own entry because many home roasters overlook it. It’s not enough to have a thermometer. Where you place the probe and how consistently you place it determines whether your data is useful. [5]
If your probe is positioned two inches higher in one roast than the next, you’re measuring different air temperatures, not the same bean-mass temperature. Your roast logs become meaningless, and you lose the ability to replicate a great batch.
Best practices for thermometry:
- Mark your thermometer probe’s insertion point with heat-resistant tape
- Always insert to the same depth and angle in your roasting vessel
- Allow the thermometer to stabilize for 30 seconds before logging a reading
- Use a dedicated roasting log (paper or app) to track temperature at 1-minute intervals
- Cross-reference your probe readings with visual and auditory cues (more on this in tip #8)
Consistency in measurement is what separates a home roaster who improves steadily from one who produces unpredictable results batch after batch.
4. Ensure Adequate Ventilation During Roasting
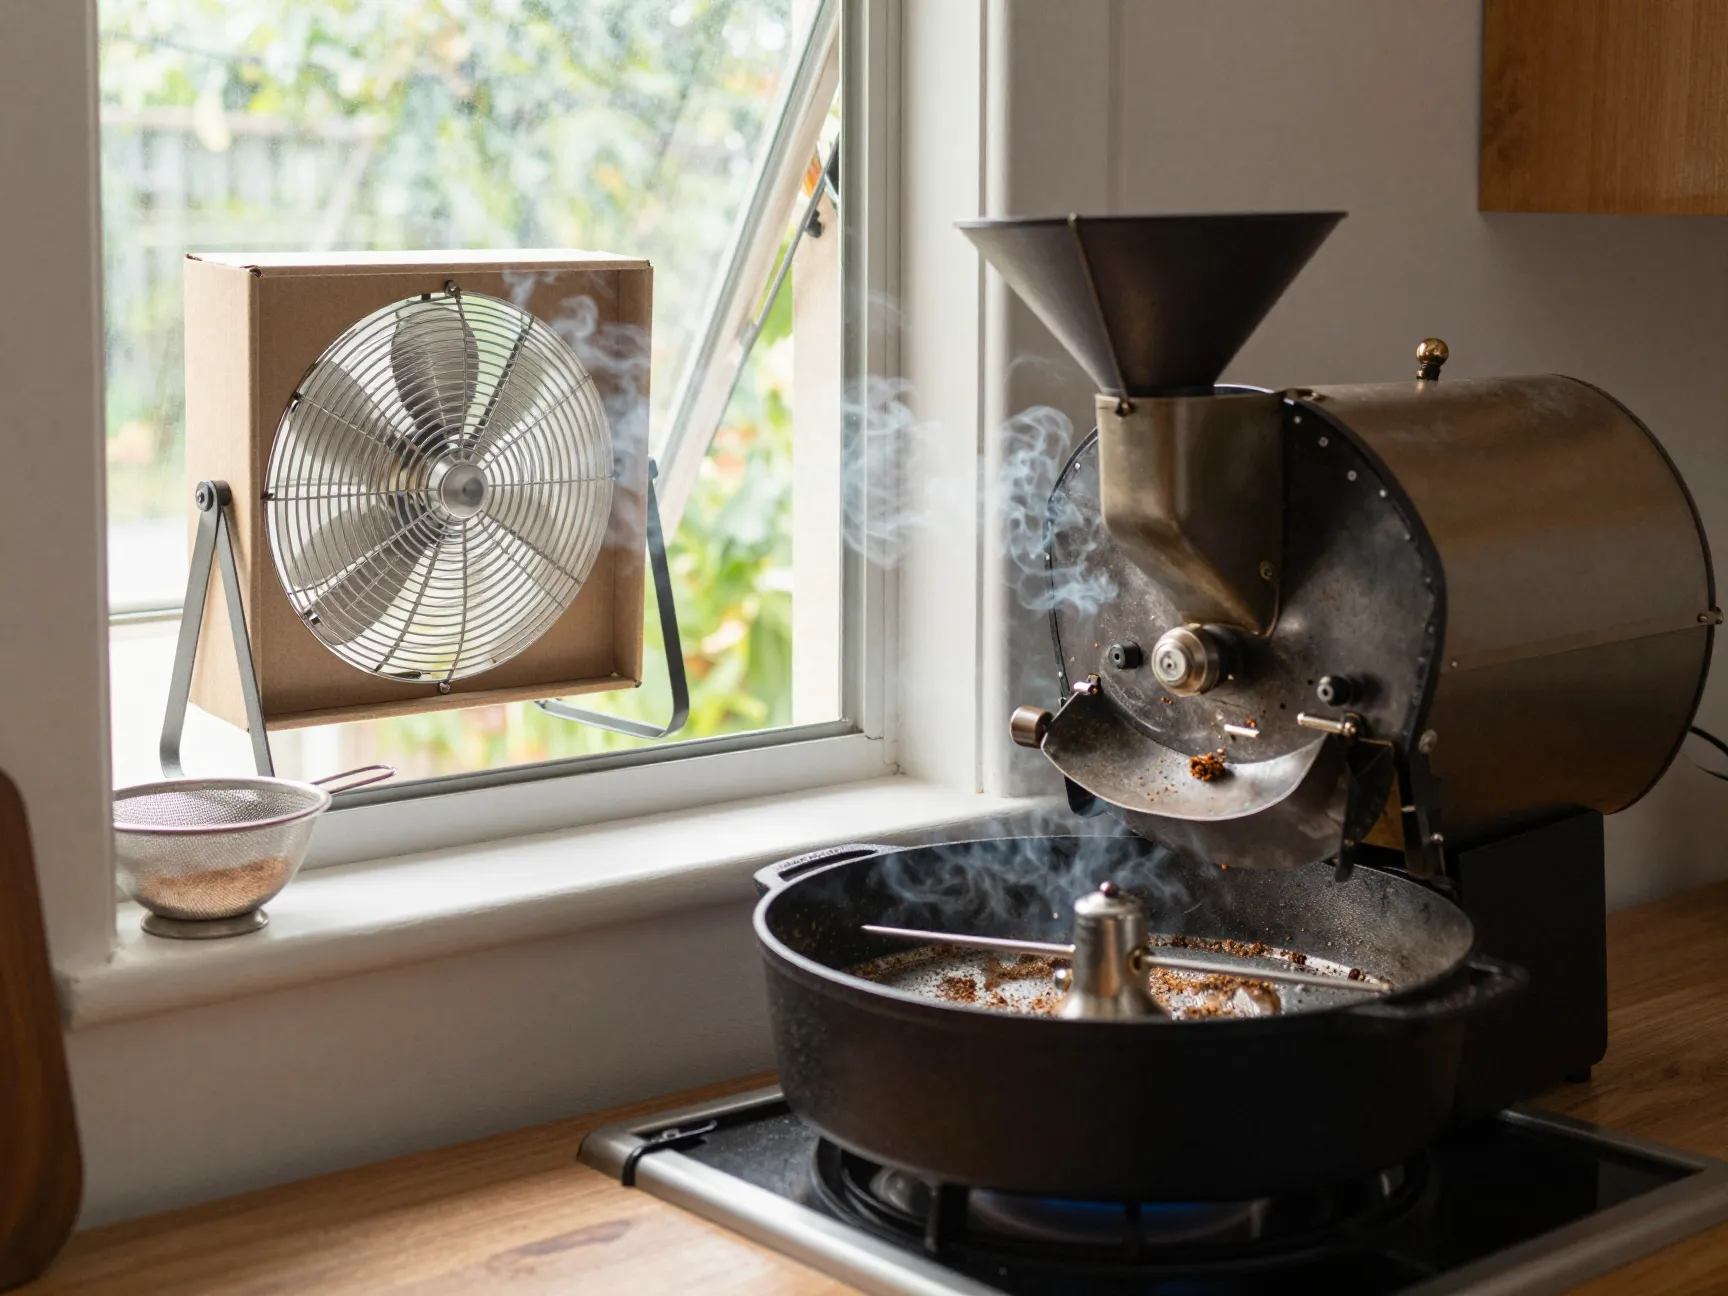
☁️ Coffee roasting produces significant smoke, chaff (the thin papery skin of the bean), and volatile organic compounds. Roasting indoors without proper ventilation doesn’t just make your kitchen smell like a campfire — it can actually contaminate your beans with smoke taint, introducing bitter, acrid flavors that no amount of careful technique can fix. [7]
Ventilation options ranked by effectiveness:
- Outdoor roasting — Best option; eliminates all indoor smoke concerns
- Dedicated range hood with external exhaust — Excellent for indoor drum roasters
- Open window + box fan directed outward — Acceptable for small batches
- Recirculating range hood — Minimally effective; not recommended for roasting
⚠️ Safety note: Never roast in an enclosed space without airflow. Beyond flavor concerns, chaff is flammable and smoke inhalation from prolonged roasting sessions poses a genuine health risk.
If you’re roasting indoors, consider placing your roaster near an open window and running a fan to direct smoke outward. Many dedicated home roasters eventually move their setup to a garage, porch, or backyard for this reason.
Technique, Timing, and the Art of the Perfect Roast
With your setup optimized, the next four tips focus on the active roasting process itself — the decisions you make from the moment beans hit heat to the moment you seal them in a storage jar.
5. Stir Beans Constantly for Even Roasting
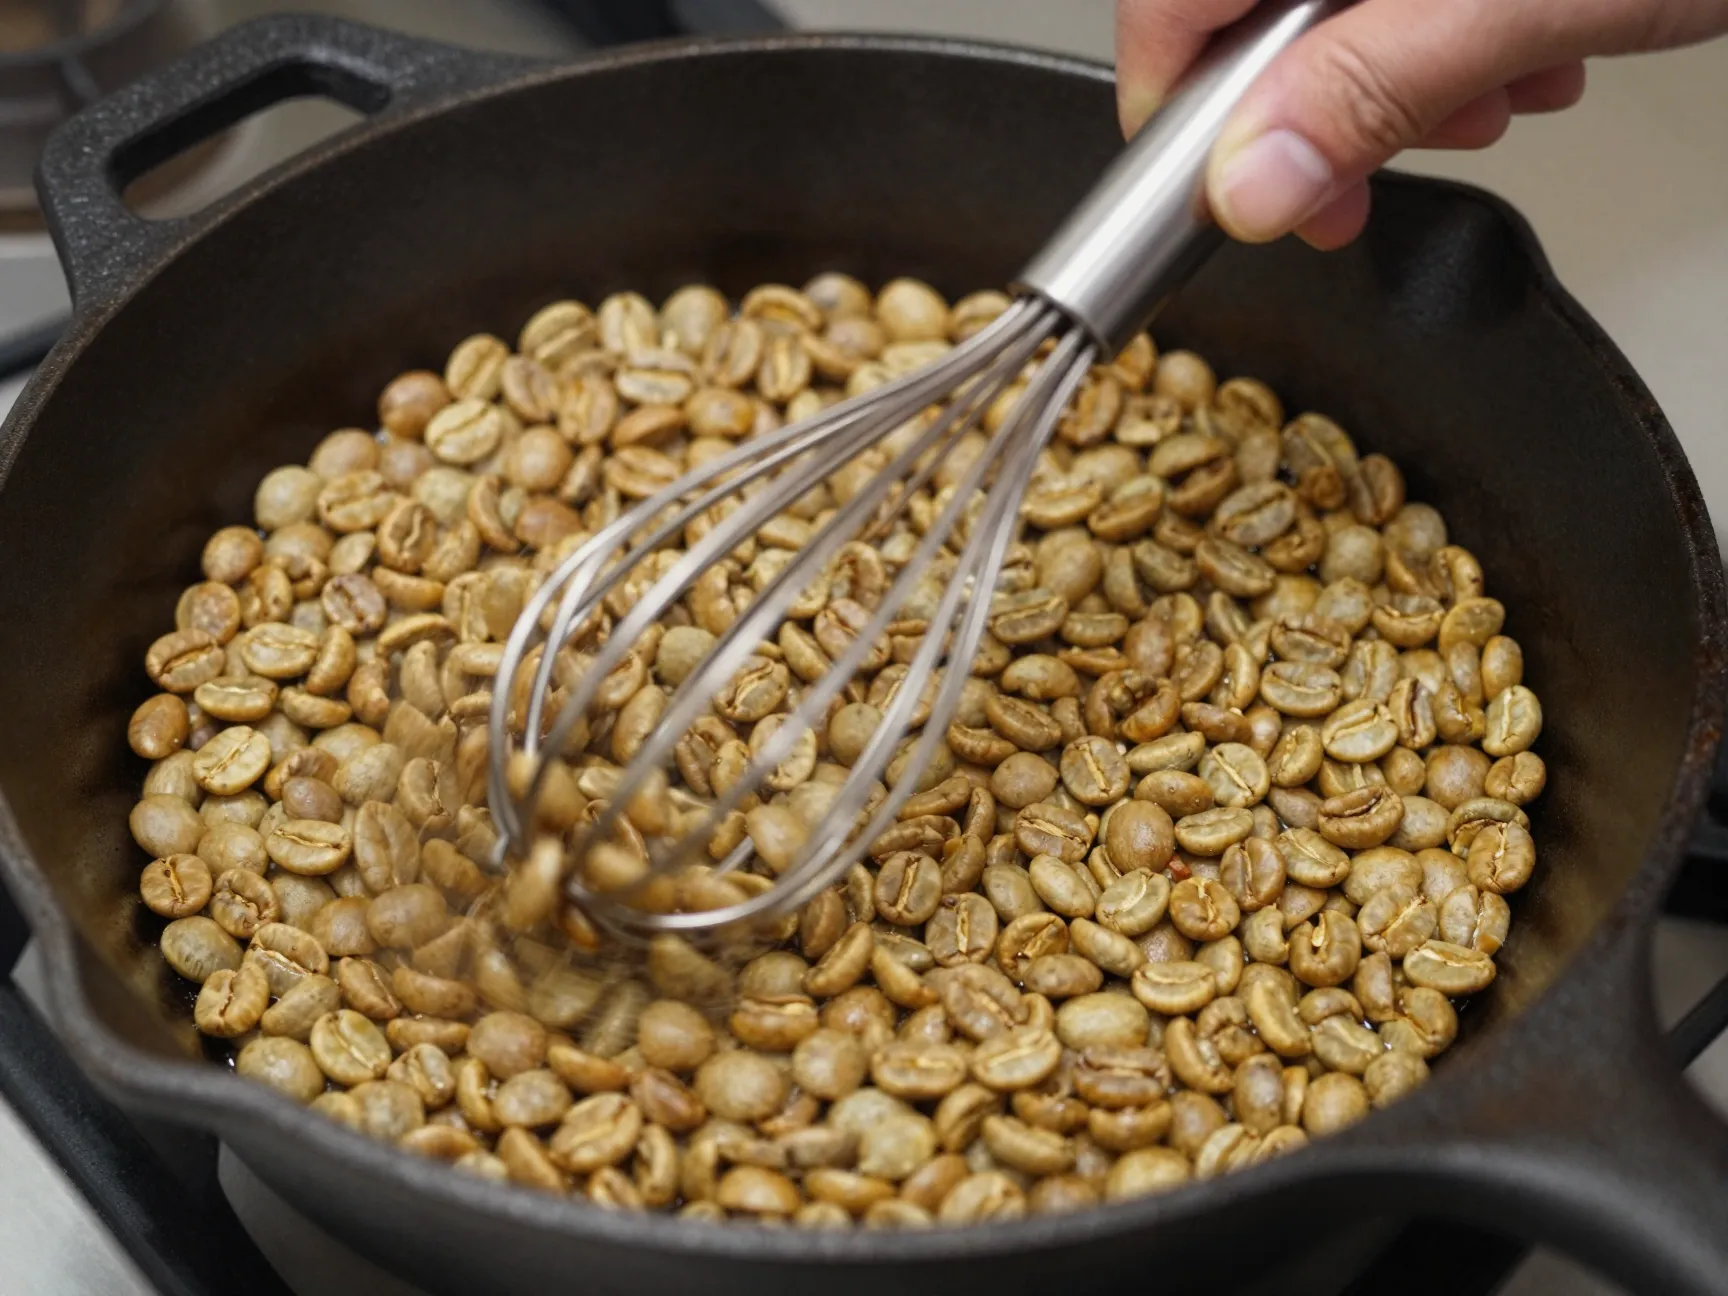
This tip sounds simple, but its impact on quality is enormous. Uneven agitation means uneven heat distribution, which means some beans develop faster than others. The result is a batch with inconsistent color — some beans light, some dark — producing a muddled, confused flavor profile in the cup. [1]
For stovetop and oven methods, continuous stirring is the only way to compensate for the uneven heat distribution of a flat pan or oven rack. A wire whisk works exceptionally well here — its multiple tines create more contact points with the beans, moving them more efficiently than a spoon or spatula.
Stirring technique by method:
| Roasting Method | Recommended Agitation |
|---|---|
| Cast iron skillet | Constant stirring with wire whisk; never stop |
| Oven on baking sheet | Shake every 60 seconds; rotate pan halfway through |
| Popcorn popper | Agitation is built-in; monitor for stuck beans |
| Drum roaster | Drum rotation handles agitation automatically |
| Wok method | Continuous circular stirring with wooden paddle |
The goal is uniform color development across every bean in the batch. When you dump your finished roast and see a consistent, even brown tone, you’ll know your agitation was on point.
6. Cool Beans Quickly After Reaching Your Desired Roast Level
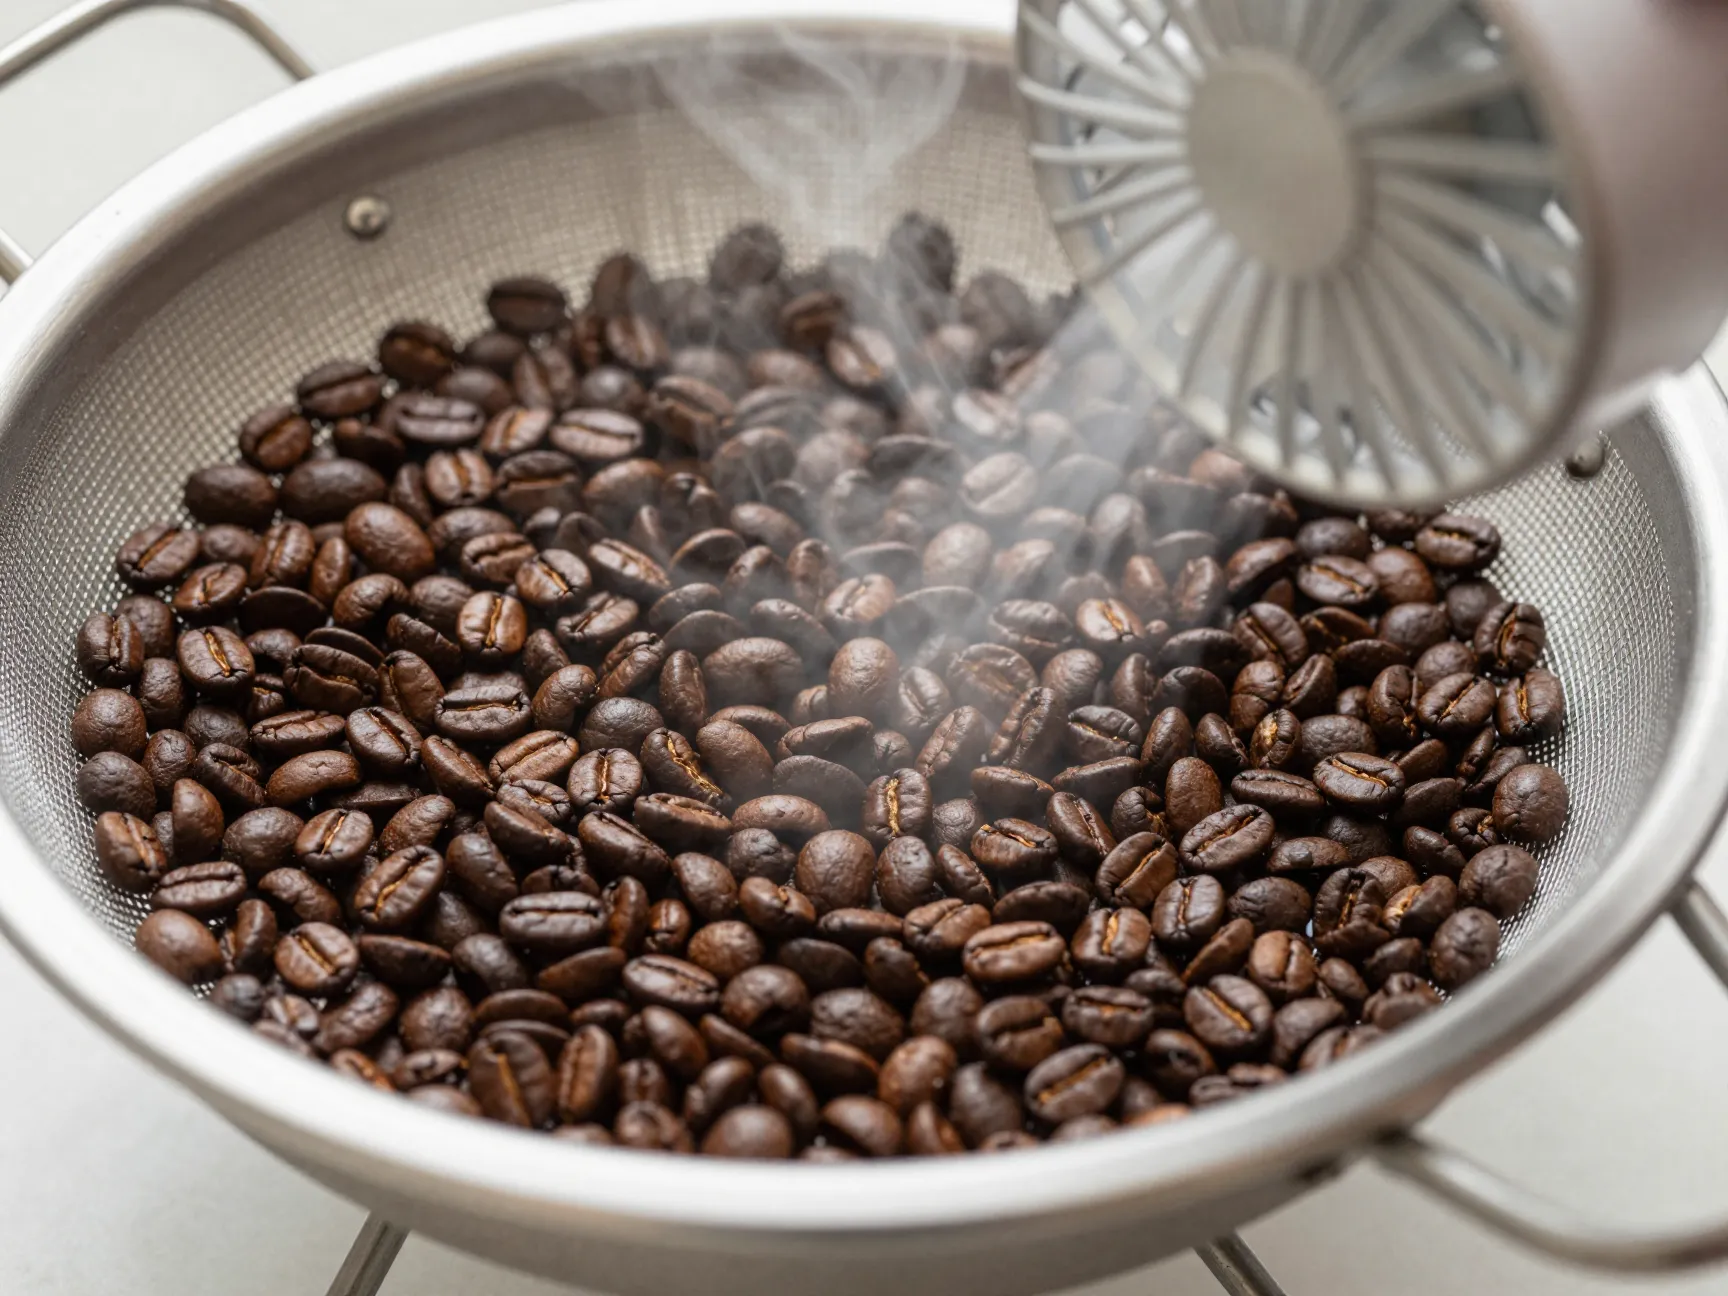
Here’s a fact that surprises many new home roasters: beans continue to roast after you remove them from the heat source. The thermal mass stored inside each bean keeps driving chemical reactions for several minutes after the external heat is gone. If you don’t cool them rapidly, you’ll overshoot your target roast level every single time. [2]
Two primary cooling methods:
- Air cooling — Spread beans in a single layer on a metal colander or cooling tray and use a fan or blow air over them while stirring. This is the most common and preferred method.
- Water quenching — Briefly mist beans with a fine spray of cold water immediately after roasting. This stops the process almost instantly but adds moisture, so beans must be used within a few days.
💡 Most specialty home roasters prefer air cooling to preserve the full aromatic complexity of the bean without introducing moisture variables.
Target cooling time: Get beans below 100°F (38°C) within 3–5 minutes for best results. Any longer and you risk continued development that pushes your roast darker than intended.
7. Monitor Roast Progression Visually and Audibly
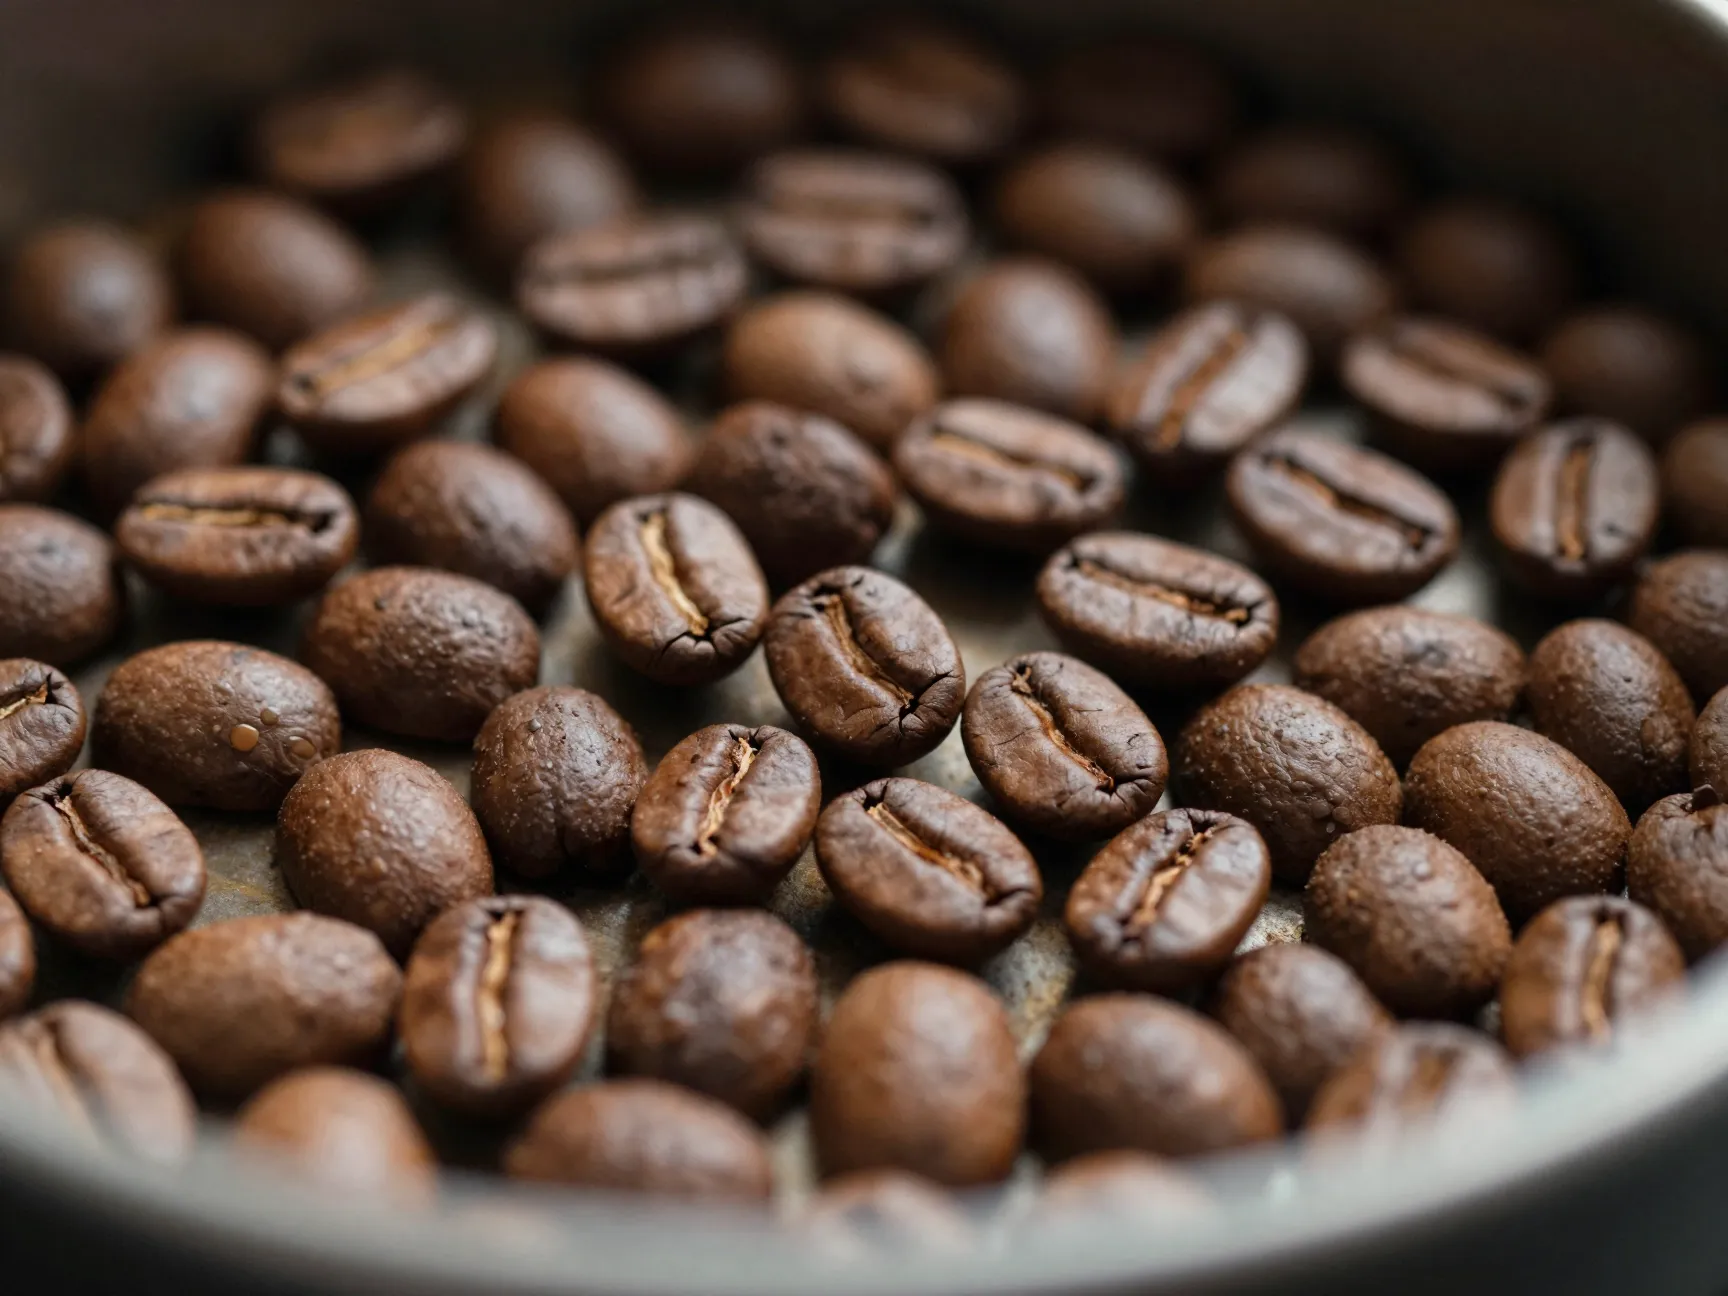
One of the most satisfying aspects of home roasting is learning to read your beans using your senses. Color, sound, and smell are your real-time feedback system — and learning to interpret them accurately is what allows you to hit your target roast level consistently. [1]
The roast progression sensory guide:
🟢 Green (0–3 min): Raw, grassy smell; beans are dense and hard
🟡 Yellow (3–6 min): Hay-like aroma; moisture steaming off; beans begin to soften
🟤 Light Brown (6–9 min): Bread-like, toasty smell; approaching first crack
🔊 First Crack (8–10 min): Loud, sharp popping sounds — like popcorn; this is your light roast marker [1]
🟫 Medium Brown (post-first crack): Sweetness develops; caramel notes emerge
🔊 Second Crack (12–15 min): Softer, rapid crackling — like Rice Krispies; dark roast territory begins
⚫ Dark/French Roast (post-second crack): Oily surface; smoky, bittersweet character
“First crack indicates the beginning of the light roast stage; timing and sensory cues determine roast level.” [1]
Keep a dedicated roasting log that records the time of first crack, the time of second crack (if reached), and the total roast duration. Over several batches, patterns will emerge that help you predict and control outcomes with increasing precision.
8. Wait 7 Days Minimum Before Brewing — Ideally 2 to 3 Weeks
This is the tip most home roasters resist — and the one that makes the biggest difference in the cup. Freshly roasted are actively off-gassing CO2, a byproduct of the roasting process. Brew them too soon and that CO2 interferes with water’s ability to extract flavor compounds evenly, resulting in a sour, uneven, underdeveloped cup. [6]
The degassing timeline:
| Rest Period | What’s Happening | Flavor Impact |
|---|---|---|
| 0–24 hours | Heavy CO2 off-gassing | Sour, grassy, unpleasant |
| 1–3 days | CO2 slowing | Slightly better but still unbalanced |
| 4–7 days | Significant CO2 released | Drinkable; flavors beginning to open |
| 7–14 days | Most CO2 gone | Good extraction; flavors well-developed |
| 2–3 weeks | Optimal degassing | Peak flavor complexity and sweetness |
| 4+ weeks | Oxidation begins | Flavors start to flatten and stale |
⏳ The sweet spot for most roasts is 10–14 days. Light roasts benefit from the longer end of this range; dark roasts, which off-gas more aggressively, are often ready slightly sooner.
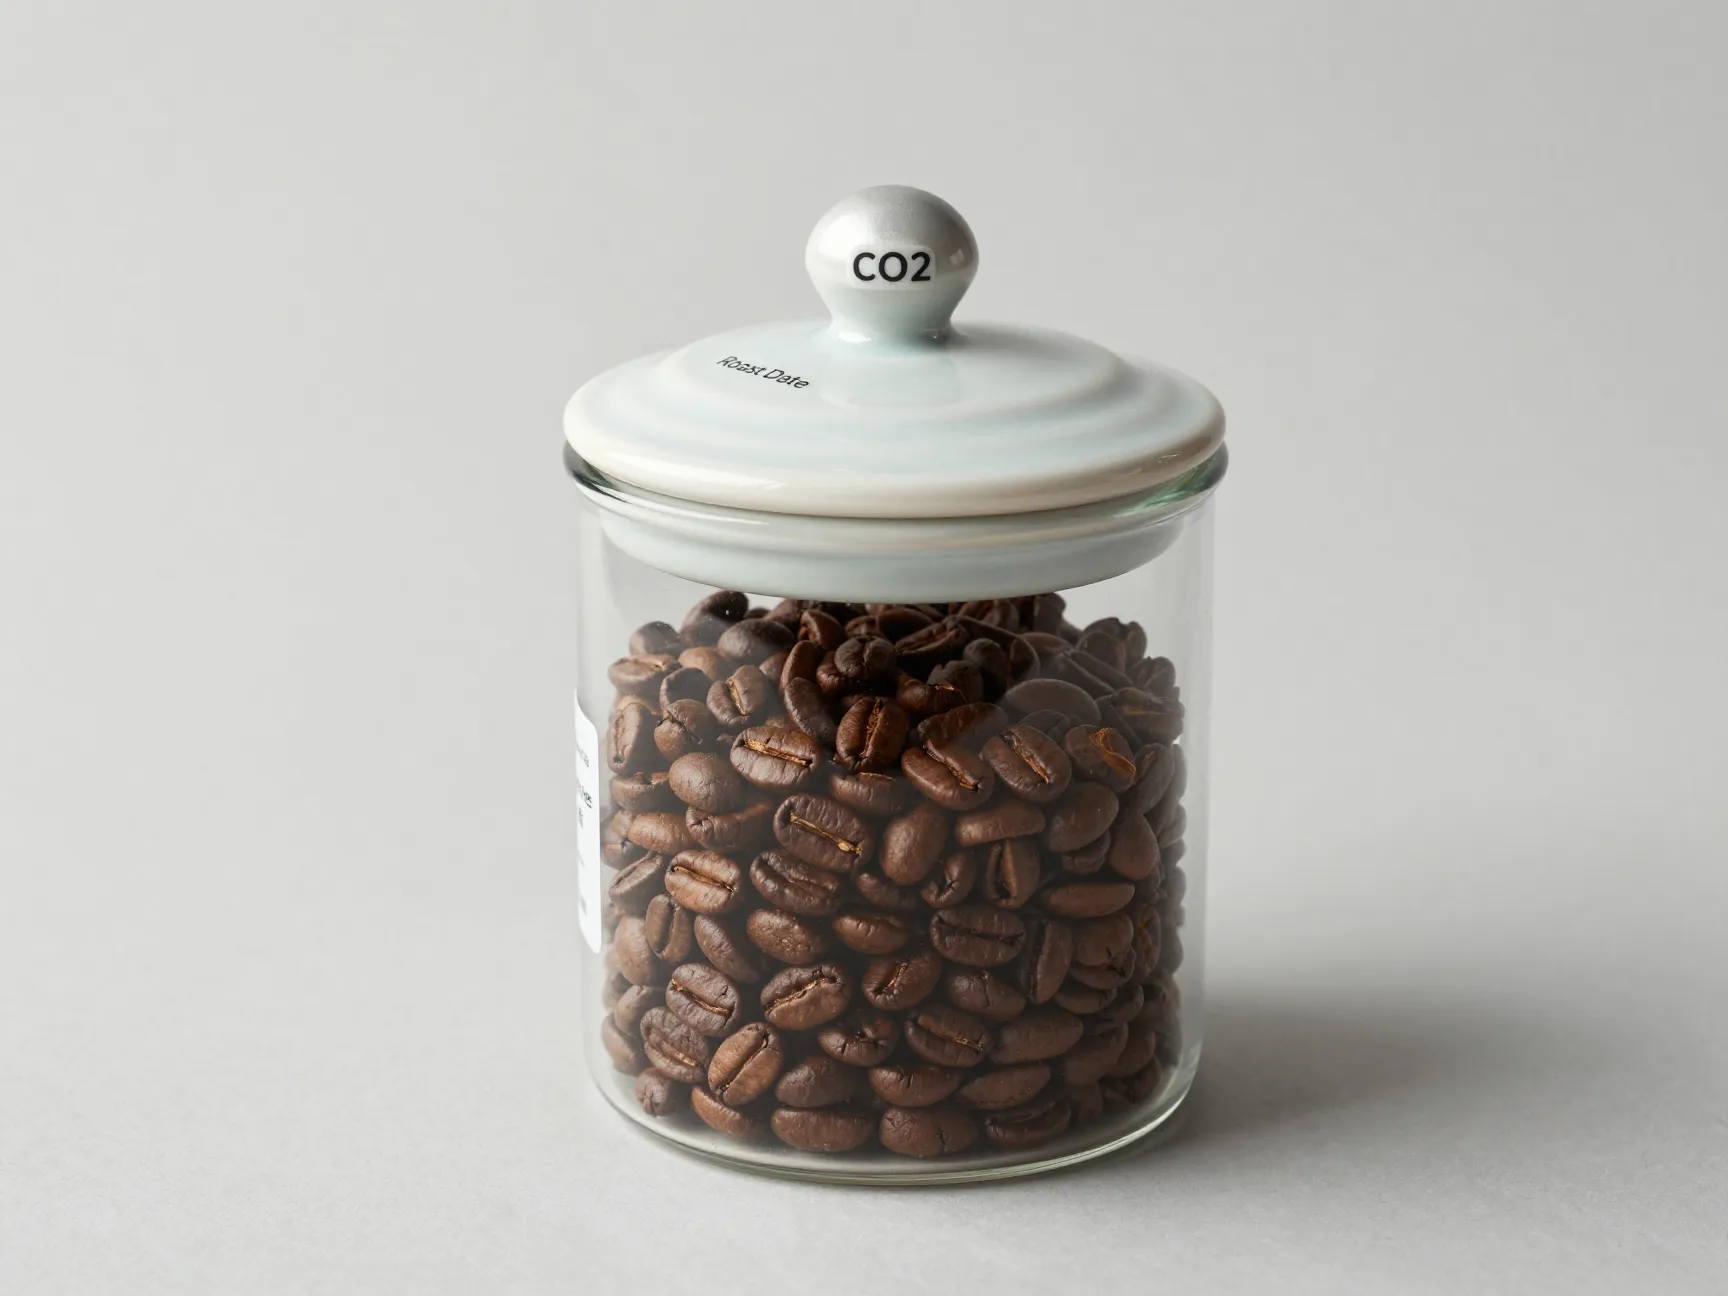
Store your resting beans in an airtight container away from light, heat, and moisture. A ceramic canister with a CO2 valve is ideal — it lets gas escape without letting oxygen in.
Putting the 8 Essential Tips for Home Coffee Roasting to Unlock Unbeatable Flavor Into Practice
Understanding the 8 Essential Tips for Home Coffee Roasting to Unlock Unbeatable Flavor as individual concepts is one thing. Applying them as an integrated system is where the real skill development happens. Here’s a quick-reference checklist to use before, during, and after every roast:
✅ Pre-Roast Checklist:
- [ ] Green beans sourced from a reputable supplier; harvest date verified
- [ ] Roasting area ventilated or outdoor setup confirmed
- [ ] Thermometer probe positioned and marked
- [ ] Roasting log ready with date, bean origin, and target roast level
✅ During-Roast Checklist:
- [ ] Temperature maintained within 350°F–480°F range
- [ ] Beans stirred or agitated continuously
- [ ] Visual and auditory cues being logged (first crack time noted)
- [ ] Ready to remove beans at precise target moment
✅ Post-Roast Checklist:
- [ ] Beans cooled below 100°F within 3–5 minutes
- [ ] Stored in airtight container with CO2 valve
- [ ] Rest period marked on container (brew date = roast date + 7–14 days minimum)
- [ ] Roast notes completed for future reference
Common Home Roasting Mistakes to Avoid
Even with the best intentions, certain errors show up repeatedly among new home roasters. Here are the most common ones — and how to sidestep them:
❌ Roasting too large a batch for your equipment — Overcrowding prevents even heat distribution and agitation. Start with 100–200g batches until you understand your equipment’s capacity.
❌ Ignoring chaff management — Chaff is flammable and can cause flare-ups on stovetop methods. Use a colander or screen to catch it, and keep your roasting area clear.
❌ Skipping the roast log — Memory is unreliable. Without written records, you can’t replicate a great roast or diagnose a bad one.
❌ Brewing too soon — The most common mistake and one of the most impactful. Resist the temptation. The wait is worth it.
❌ Using the same temperature profile for all bean origins — Dense, high-altitude beans (like Ethiopian Yirgacheffe or Guatemalan) require different heat application than lower-density beans. Adjust your approach based on bean density and origin. [9]
Conclusion: Your Path to Unbeatable Home-Roasted Coffee in 2026
The gap between average home-roasted coffee and truly exceptional home-roasted coffee comes down to eight decisions — all of which are within your control. The 8 Essential Tips for Home Coffee Roasting to Unlock Unbeatable Flavor aren’t secrets reserved for professionals. They’re the practical application of understanding what need to reach their full potential.
Your actionable next steps:
- Order a small sample of quality green beans from a reputable supplier this week — start with a well-known origin like Colombian or Ethiopian to build your flavor reference point.
- Set up your ventilation and thermometry before your first roast — don’t improvise these on the day.
- Roast a small 150g test batch using the temperature and sensory guidelines in this article, and log every detail.
- Wait the full 7–14 days before brewing your first batch — use that time to research your next bean selection.
- Review your roast log after brewing and identify one variable to adjust for your next roast.
Home roasting is a craft that rewards patience, attention, and curiosity. Every batch teaches you something new. Start with these eight principles, stay consistent, and the unbeatable flavor you’re chasing is closer than you think. ☕
References
[1] A Beginners Guide To Roasting The Perfect Coffee At Home – https://www.genuinebluemountaincoffee.com/blogs/news/a-beginners-guide-to-roasting-the-perfect-coffee-at-home
[2] Coffee Roasts Guide Unlocking The Richness Of Every Cup – https://www.cooperscoffeeco.com/coffee-roasts-guide-unlocking-the-richness-of-every-cup/
[3] 10 Essential Tips For Brewing Perfect Home Coffee – https://visiblecoffeeroasters.com/blogs/news/10-essential-tips-for-brewing-perfect-home-coffee
[4] 11 Tips For Brewing At Home – https://www.pinupcoffeeco.com/blogs/coffee-stories/11-tips-for-brewing-better-coffee-at-home
[5] Hopefully Useful Home Roasting Tips T5316 – https://www.home-barista.com/roasting/hopefully-useful-home-roasting-tips-t5316.html
[6] 8 Tips To Become A Better – https://www.greenplantation.com/a/8-tips-to-become-a-better-home-barista
[7] Tips For Better Home Roasting Based Coffee – https://www.sonofresco.com/tips-for-better-home-roasting-based-coffee/
[8] Watch – https://www.youtube.com/watch?v=WhXCIFMMCYo
[9] Home Roast Coffee – https://www.coffeebeancorral.com/blog/post/home-roast-coffee