9 Pro Tips on How to Make Espresso Martinis That Rival a Bartender’s
The is now the most ordered cocktail in the United States — surpassing the Old Fashioned for the first time in over a decade. Yet most home versions fall flat: watery, foamless, and missing that signature velvet top that makes the drink worth ordering in the first place. If you’ve ever been disappointed by your own attempt, you’re not alone — and the fix is simpler than you think.
Disclosure: This post contains affiliate links. As an Amazon Associate, we earn from qualifying purchases, and at no extra cost to you.
These 9 Pro Tips on How to Make Espresso Martinis That Rival a Bartender’s cover everything from the exact shaking technique to glassware prep, so your next cocktail looks and tastes like it came from a high-end bar. Whether you’re hosting a dinner party in 2026 or just want to impress yourself on a Friday night, this guide has you covered.
Key Takeaways 🎯
- Fresh espresso is non-negotiable — or will never produce proper foam or flavor depth.
- Vigorous shaking for 10–12 seconds is the single most important technique for creating the iconic thick foam top.
- The 1:1:1 ratio (vodka : coffee liqueur : espresso) is your baseline for balanced flavor.
- Pre-chilled glassware keeps your drink colder longer and preserves the foam.
- Large ice cubes + a full shaker create the agitation needed for professional-level results.
Why Most Homemade Espresso Martinis Fall Short
Before diving into the tips, it helps to understand why home versions so often disappoint. The was invented by legendary London bartender Dick Bradsell in the 1980s. His daughter Bea Bradsell has since shared his secrets — and the gap between a great espresso martini and a mediocre one almost always comes down to technique, not fancy equipment [1][3].
Three common mistakes show up again and again:
- Using the wrong type of coffee
- Under-shaking (or worse, stirring)
- Skipping glassware prep
The good news? Every single one of these mistakes is easy to correct. Let’s get into it.
The 9 Pro Tips on How to Make Espresso Martinis That Rival a Bartender’s
1. Start With Fresh Espresso — Always
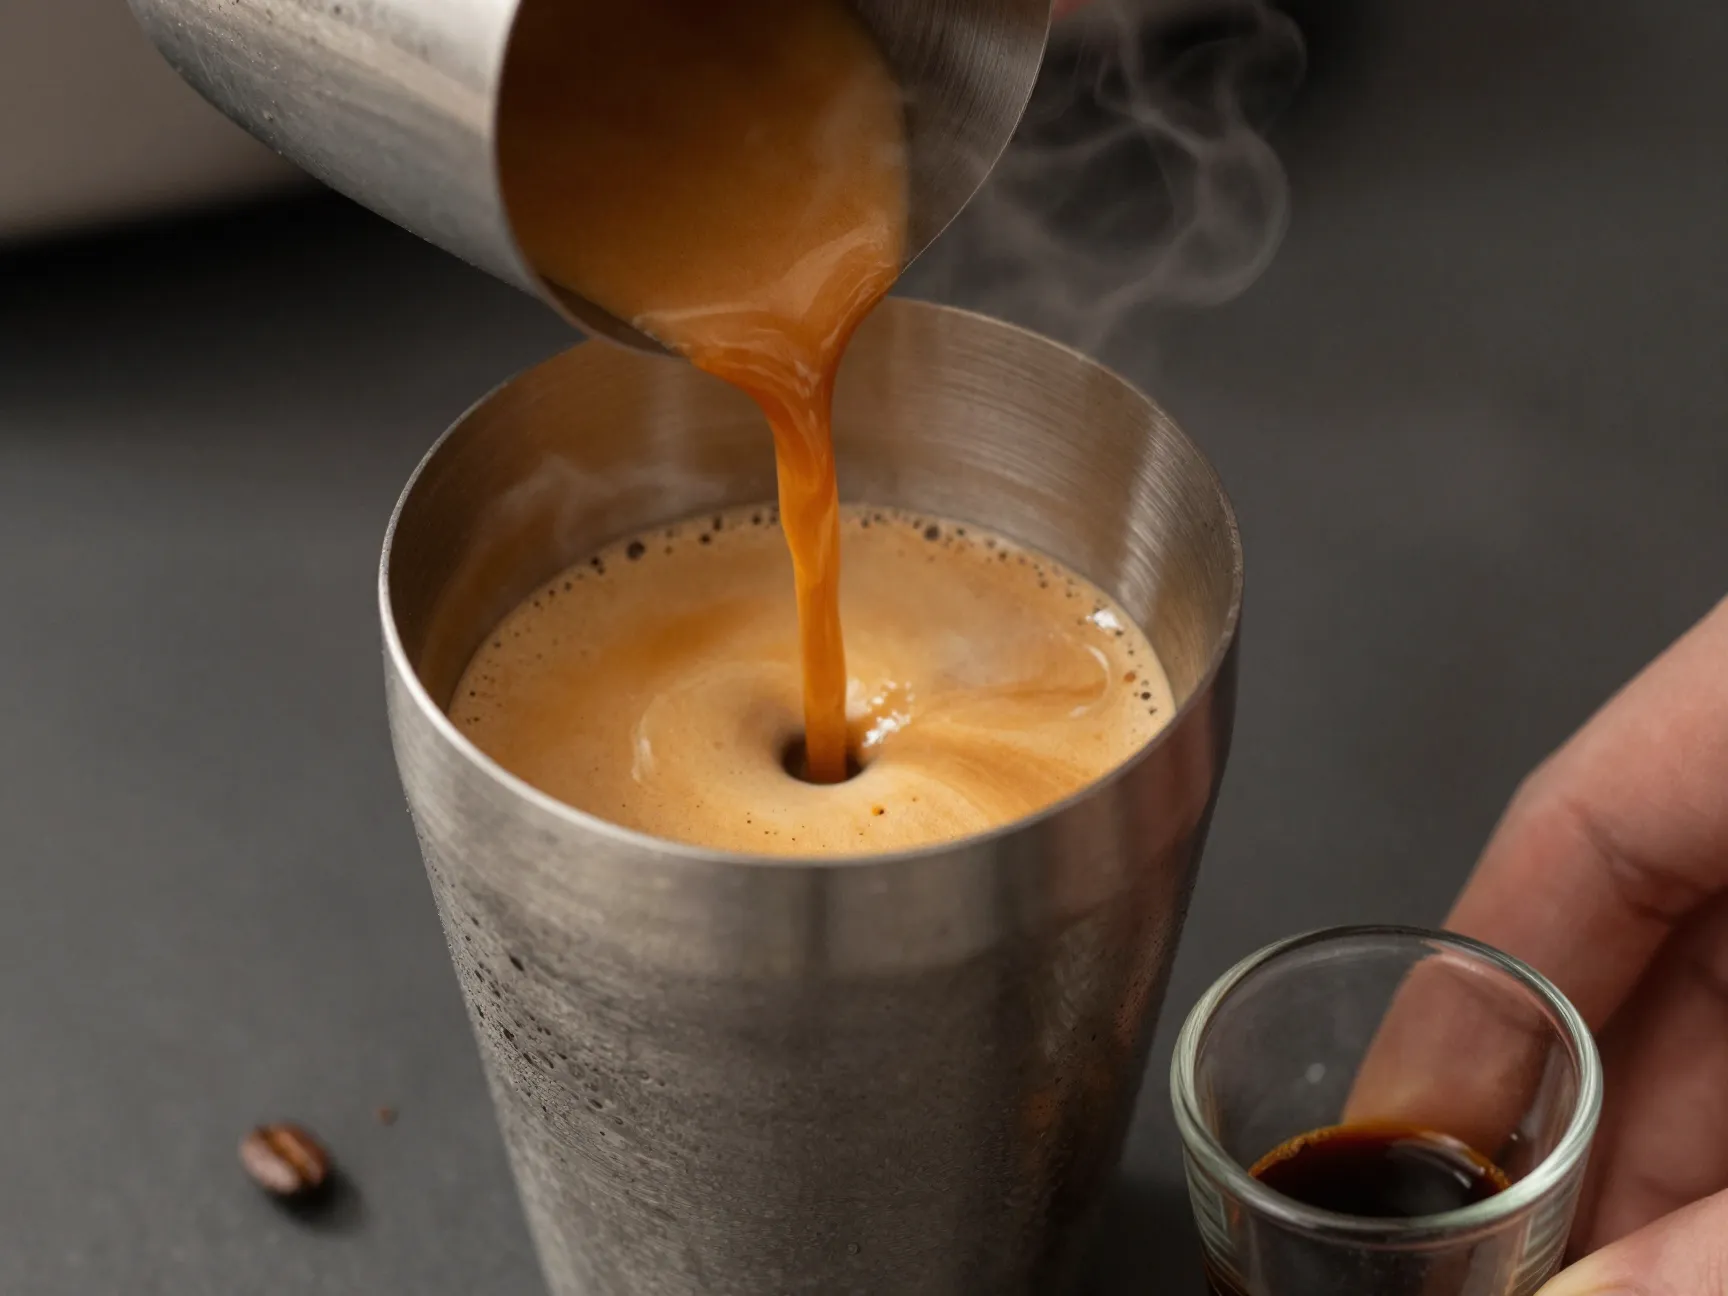
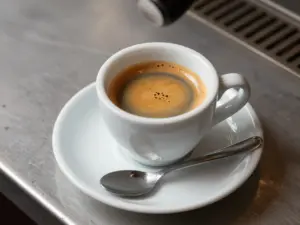
Nothing else matters if you get this wrong. Fresh espresso from a proper espresso machine is the foundation of every great espresso martini [1][2][3]. The crema — that golden-brown foam that sits on top of a freshly pulled shot — is what creates the signature thick foam top when the drink is shaken.
💡 “The crema in fresh espresso is packed with emulsified coffee oils that are essential for foam formation. Without it, you’re just making a coffee cocktail.”
What to avoid:
- Instant coffee granules
- Standard drip-brewed coffee
- Cold brew concentrate
- Espresso that has been sitting for more than 10 minutes
If you don’t own an espresso machine, a Moka pot is a reasonable substitute. It won’t produce true crema, but it creates a stronger, more concentrated brew than a drip machine. A pod-based machine (like a Nespresso) is another acceptable option — the pressure-brewed coffee still contains enough oils to help with foam [2].
2. Let the Espresso Cool Slightly Before Shaking
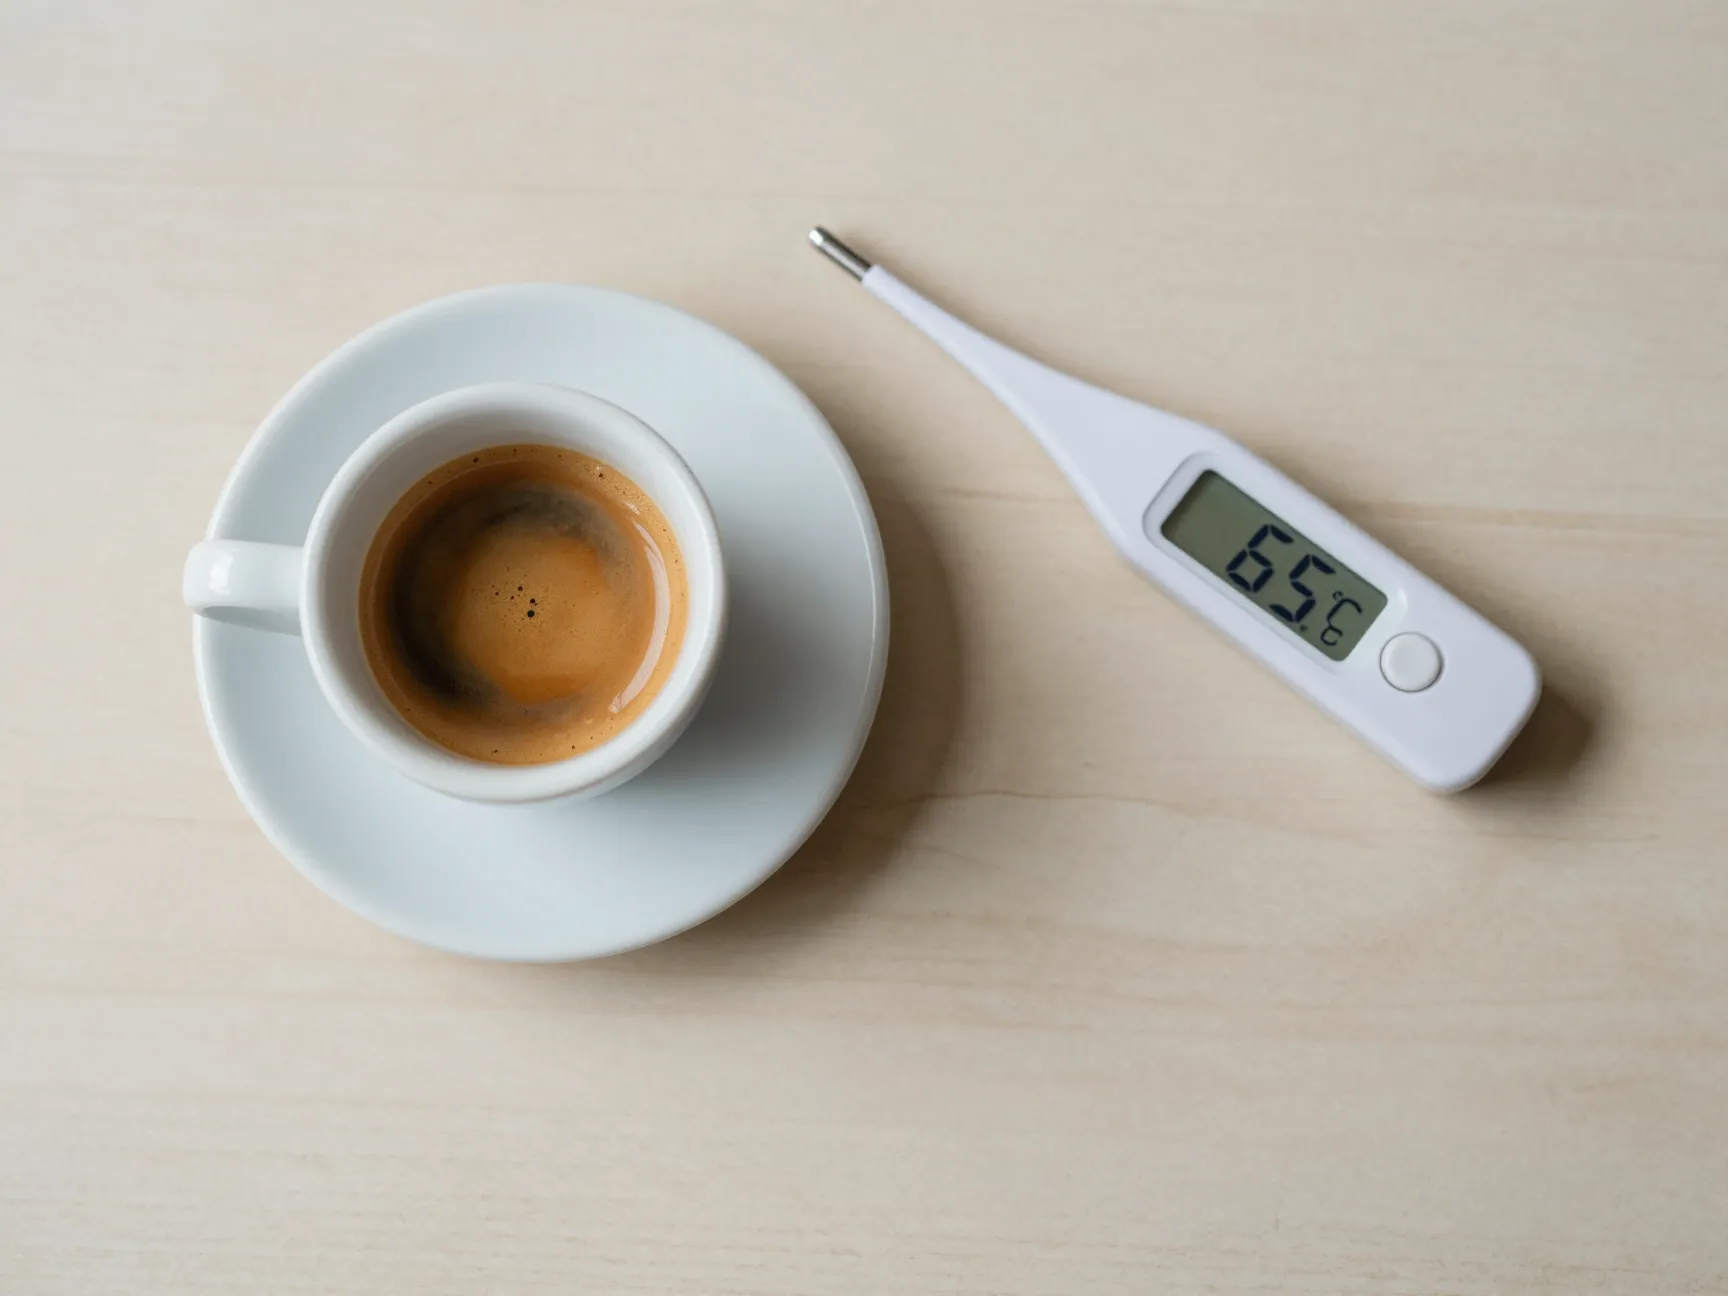
This tip surprises a lot of people. You want your espresso warm but not scalding hot when it goes into the shaker [1]. Here’s why: extremely hot liquid melts ice too quickly, which dilutes the drink and kills the foam before it forms.
The sweet spot: Pull your shot, then let it rest for 60–90 seconds. It should be warm to the touch but not steaming aggressively. This brief rest also allows the crema to settle and concentrate, which actually improves foam production during shaking.
| Espresso Temperature | Result |
|---|---|
| Too hot (above 80°C / 176°F) | Rapid ice melt, watery drink, poor foam |
| Ideal (60–70°C / 140–158°F) | Good agitation, thick foam, balanced dilution |
| Too cold (room temp or below) | Weak foam, flat flavor |
3. Master the 1:1:1 Ratio
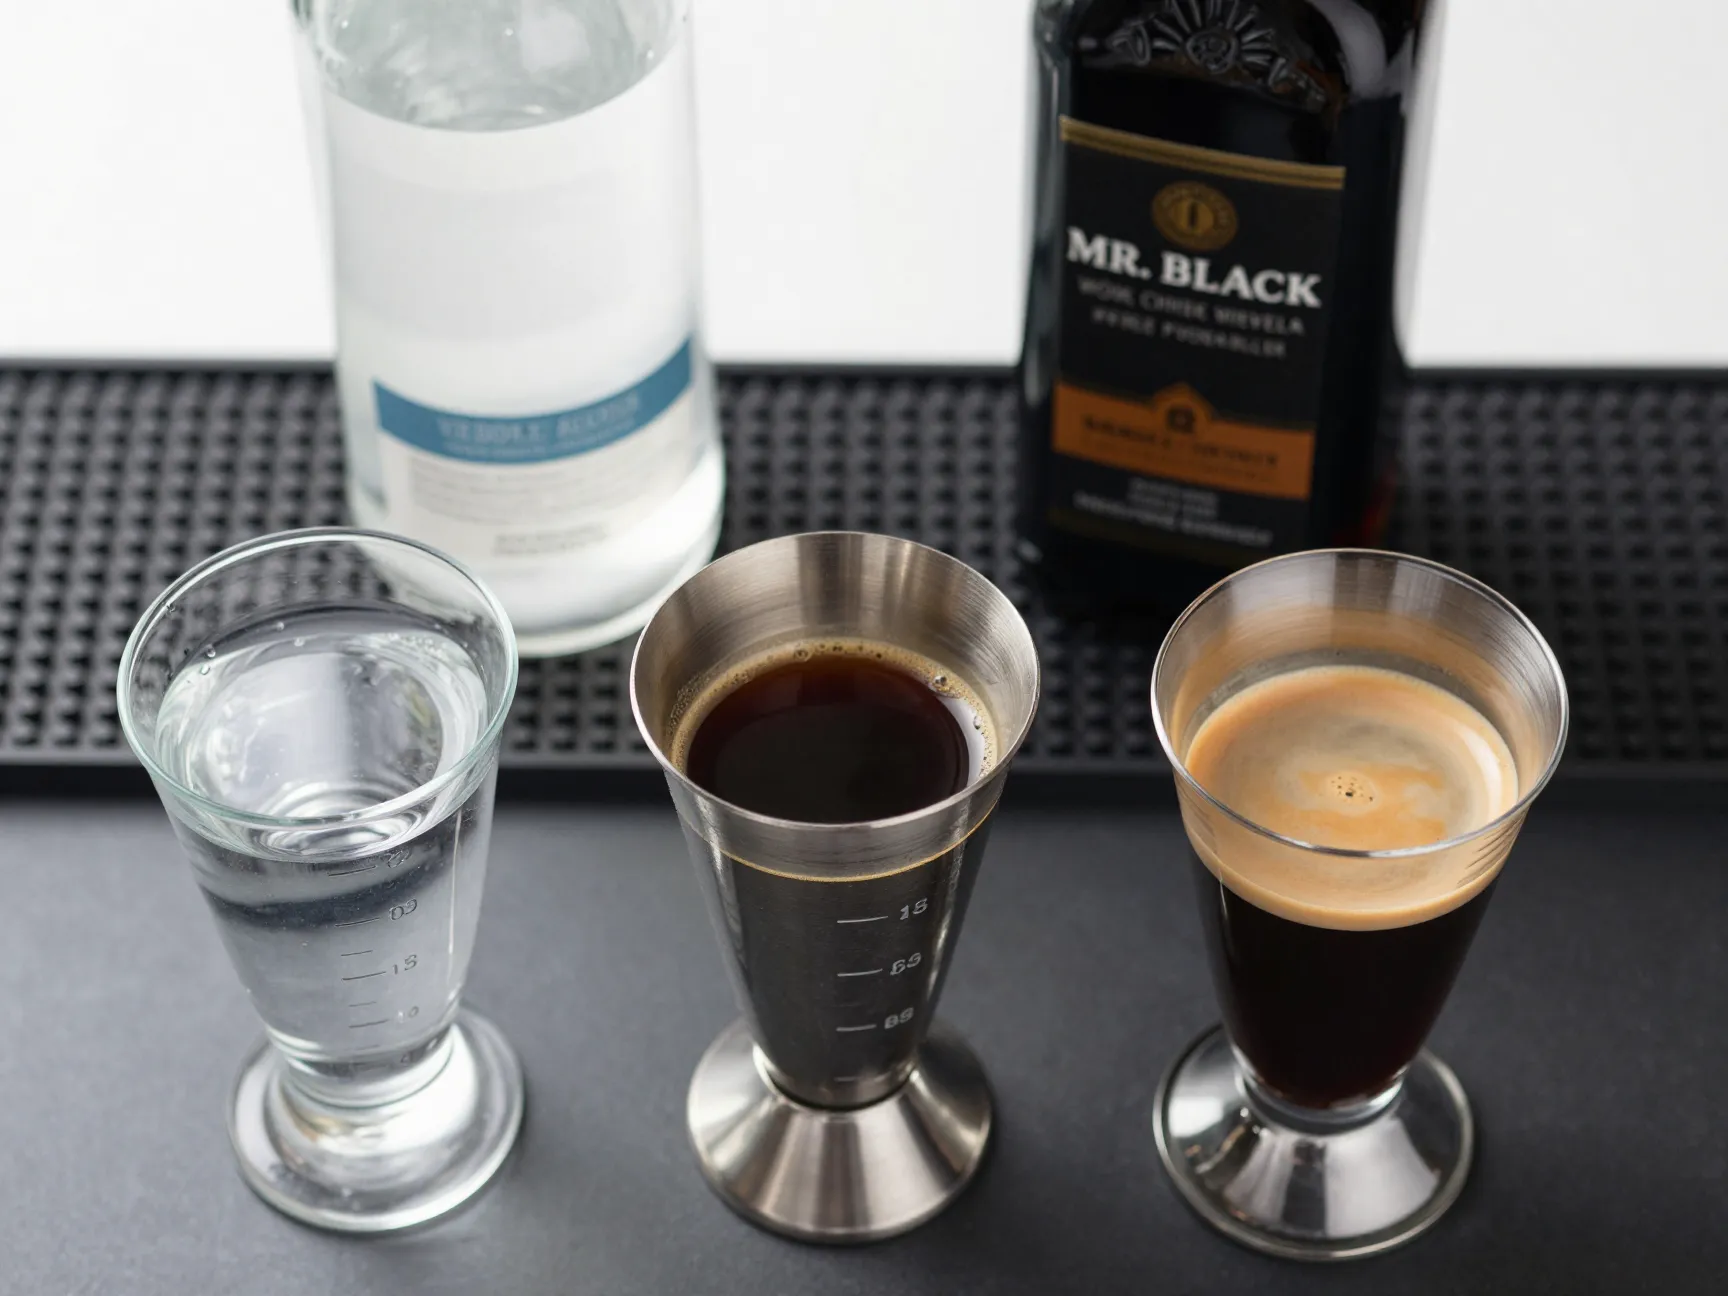
The classic espresso is built on a beautifully simple formula: equal parts vodka, coffee liqueur, and fresh espresso [3]. This 1:1:1 ratio creates a drink that is neither too sweet nor too bitter, with the alcohol and coffee in perfect harmony.
Standard single-serve recipe:
- 1 oz (30ml) vodka
- 1 oz (30ml) coffee liqueur (Kahlúa or Mr. Black)
- 1 oz (30ml) fresh espresso
Some bartenders adjust this slightly — adding a half-ounce more espresso for a stronger coffee flavor, or reducing the liqueur for a less sweet profile. But if you’re new to making this cocktail, start with 1:1:1 and tweak from there once you understand the baseline.
🍸 Pro Note: The total volume of 3 oz (90ml) fills a standard coupe or martini glass almost perfectly after dilution from shaking.
4. Choose the Right Coffee Liqueur
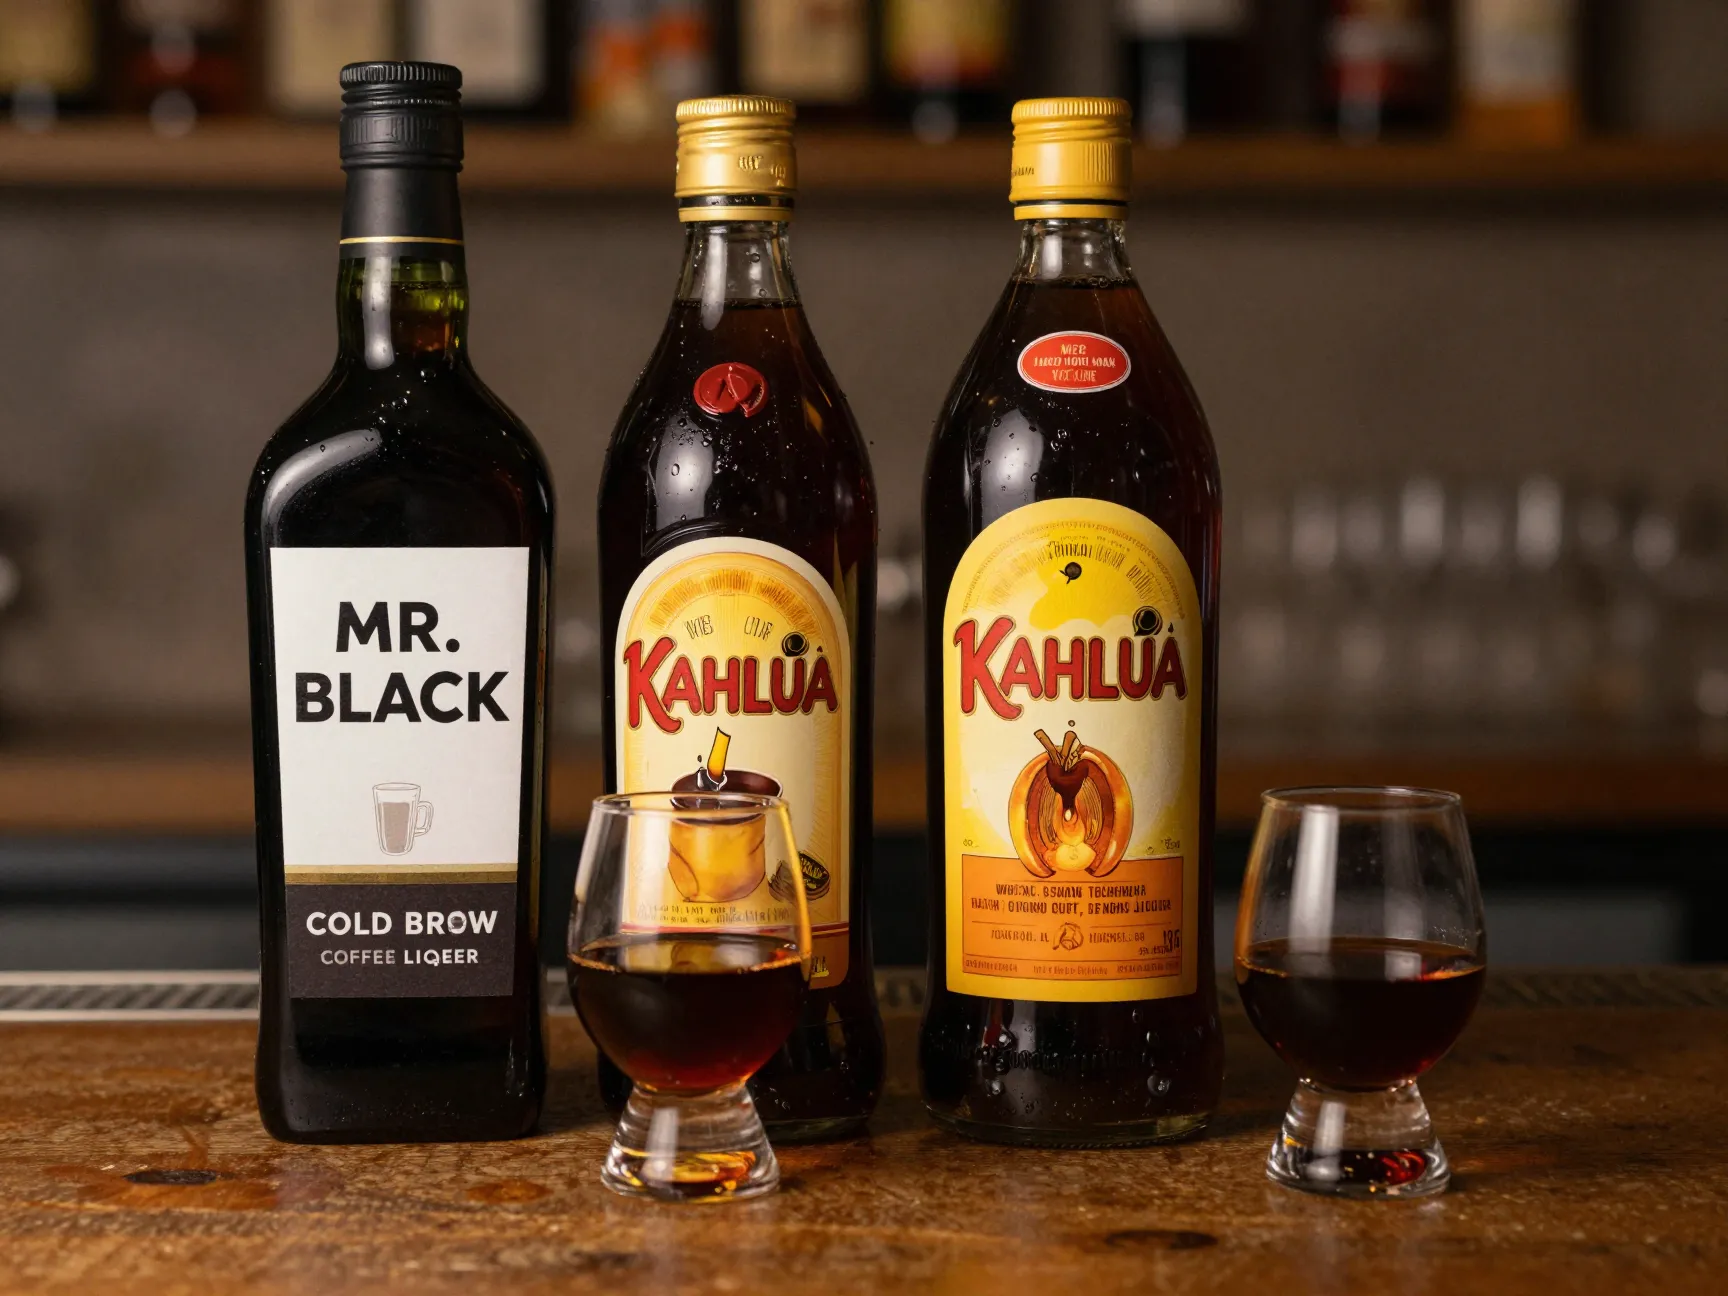
Not all coffee liqueurs are created equal, and your choice here has a significant impact on the final flavor [2].
The two most recommended options:
- Mr. Black Cold Liqueur — Made with coffee and vodka as the base spirit. It has a more intense, less sweet coffee flavor with lower sugar content. Preferred by many craft bartenders for a drier, more sophisticated result.
- Kahlúa — The classic choice. It uses rum as its base spirit, which adds a subtle sweetness and warmth. Higher sugar content makes for a sweeter, more approachable drink.
Quick comparison:
| Liqueur | Base Spirit | Sweetness | Coffee Intensity |
|---|---|---|---|
| Mr. Black | Vodka | Low | High |
| Kahlúa | Rum | High | Medium |
| Tia Maria | Rum | Medium | Medium |
If you want a cocktail that tastes like a dessert, go with Kahlúa. If you want something that tastes like a serious coffee drink with a kick, Mr. Black is your pick [2].
5. Use Large Ice Cubes and Fill the Shaker Properly
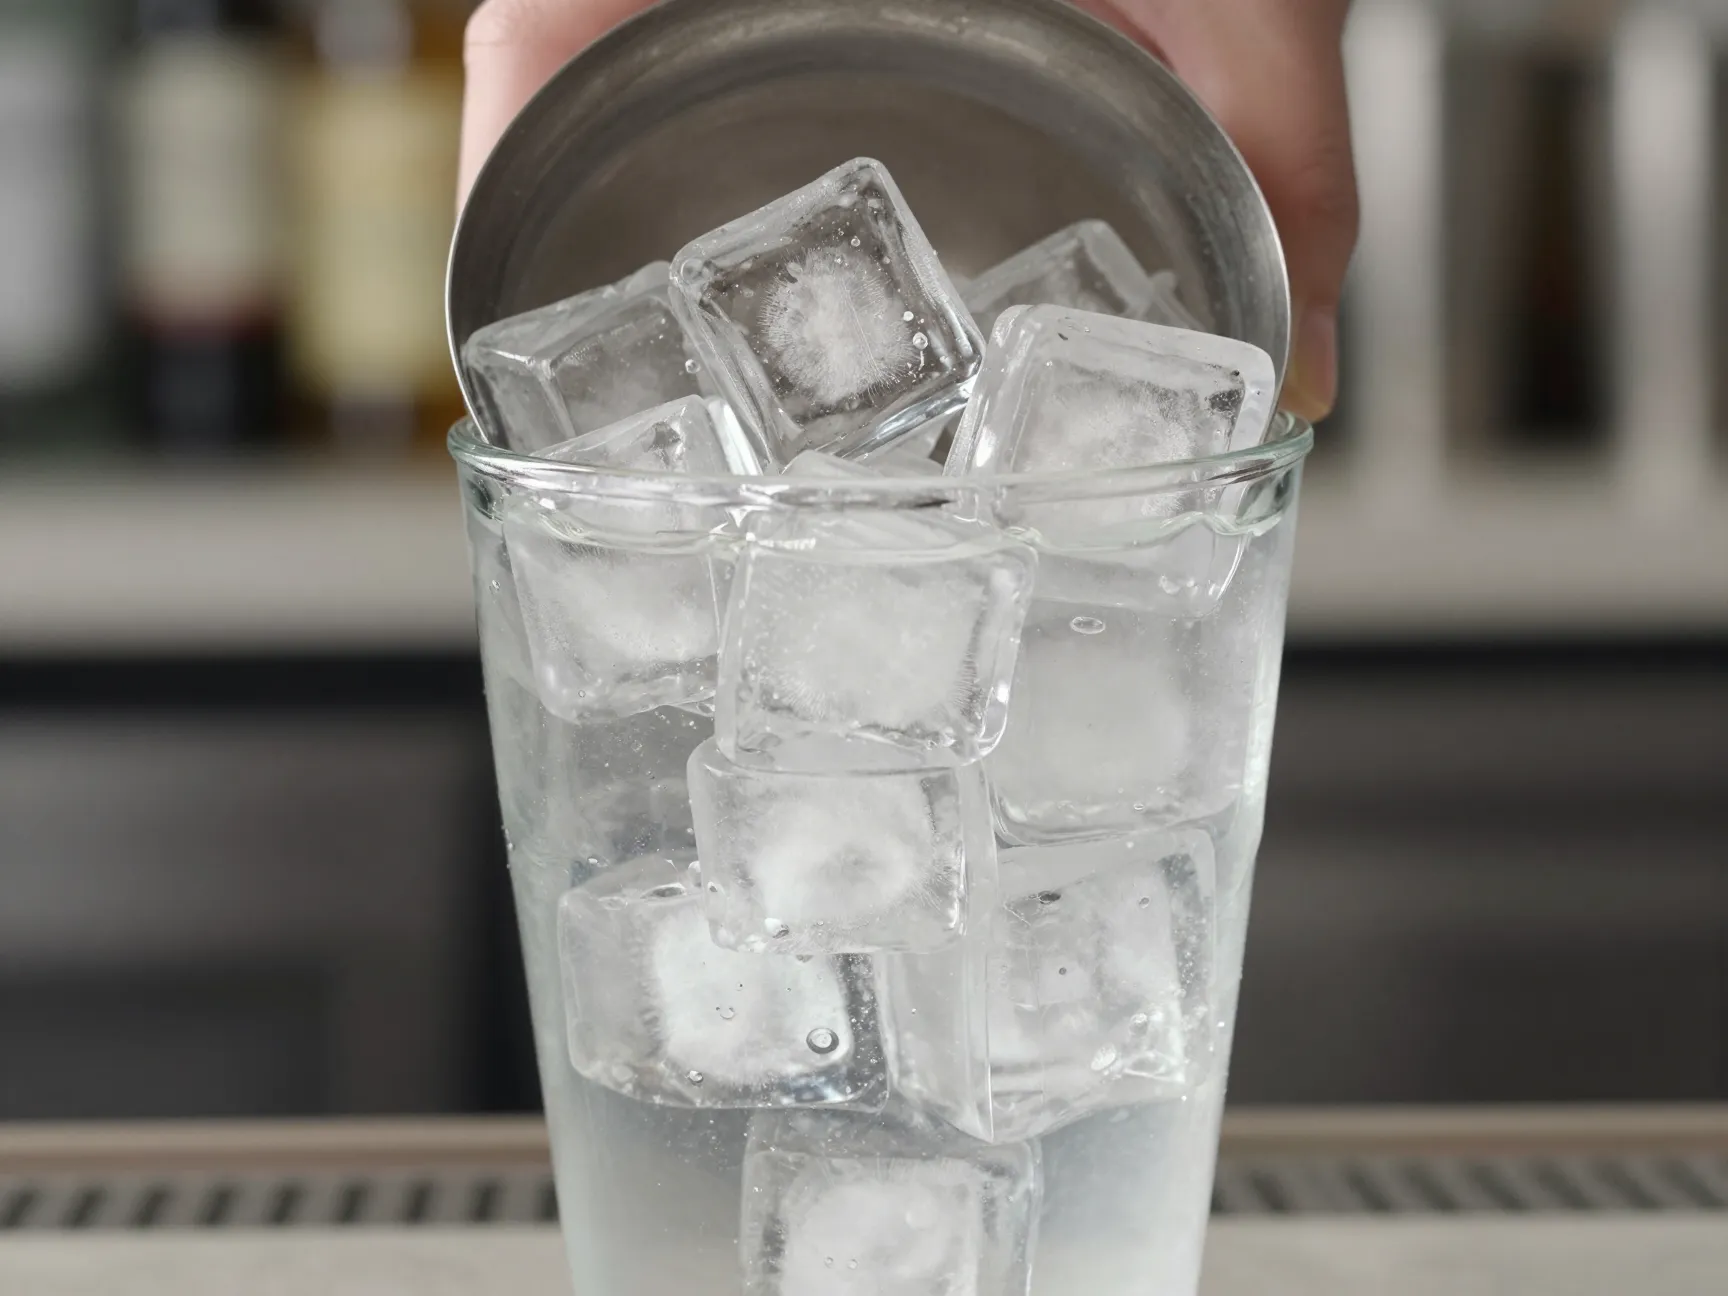
Here’s a tip that most home bartenders overlook entirely: the size and quantity of your ice matters enormously [3].
Large ice cubes (roughly 1–1.5 inches square) do two things:
- They create more aggressive agitation during shaking, which emulsifies the coffee oils and generates foam.
- They melt more slowly than small cubes or crushed ice, which means less dilution.
How full should your shaker be? Fill it two-thirds to three-quarters full with large ice cubes [3]. This gives the liquid enough room to move and aerate while still having plenty of ice contact for chilling.
❌ Common mistake: Using a nearly empty shaker with a few small ice cubes. The liquid barely moves, the ice melts fast, and you end up with a lukewarm, watery drink with zero foam.
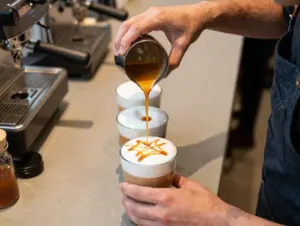
6. Shake It Like You Mean It — 10 to 12 Seconds of Hard Shaking
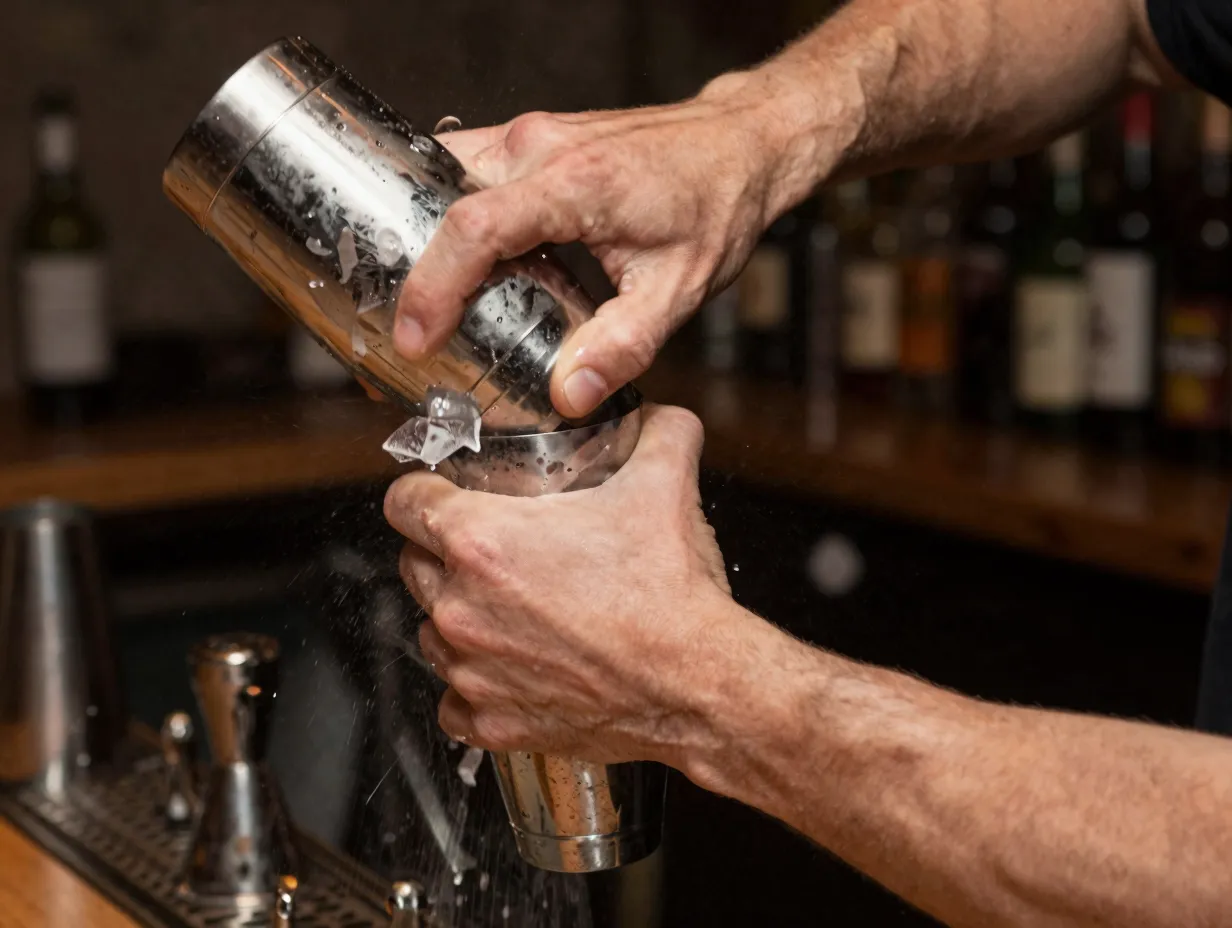
This is the single most important technique in the entire process. Bea Bradsell, daughter of the cocktail’s inventor, famously advises to “shake it like you hate it” [1][3]. She’s not joking.
Why aggressive shaking works:
- The violent motion forces air into the liquid
- Coffee oils from the espresso crema emulsify with the vodka and liqueur
- This emulsification creates the thick, stable foam that defines the drink
The right technique:
- Hold the shaker with both hands (one on top, one on bottom)
- Shake horizontally or at a slight angle
- Use your whole arm, not just your wrist
- Maintain hard, fast shaking for a full 10 to 12 seconds [1][3]
You’ll know you’ve done it right when you hear the ice changing sound — from loud and clunky to a tighter, more muffled rattle. That’s the sound of proper chilling and aeration happening.
💪 Stirring is not an option here. Stirring chills the drink but produces zero foam — you might as well be making a completely different cocktail [2].
7. Pre-Chill Your Glassware
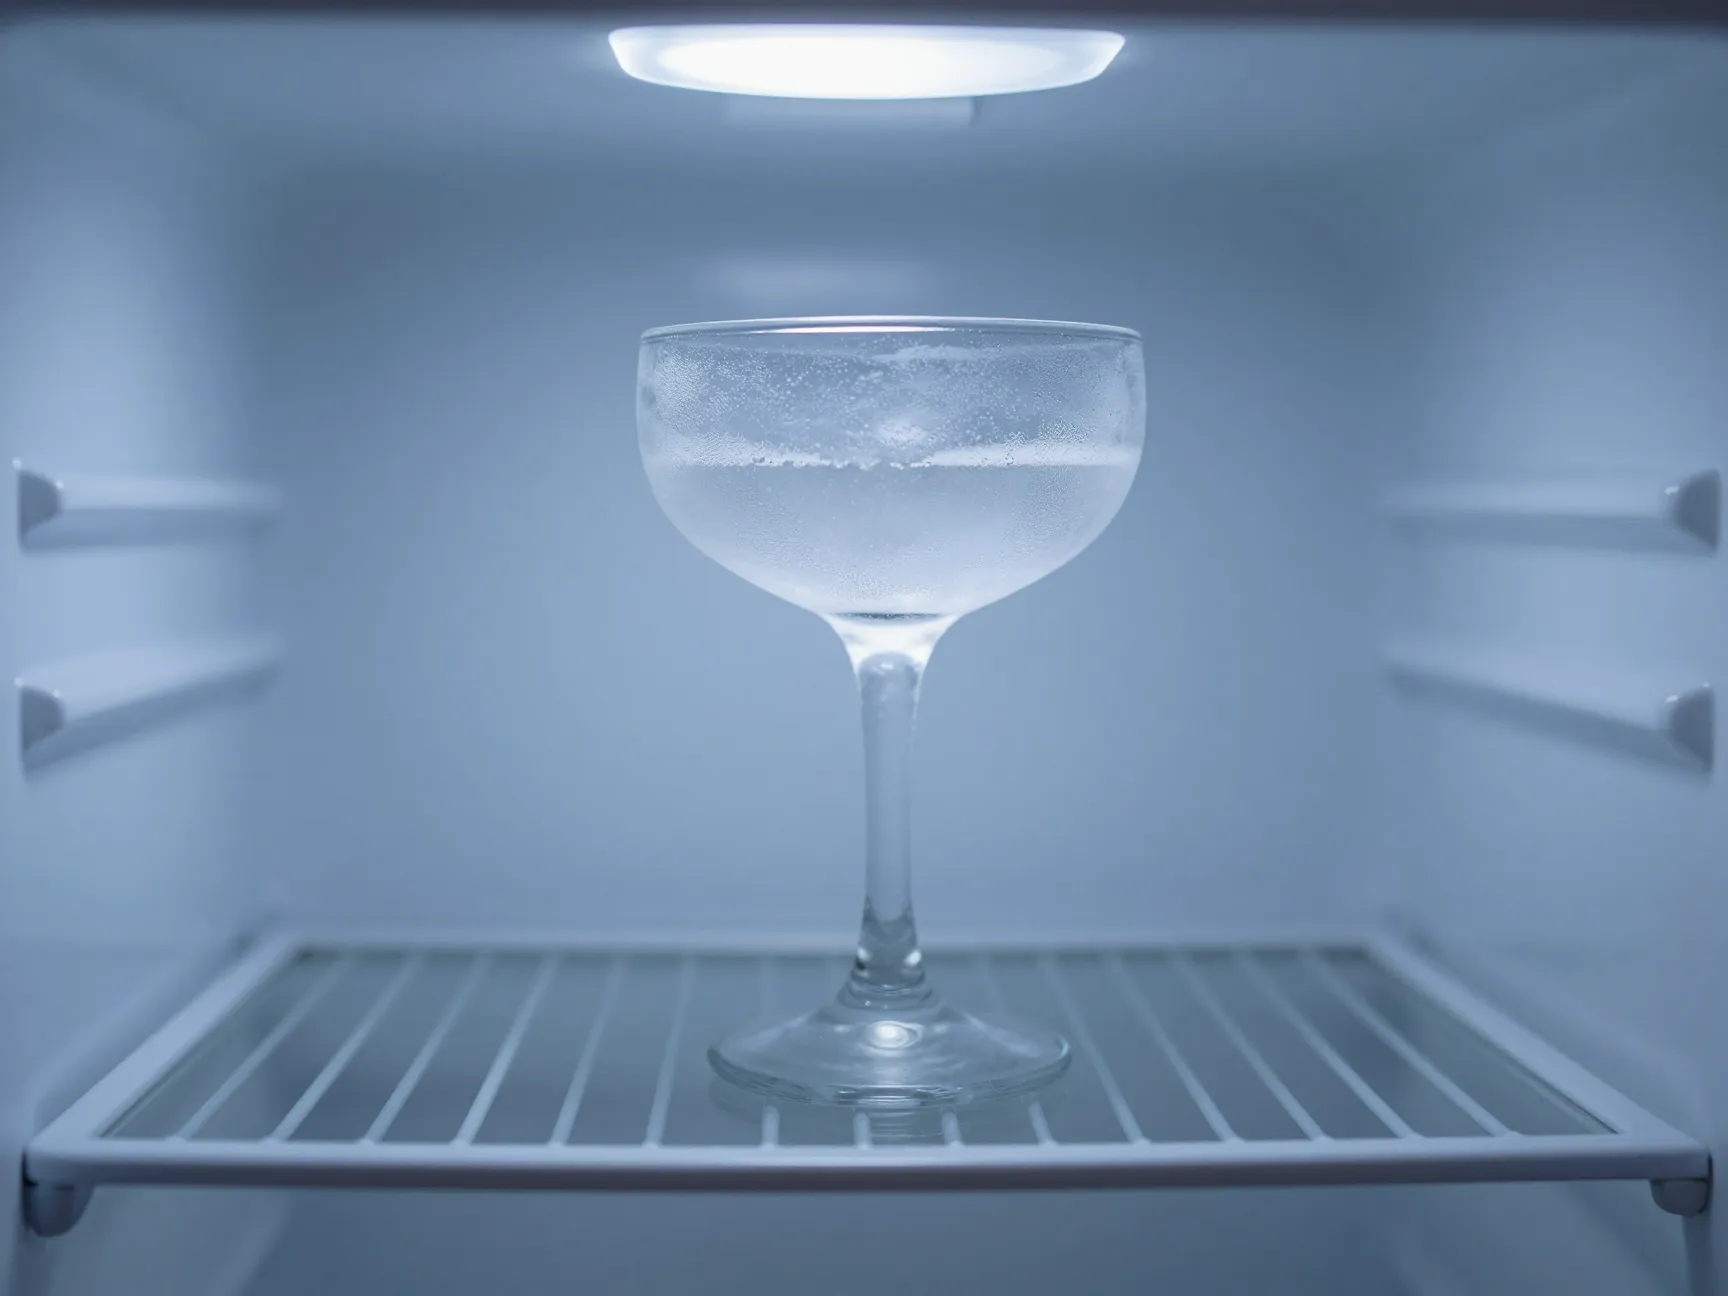
A warm glass is the enemy of a great espresso martini. When you pour a cold, foamy cocktail into a room-temperature glass, two things happen fast: the drink warms up, and the foam starts to collapse [2][3].
How to pre-chill your glass:
- Place your coupe or martini glass in the freezer for 10–20 minutes before you start making the drink [2][3]
- Alternatively, fill the glass with ice water while you prepare the cocktail, then dump it out just before pouring
A frosted glass does more than just keep the drink cold — it actually helps the foam set and hold its structure, giving you that picture-perfect presentation that lasts through the whole drink.
Best glass types for espresso martinis:
- Coupe glass — The modern preferred choice; wide rim shows off the foam beautifully
- Classic martini (V-shaped) glass — Traditional option; slightly harder to carry without spilling
- Nick & Nora glass — Elegant, smaller volume, great for a more refined presentation
8. Strain for the Right Texture
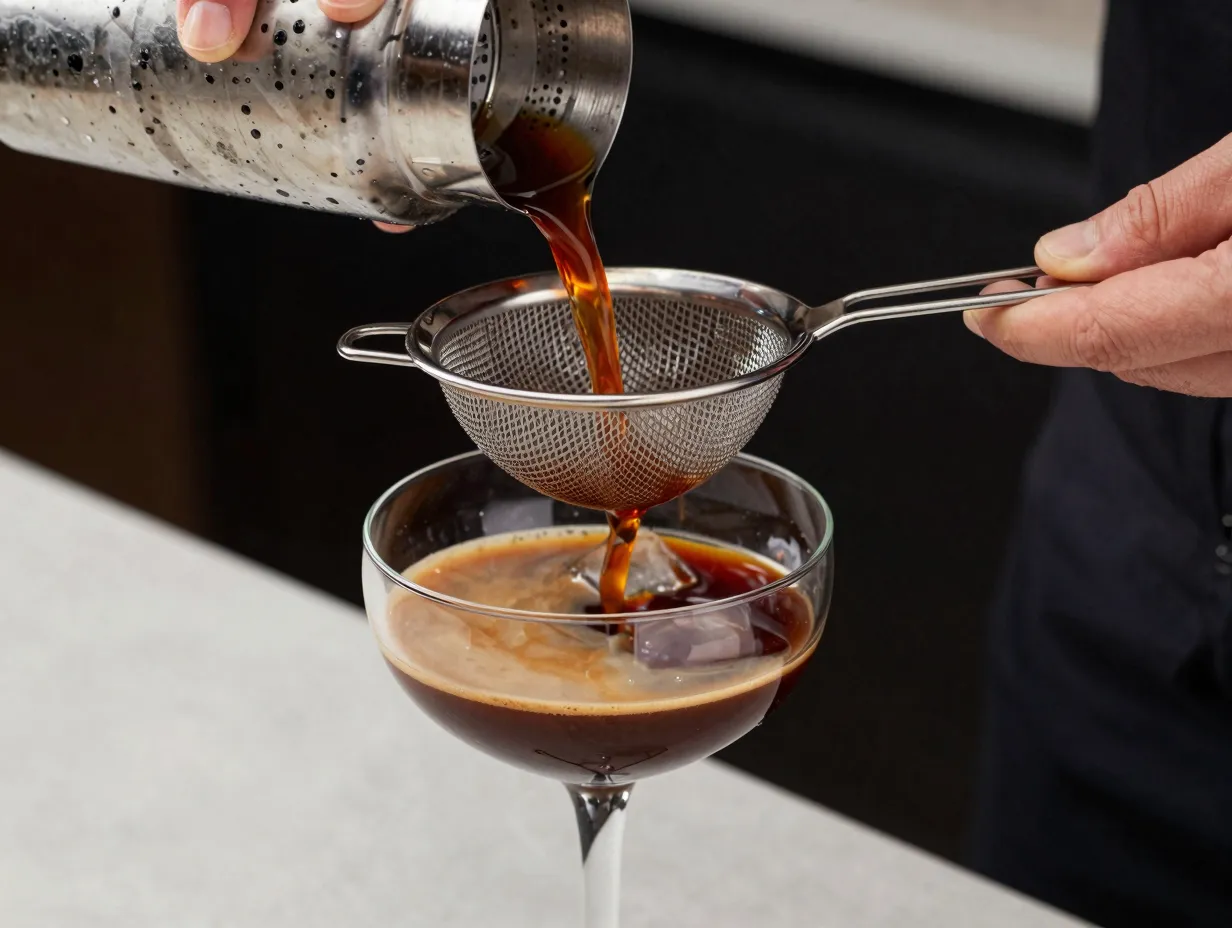
How you strain the cocktail affects the final texture and appearance [1]. There are two schools of thought here:
Option A: Fine straining (double straining)
- Pour through both the built-in shaker strainer AND a fine mesh strainer
- Removes small ice chips and
- Results in a cleaner, silkier texture
- Preferred for a more refined, restaurant-quality presentation [1]
Option B: Standard straining
- Use only the built-in shaker strainer
- Allows some micro-particles through
- Can create a slightly creamier, more textured mouthfeel
- Some bartenders prefer this for a more rustic, full-bodied result [1]
🍽️ My recommendation: Fine strain for dinner parties or when presentation matters. Standard strain when you just want a delicious drink fast.
Either way, pour slowly and steadily at a slight angle, then straighten the glass as it fills to encourage the foam to rise and settle on top.
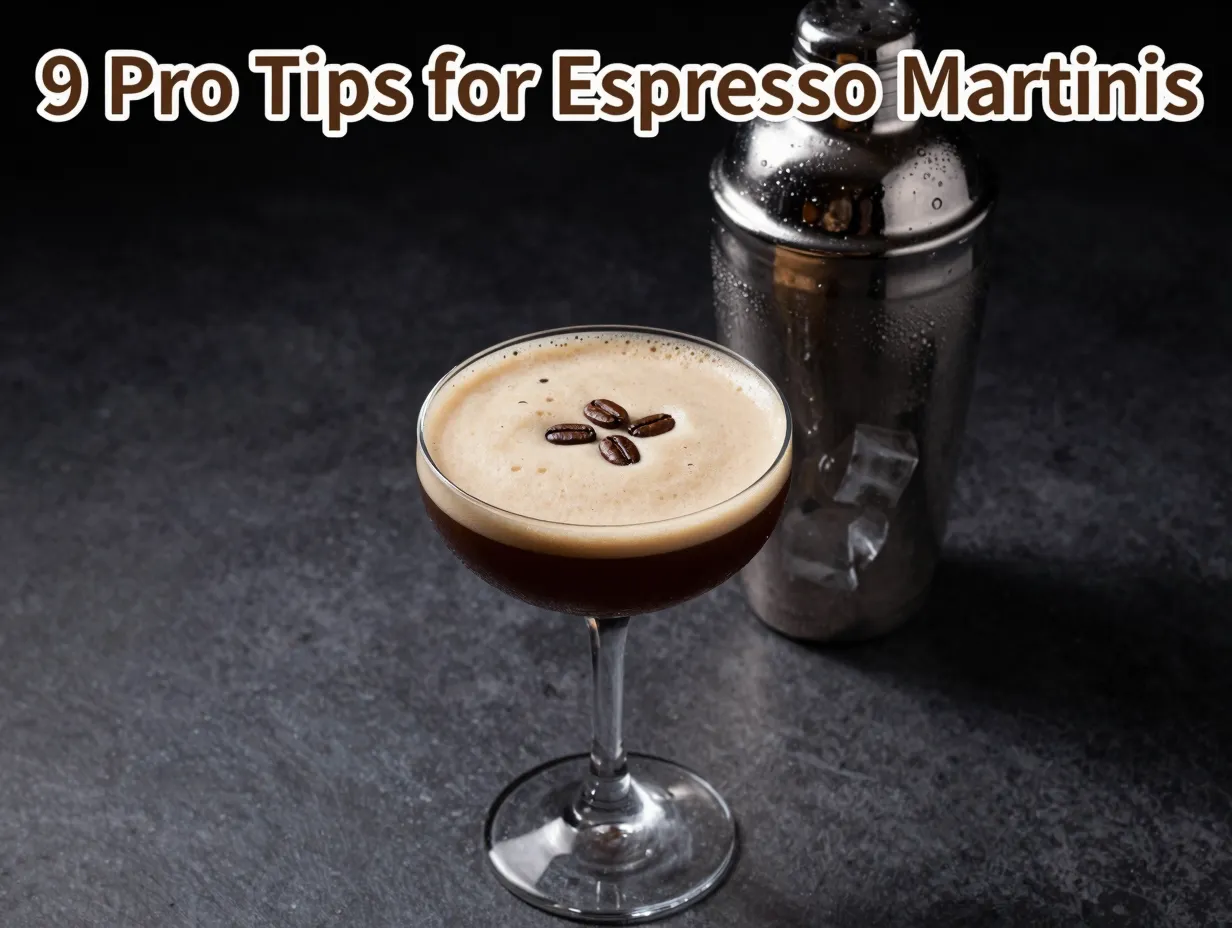
9. Garnish With Three Coffee Beans in the Traditional Petal Formation

The three aren’t just decoration — they carry meaning. In Italian tradition, they represent health, wealth, and happiness (salute, soldi, and felicità). Placing them correctly is the final touch that signals a properly made cocktail [1].
How to garnish like a pro:
- Wait until the foam has fully settled after pouring (about 10–15 seconds)
- Gently place three whole coffee beans on the surface of the foam
- Arrange them in a petal or Y-formation, evenly spaced around the center
- Press them just barely into the foam so they sit flat but don’t sink
Bonus for 2026:
- A light dusting of cacao powder or edible gold for special occasions
- A thin strip of orange zest expressed over the top for a citrus note
- A single chocolate-covered espresso bean in the center for a more indulgent look
Quick Reference: The Complete Pro Espresso Martini Recipe
Here’s everything pulled together into one clean, actionable recipe:
Ingredients (1 serving):
- 1 oz (30ml) quality vodka
- 1 oz (30ml) Mr. Black or Kahlúa coffee liqueur
- 1 oz (30ml) fresh espresso (cooled 60–90 seconds)
Equipment:
- Cocktail shaker
- Large ice cubes (fill shaker 2/3 to 3/4 full)
- Fine mesh strainer (optional)
- Pre-chilled coupe or martini glass
- 3 whole coffee beans for garnish
Method:
- Pull your espresso shot and let it cool for 60–90 seconds.
- Place your glass in the freezer (or fill with ice water).
- Add vodka, coffee liqueur, and espresso to shaker.
- Fill shaker 2/3 to 3/4 full with large ice cubes.
- Shake hard for 10–12 full seconds.
- Fine strain (or standard strain) into your chilled glass.
- Wait 10–15 seconds for foam to settle.
- Garnish with three coffee beans in petal formation.
- Serve immediately.
Total prep time: Under 5 minutes ⏱️
Common Mistakes to Avoid
Even with the best tips in hand, a few pitfalls can still trip you up. Here’s a quick checklist:
| Mistake | Why It Hurts | Fix |
|---|---|---|
| Using instant coffee | No crema, no foam | Use fresh espresso only |
| Shaking too gently | Flat, foamless surface | Shake hard for 10–12 seconds |
| Warm glassware | Foam collapses fast | Pre-chill for 10–20 minutes |
| Small or crushed ice | Over-dilution, poor agitation | Use large cubes, fill shaker properly |
| Pouring too quickly | Foam doesn’t form properly | Pour slowly and steadily |
| Using old espresso | Stale flavor, no crema | Use espresso within 10 minutes |
Frequently Asked Questions
Can I make espresso martinis without an espresso machine?
Yes — a Moka pot or Nespresso machine are both acceptable alternatives. Avoid drip coffee or instant coffee, as neither produces the oils needed for foam [2].
Why is my espresso martini not foamy?
The most common reasons are: using old or non-espresso coffee, not shaking hard enough or long enough, or using warm glassware [1][3].
Can I make a batch for a party?
You can pre-mix the vodka, liqueur, and cooled espresso and refrigerate the batch. Shake individual portions to order — you cannot batch-shake and maintain foam [3].
What’s the best vodka for an espresso martini?
A clean, neutral vodka works best so it doesn’t compete with the coffee flavor. Grey Goose, Ketel One, and Absolut are all solid choices.
Conclusion: Your Bartender-Level Espresso Martini Starts Now
Mastering these 9 Pro Tips on How to Make Espresso Martinis That Rival a Bartender’s doesn’t require years of experience or expensive equipment. It requires the right knowledge applied consistently — fresh espresso, proper technique, the right ice, and a chilled glass.
Your actionable next steps:
- Pull a fresh espresso shot — commit to never using instant coffee again.
- Practice the shake — 10–12 seconds, hard and fast, every single time.
- Pre-chill your glasses — put them in the freezer before you start anything else.
- Try both Mr. Black and Kahlúa — taste the difference and decide which you prefer.
- Nail the garnish — three beans, petal formation, placed after the foam settles.
The espresso martini rewards attention to detail more than almost any other cocktail. Get these fundamentals right, and the result is a drink that’s genuinely impressive — smooth, bold, beautifully foamy, and completely worth making at home.
Now go pull that shot. 🍸☕
References
[1] Espresso Martini – https://www.tayportdistillery.com/blogs/cocktail-recipes/espresso-martini
[2] Espresso Martini – https://preppykitchen.com/espresso-martini/
[3] Watch – https://www.youtube.com/watch?v=7RYAR9FfQ90