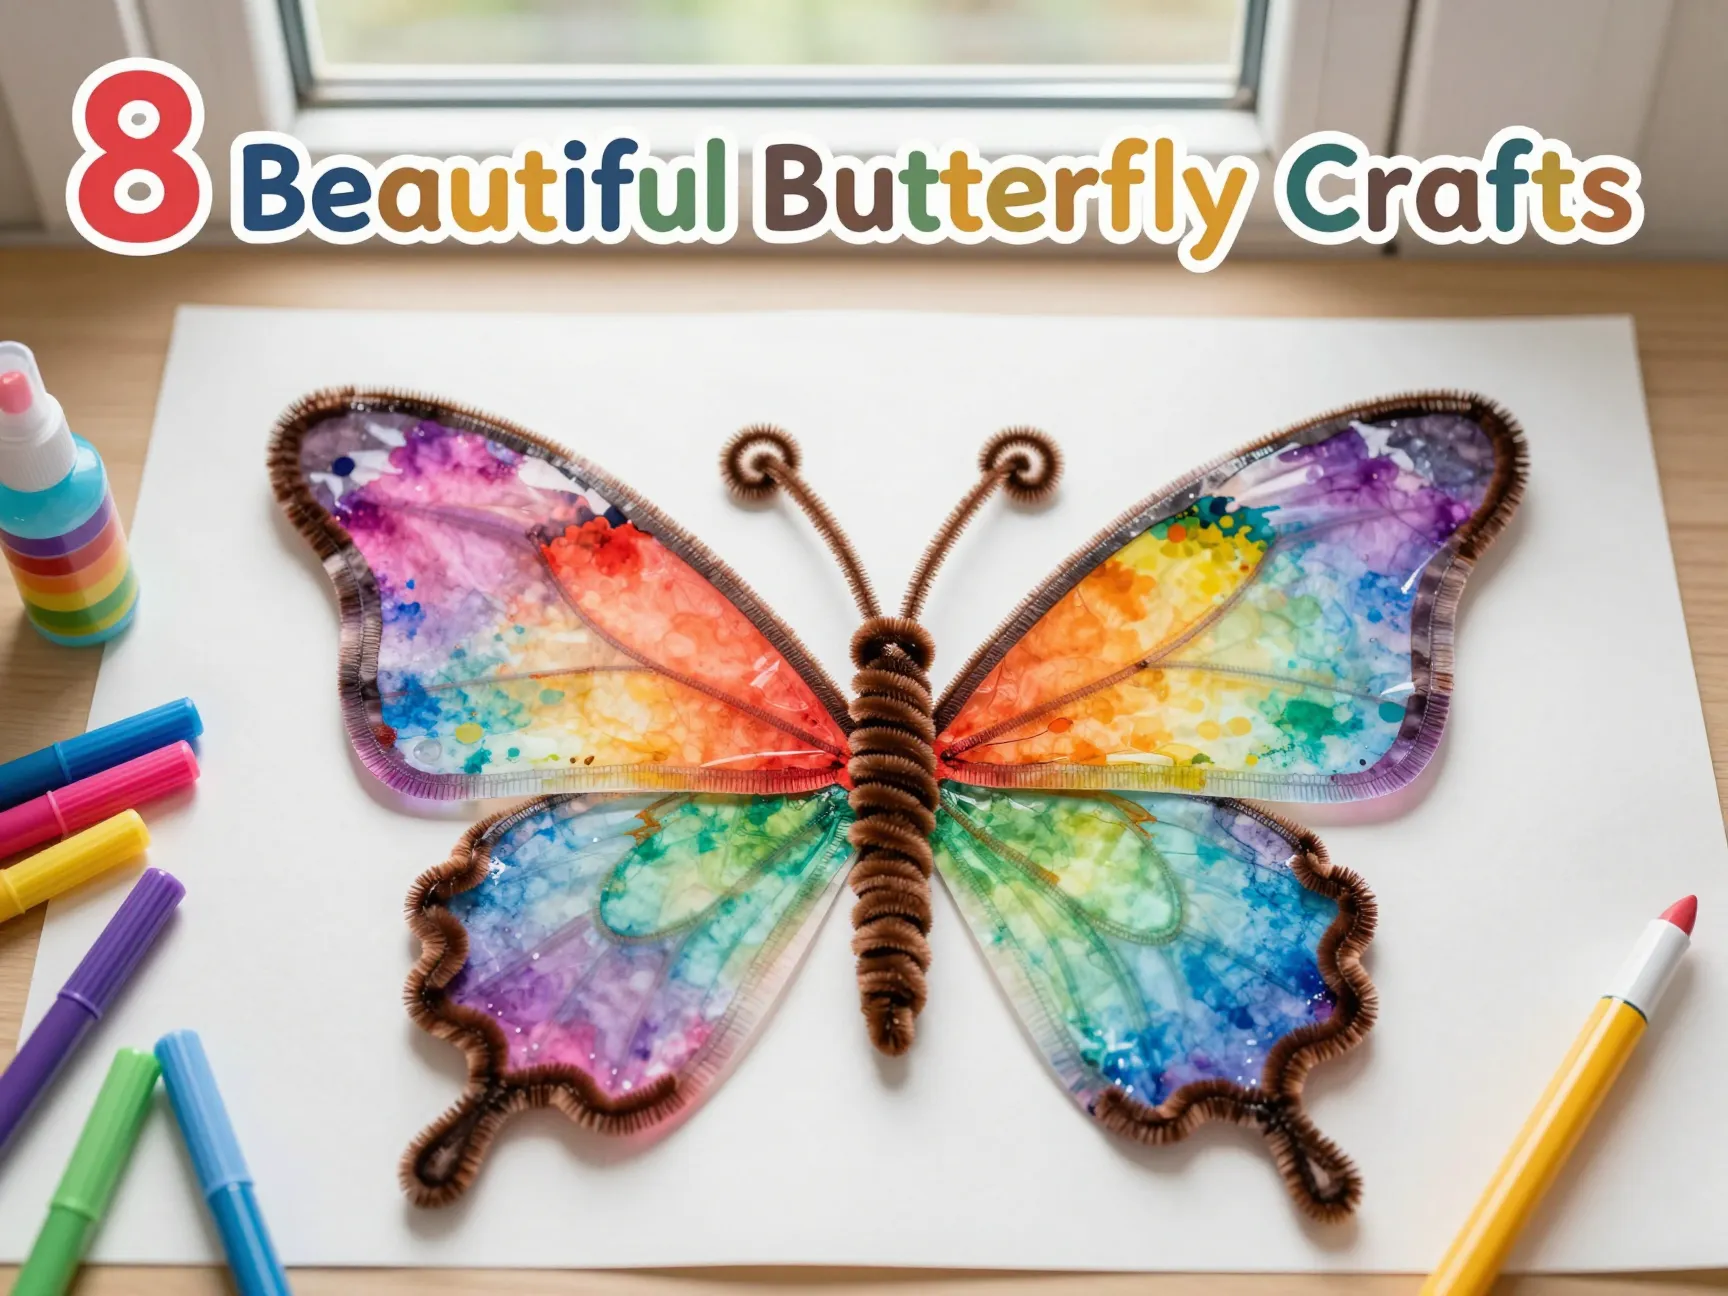
8 Beautiful Butterfly Craft with Coffee Filters Projects
A single coffee filter costs less than two cents — yet it can be transformed into a stunning butterfly wing that rivals store-bought in color and beauty. That surprising fact is exactly why the 8 Beautiful Butterfly Craft with Projects has become one of the most shared kids’ across classrooms and family homes alike. Whether you are a parent looking for a rainy-day activity, a teacher planning a spring unit, or a crafter who loves budget-friendly projects, these coffee filter butterfly crafts deliver big results with minimal cost and effort.
Disclosure: This post contains affiliate links. As an Amazon Associate, we earn from qualifying purchases, and at no extra cost to you.
In this guide, I’ll walk you through eight distinct and creative variations of this beloved craft. Each project uses simple, accessible materials and produces a gorgeous finished butterfly that kids of all ages will be proud to display.
Key Takeaways
- ☕ + washable markers + water are the only core supplies needed for most projects [1][3][6]
- 🎨 Color blending matters — avoid mixing opposite colors on the color wheel to prevent muddy results [3][6]
- 🦋 Two coffee filters per butterfly creates fuller, more realistic-looking wings [1][3][6]
- 👶 All skill levels welcome — these projects work for toddlers through older children and adults [4][5]
- 💰 Dollar store materials make bulk crafting extremely budget-friendly [3]
Why Coffee Filter Butterfly Crafts Are So Popular in 2026
Before diving into the projects, it helps to understand why this craft has stood the test of time. Coffee filters are made from a porous paper that absorbs liquid color beautifully, creating a soft, watercolor-like effect when markers bleed into the fibers. The result looks far more sophisticated than the effort involved.
Here is a quick overview of what makes this craft so appealing:
| Feature | Benefit |
|---|---|
| Low cost | Materials available at dollar stores [3] |
| Easy setup | No special tools required [1][6] |
| Age-flexible | Works for toddlers through adults [4][5] |
| Educational | Teaches color theory and fine motor skills [3][6] |
| Quick turnaround | Drying time is 15–20 minutes [1][5] |
| Visually stunning | Translucent wings glow in sunlight |
💡 Pull Quote: “The magic of coffee filter butterflies is that the craft looks harder than it is — and that’s exactly what makes kids feel like real artists.”
Essential Materials for All 8 Beautiful Butterfly Craft with Coffee Filters Projects
Before we jump into the individual projects, gather these core supplies. Most of these can be found at your local dollar store or craft shop. [3]
Core supplies you will need:
- Round or basket-style coffee filters (two per butterfly) [1][3][6]
- Washable markers or liquid watercolors
- A spray bottle filled with water
- Pipe cleaners (also called chenille stems) for the body and antennae
- Scissors (for some variations)
- Optional: clothespins, craft sticks, string, or binder clips for alternative body styles [4]
Pro tip: Washable markers work best for younger children because they are non-toxic and blend easily when spritzed with water. Watercolor paints are great for older kids who want more control over their color placement. [6]
The 8 Beautiful Butterfly Craft with Coffee Filters Projects
Now let’s explore each project in detail. I have arranged them from simplest to most complex, so you can choose the right level for your crafter.
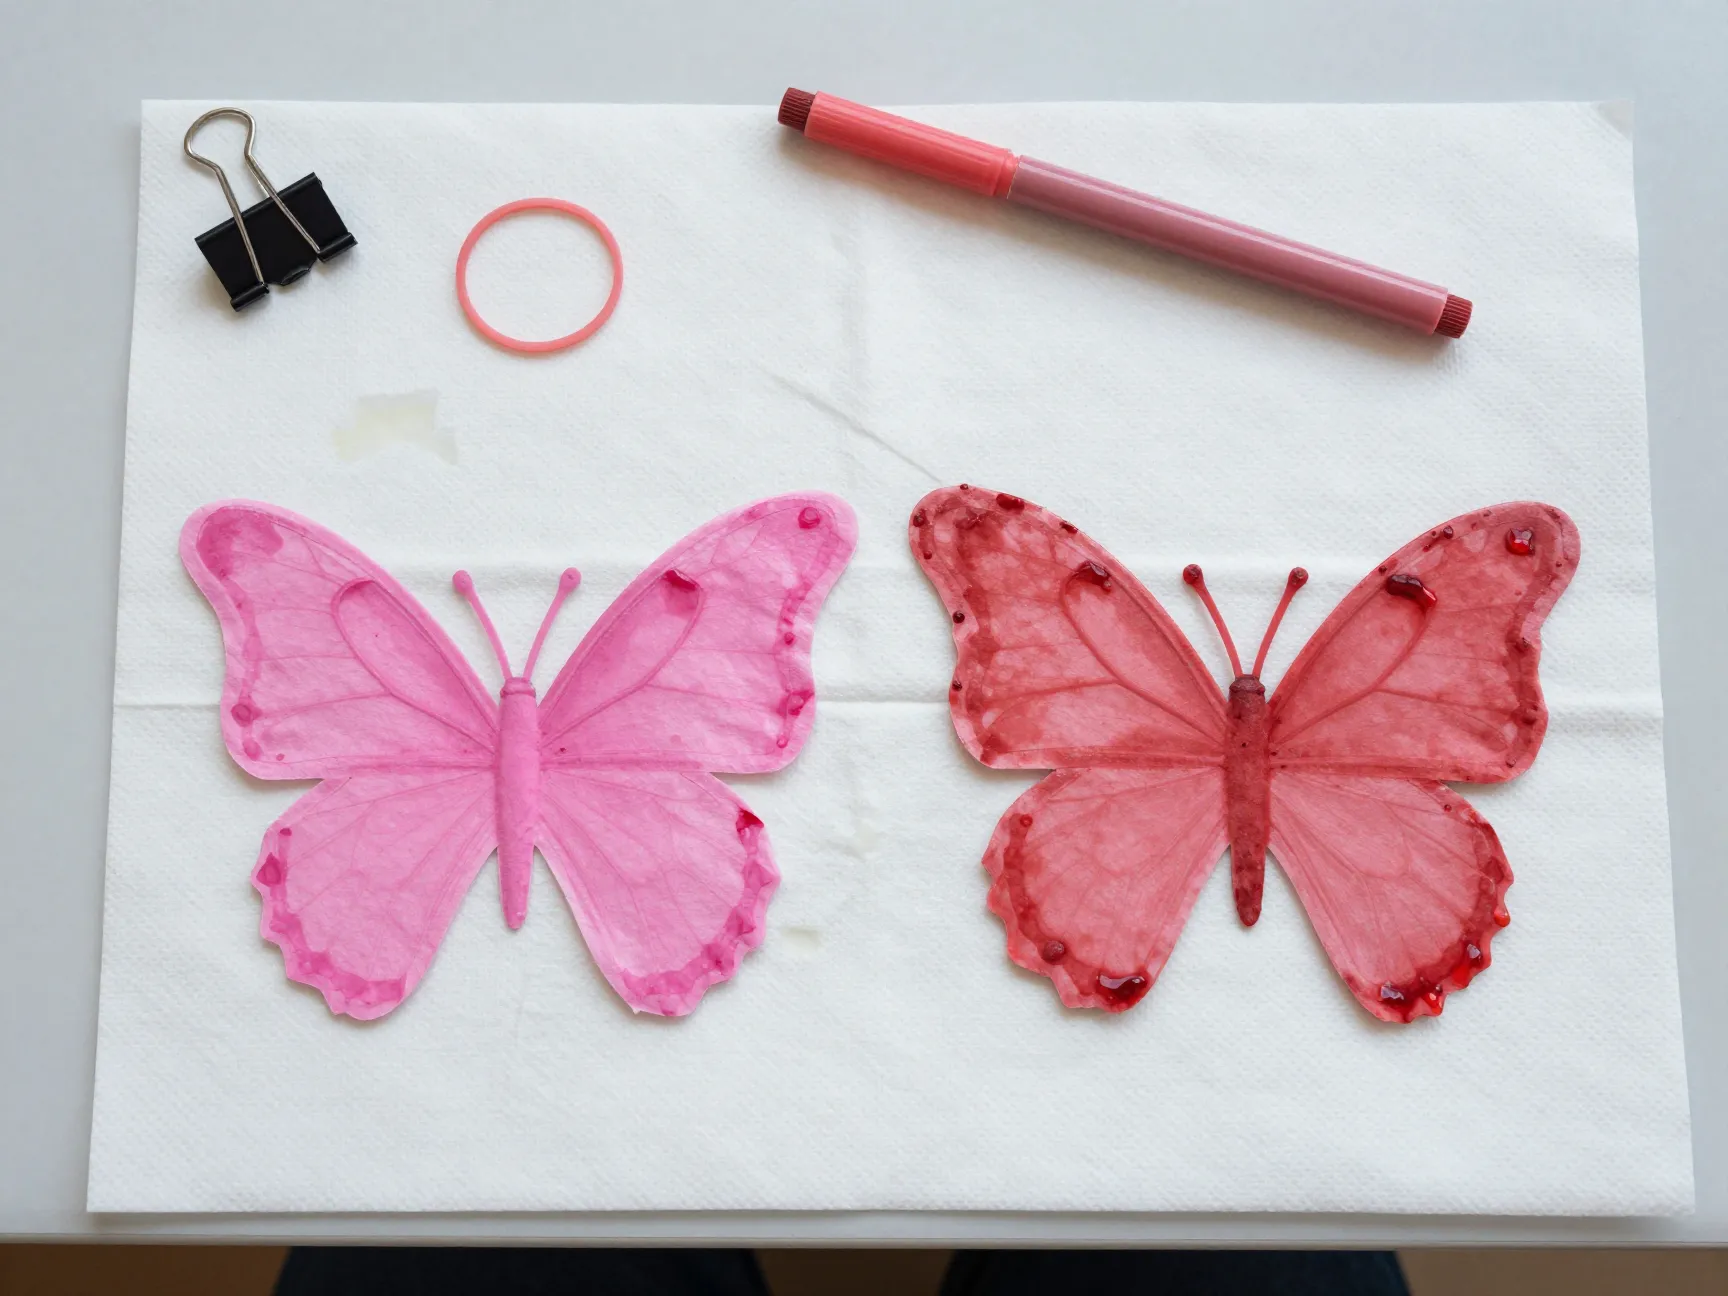
1. Classic Marker-Bleed Butterfly
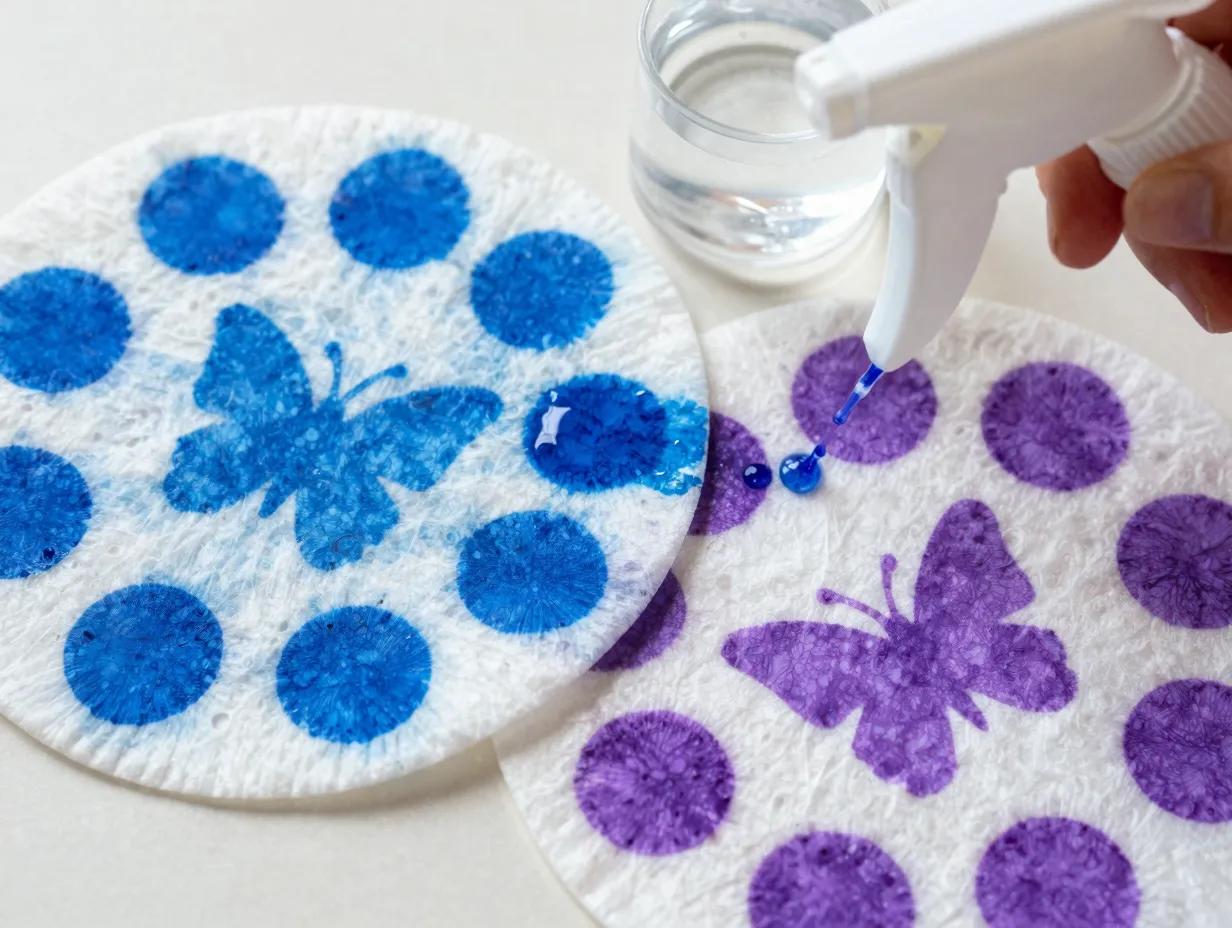
This is the original version and the best starting point for beginners. It requires zero painting experience and produces consistently beautiful results.
How to make it:
- Lay two coffee filters flat on a protected surface.
- Use washable markers to draw dots, stripes, or patches of color across both filters.
- Lightly spritz both filters with water from a spray bottle.
- Watch the colors bleed and blend together — this is the magical part! 🌈
- Allow the filters to dry for 15–20 minutes (or up to 2 hours for fully saturated filters). [1][5]
- Once dry, pinch both filters together in the center and twist a pipe cleaner around the middle.
- Curl the pipe cleaner ends upward to form antennae.
Best for: Toddlers and preschoolers with adult supervision during the water step. [4][5]
Color tip: Stick to colors that are near each other on the color wheel — like blue and purple, or red and orange — for the most vibrant results. Avoid combining red and green, blue and orange, or yellow and purple, as these opposite pairs create muddy brown tones. [3][6]
2. Watercolor Wash Butterfly
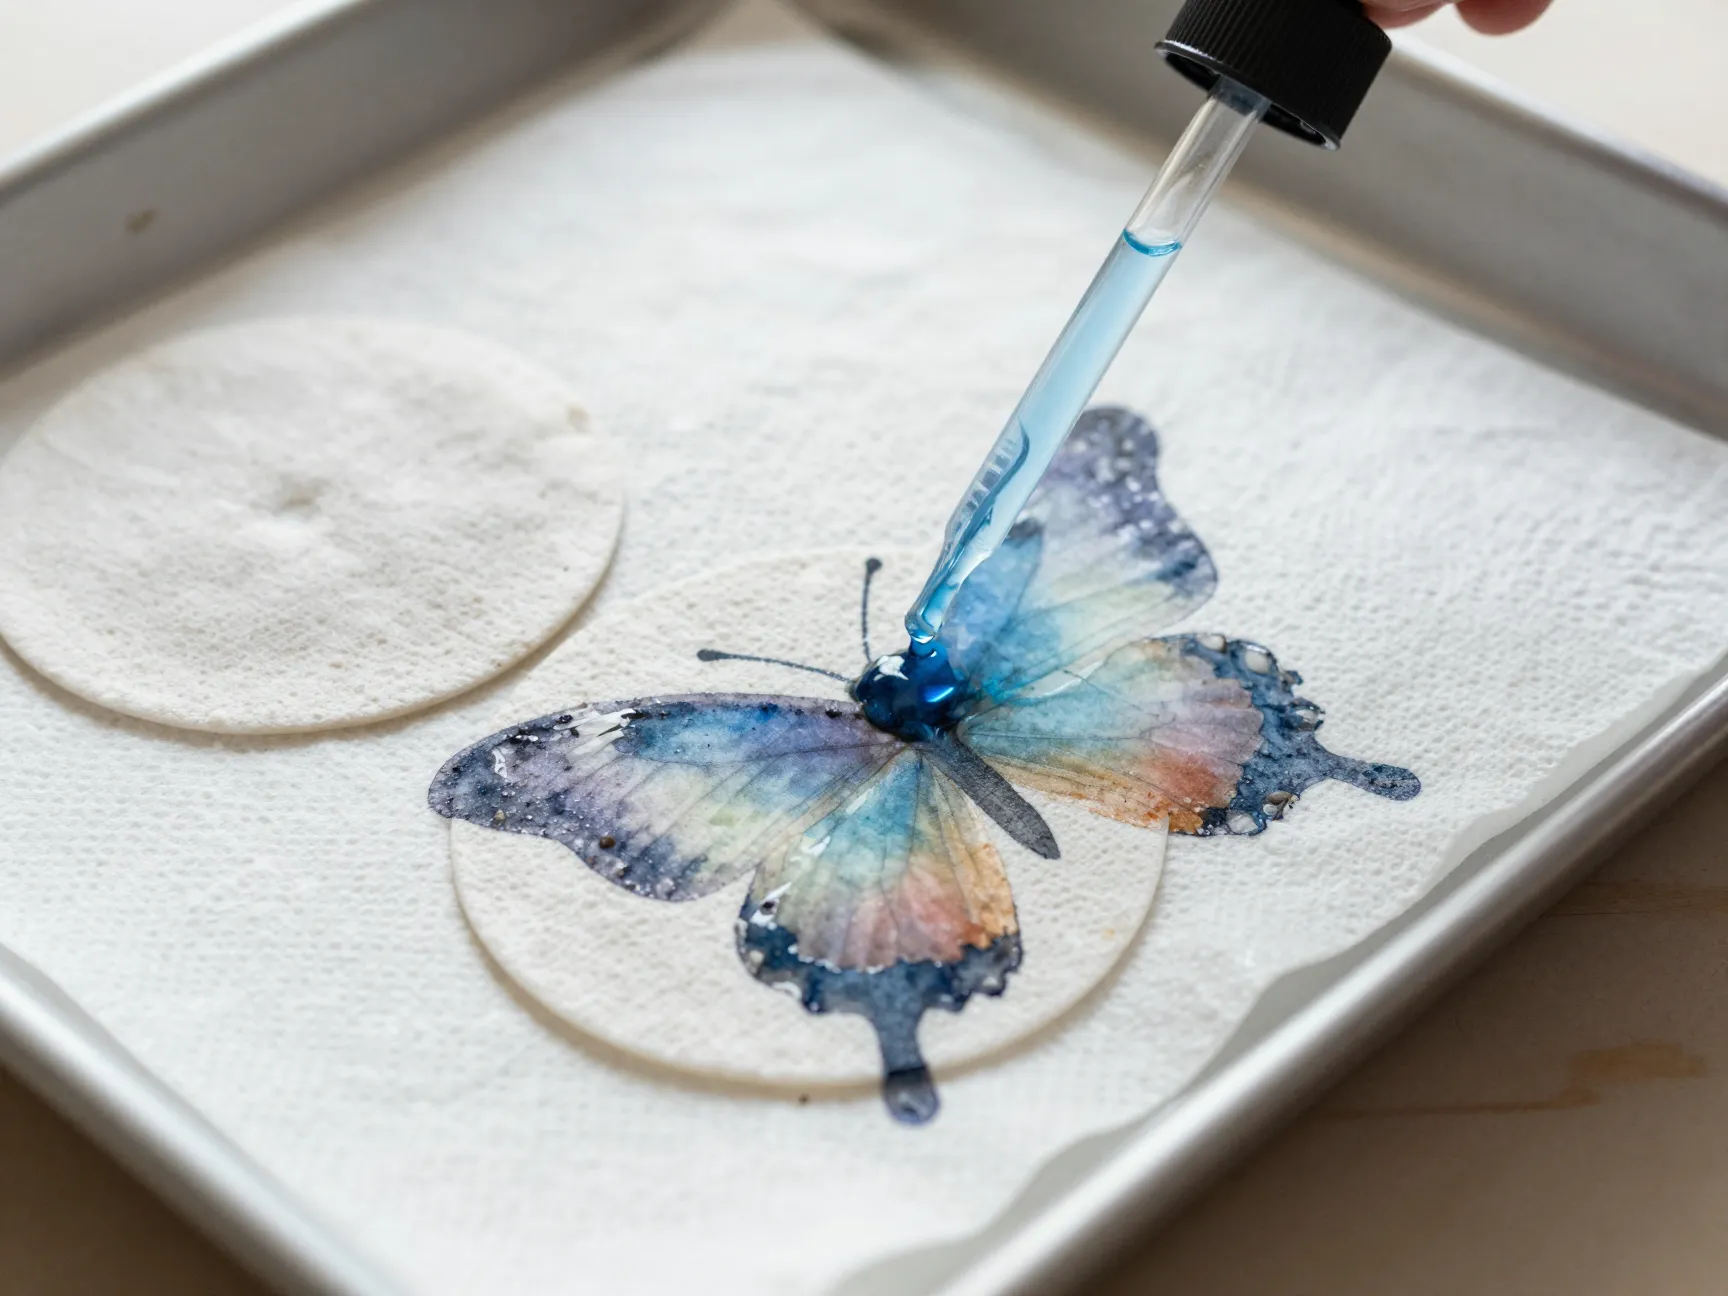
This variation uses liquid watercolors instead of markers, giving the wings a more painterly, artistic look. The colors tend to be more transparent and layered.
How to make it:
- Place two coffee filters on a tray or baking sheet lined with paper towels (to catch drips).
- Use a paintbrush or dropper to apply liquid watercolors directly to the dry filters.
- Let the colors flow naturally — do not overwork the paint.
- Spritz lightly with water to encourage blending.
- Dry completely (up to 2 hours for best results). [5]
- Assemble with a pipe cleaner body as in Project 1.
Best for: Ages 5 and up who enjoy painting. [5]
Pro tip: Use a hair dryer on a low setting to speed up drying time without distorting the filter shape.
3. Tie-Dye Coffee Filter Butterfly
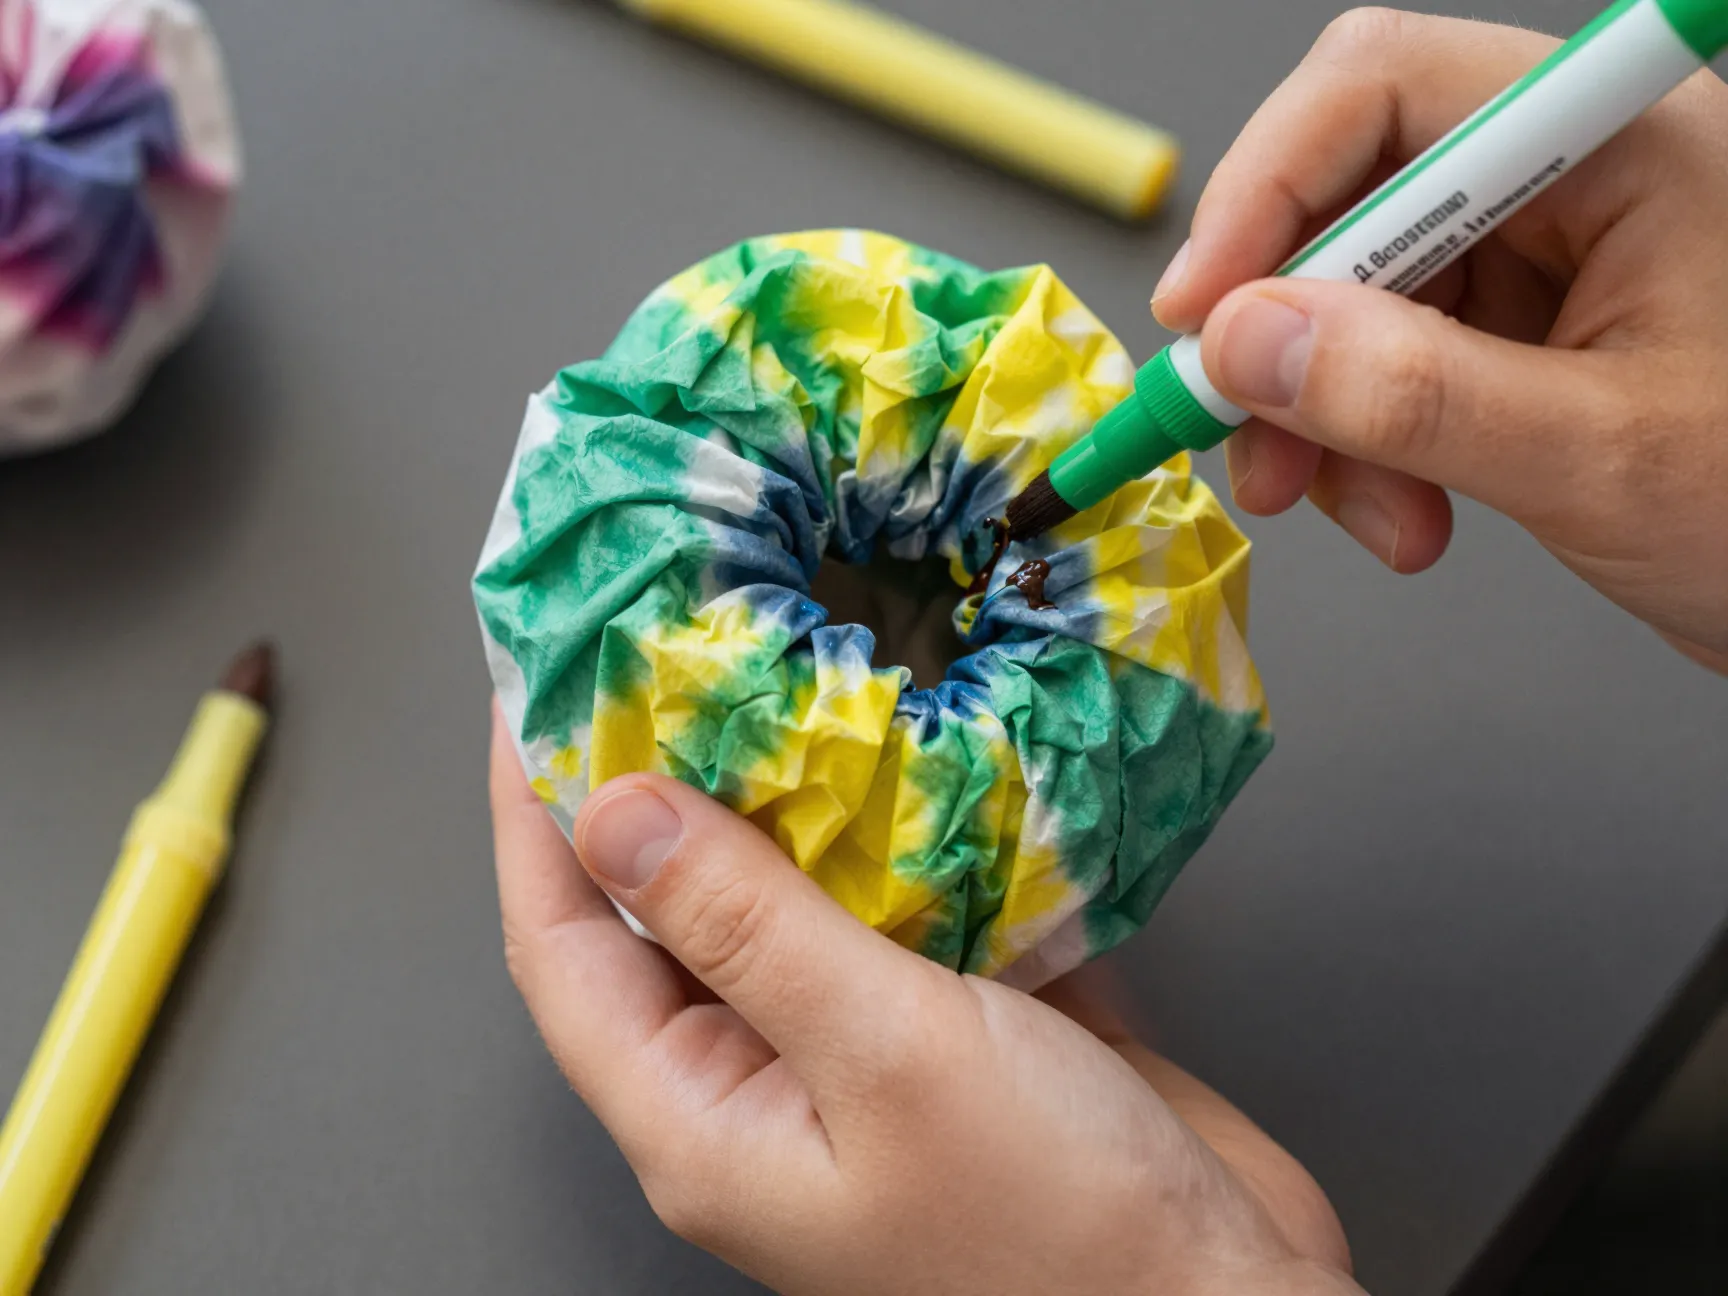
This project adds a twist — literally. By folding and bunching the filter before applying color, you create a tie-dye effect that looks incredibly complex but takes only minutes.
How to make it:
- Scrunch or fold two coffee filters into a small bundle.
- Use markers to color sections of the scrunched filter.
- Spritz with water while still scrunched.
- Carefully unfold and lay flat to dry.
- The result is a gorgeous, unpredictable tie-dye pattern. 🎨
- Assemble with a pipe cleaner body.
Best for: Ages 4 and up. Great for groups because every butterfly turns out unique. [4]
4. Clothespin Body Butterfly
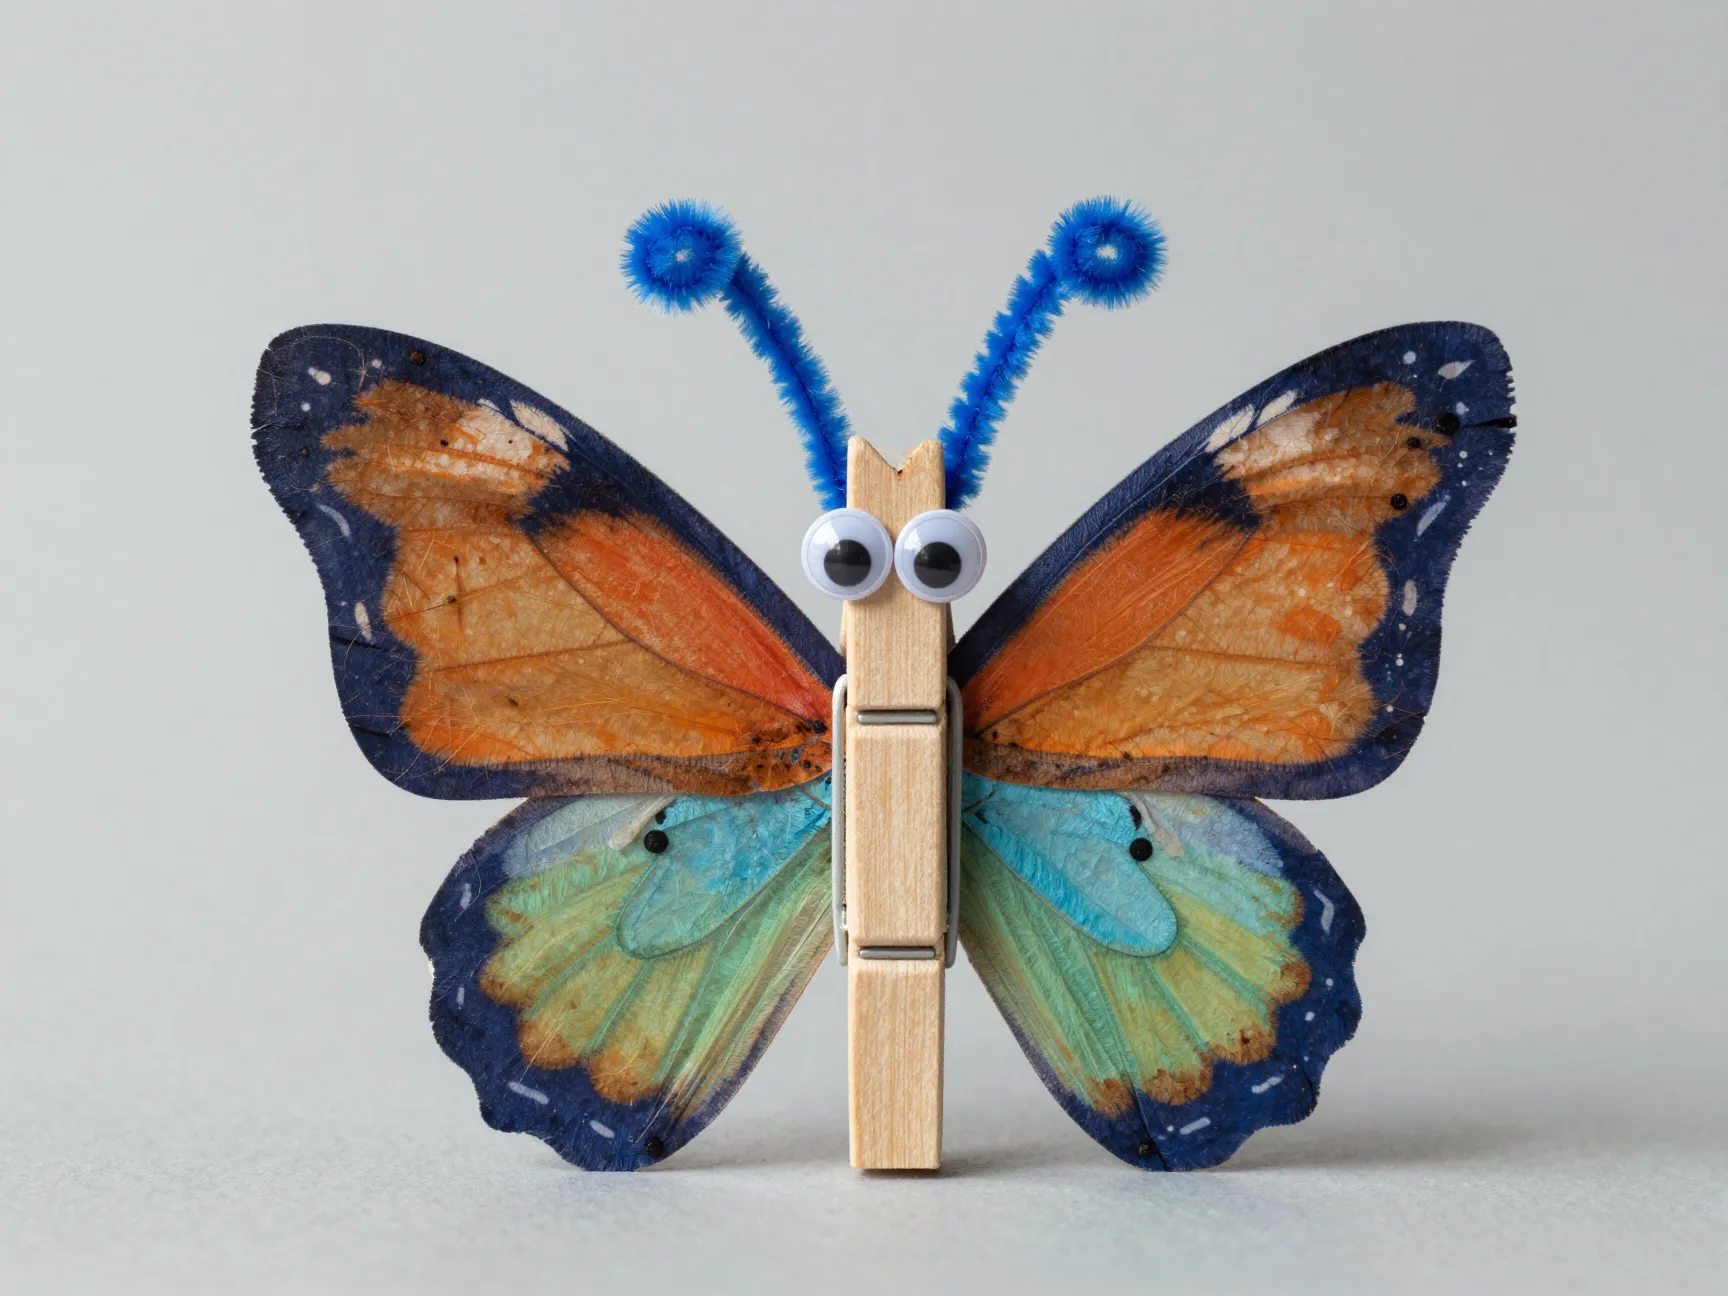
Instead of a pipe cleaner, this version uses a wooden clothespin as the butterfly’s body. The clothespin can be painted or decorated, making it a two-part craft project.
How to make it:
- Color and wet two coffee filters using the marker-bleed method (Project 1).
- While the wings dry, paint or decorate a wooden clothespin with markers or acrylic paint.
- Let both parts dry completely.
- Pinch the dried filters in the center and clip the clothespin around the gathered middle.
- Add googly eyes to the clothespin head and pipe cleaner antennae through the top. [4]
Best for: Ages 5 and up. The finished butterfly can clip onto curtains, bags, or plant pots as a decoration. 🌿
5. Rainbow Gradient Butterfly
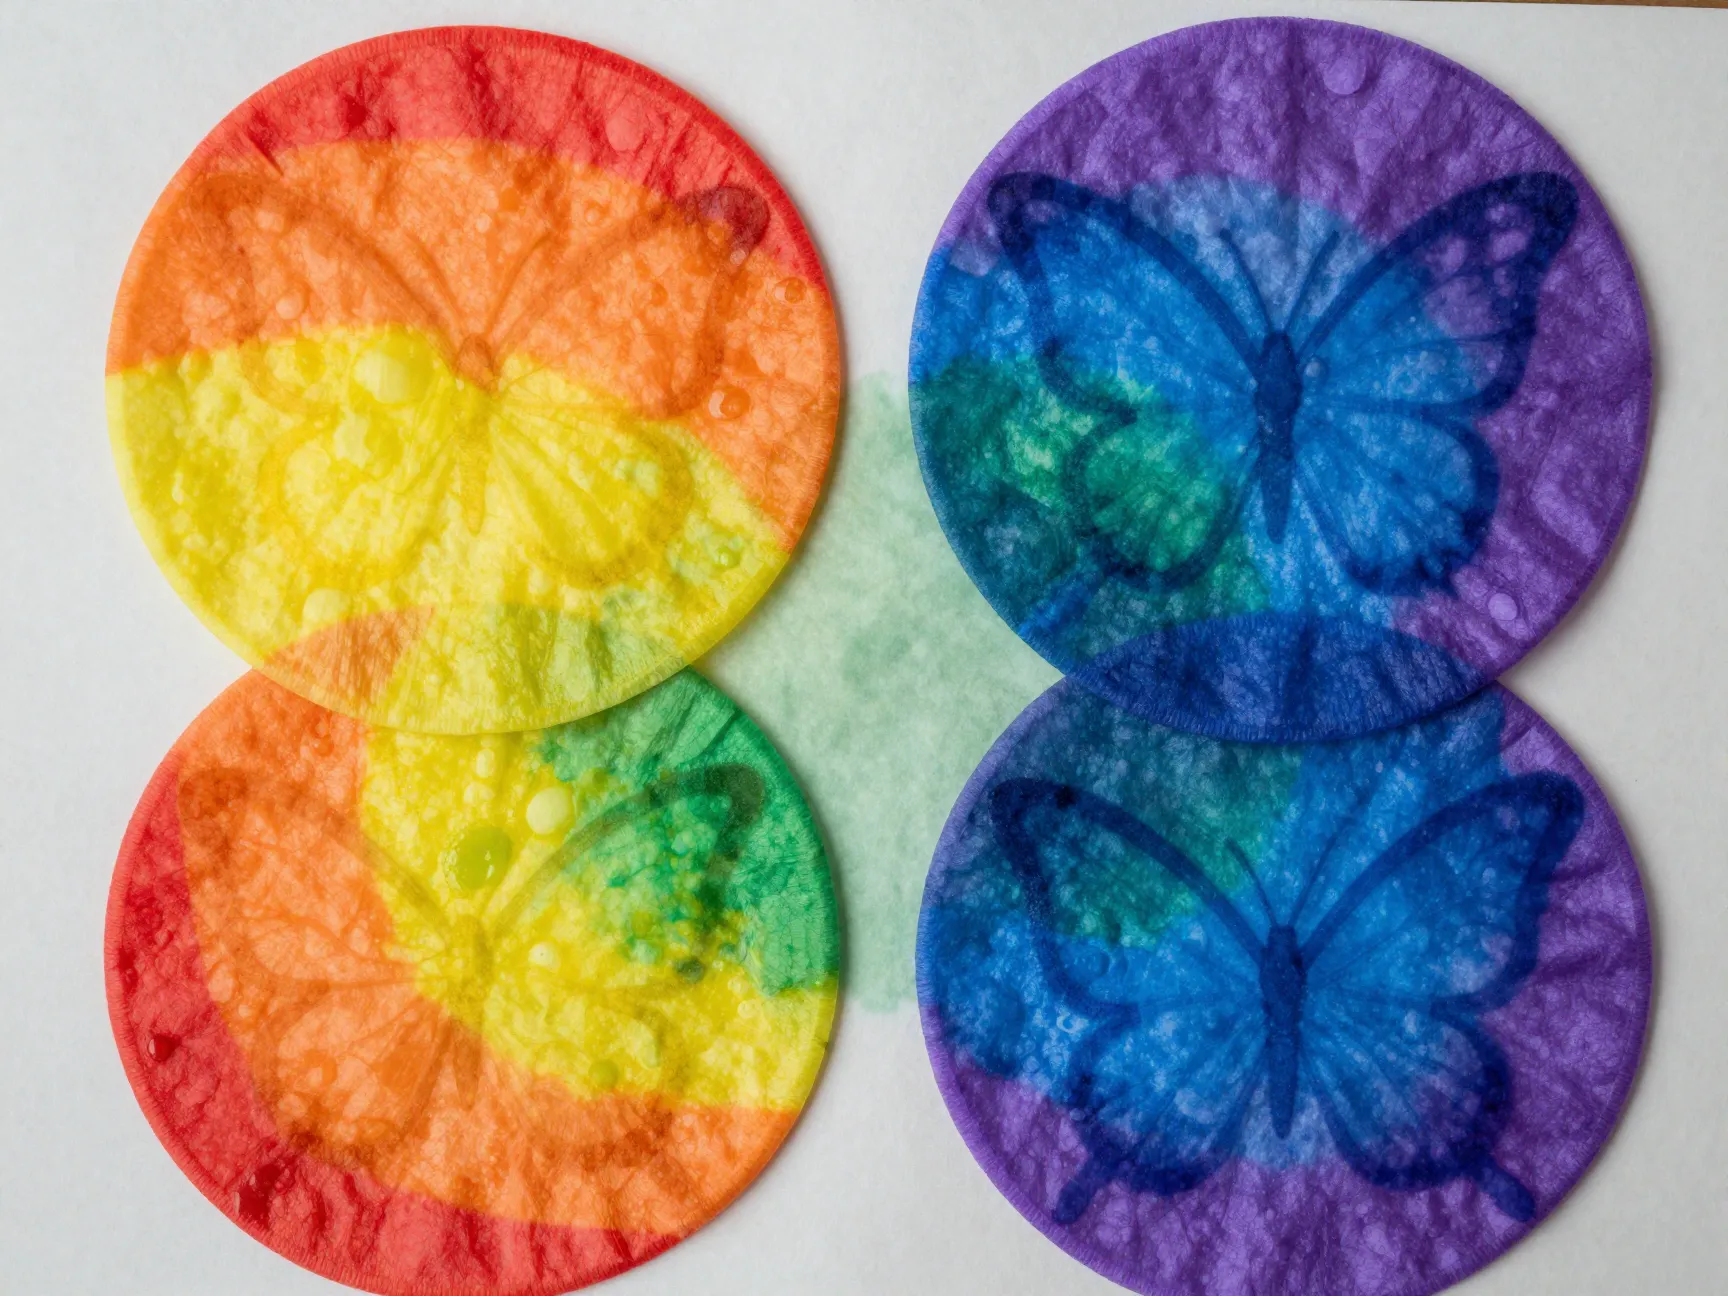
This project teaches basic color theory in a hands-on way. Children learn how colors transition from one to another across the spectrum.
How to make it:
- Lay two coffee filters flat.
- Starting from one edge, color in bands of red, orange, yellow, green, blue, and purple — in that order.
- Keep the bands touching so they bleed together when wet.
- Spritz with water and watch the rainbow emerge.
- Dry and assemble with a pipe cleaner body. [6]
Educational value: This is an excellent craft for a science or art lesson on the color spectrum. Ask children to name the colors they see and predict what will happen when the water is added. [3][6]
Best for: Kindergarten through Grade 3. Works wonderfully in classroom settings. [4]
6. Two-Filter Layered Wing Butterfly
Most authoritative tutorials recommend using two coffee filters per butterfly to create fuller, more dimensional wings. [1][3][6] This project takes that idea further by using two differently colored filter pairs to create a layered wing effect.
How to make it:
- Color and prepare four coffee filters total — two in warm colors (reds, oranges, yellows) and two in cool colors (blues, purples, greens).
- Dry all four filters completely.
- Layer one warm filter on top of one cool filter for each wing side.
- Pinch all four filters together at the center.
- Twist a pipe cleaner tightly around the center gather.
- Gently separate and fluff the layers to create depth and dimension.
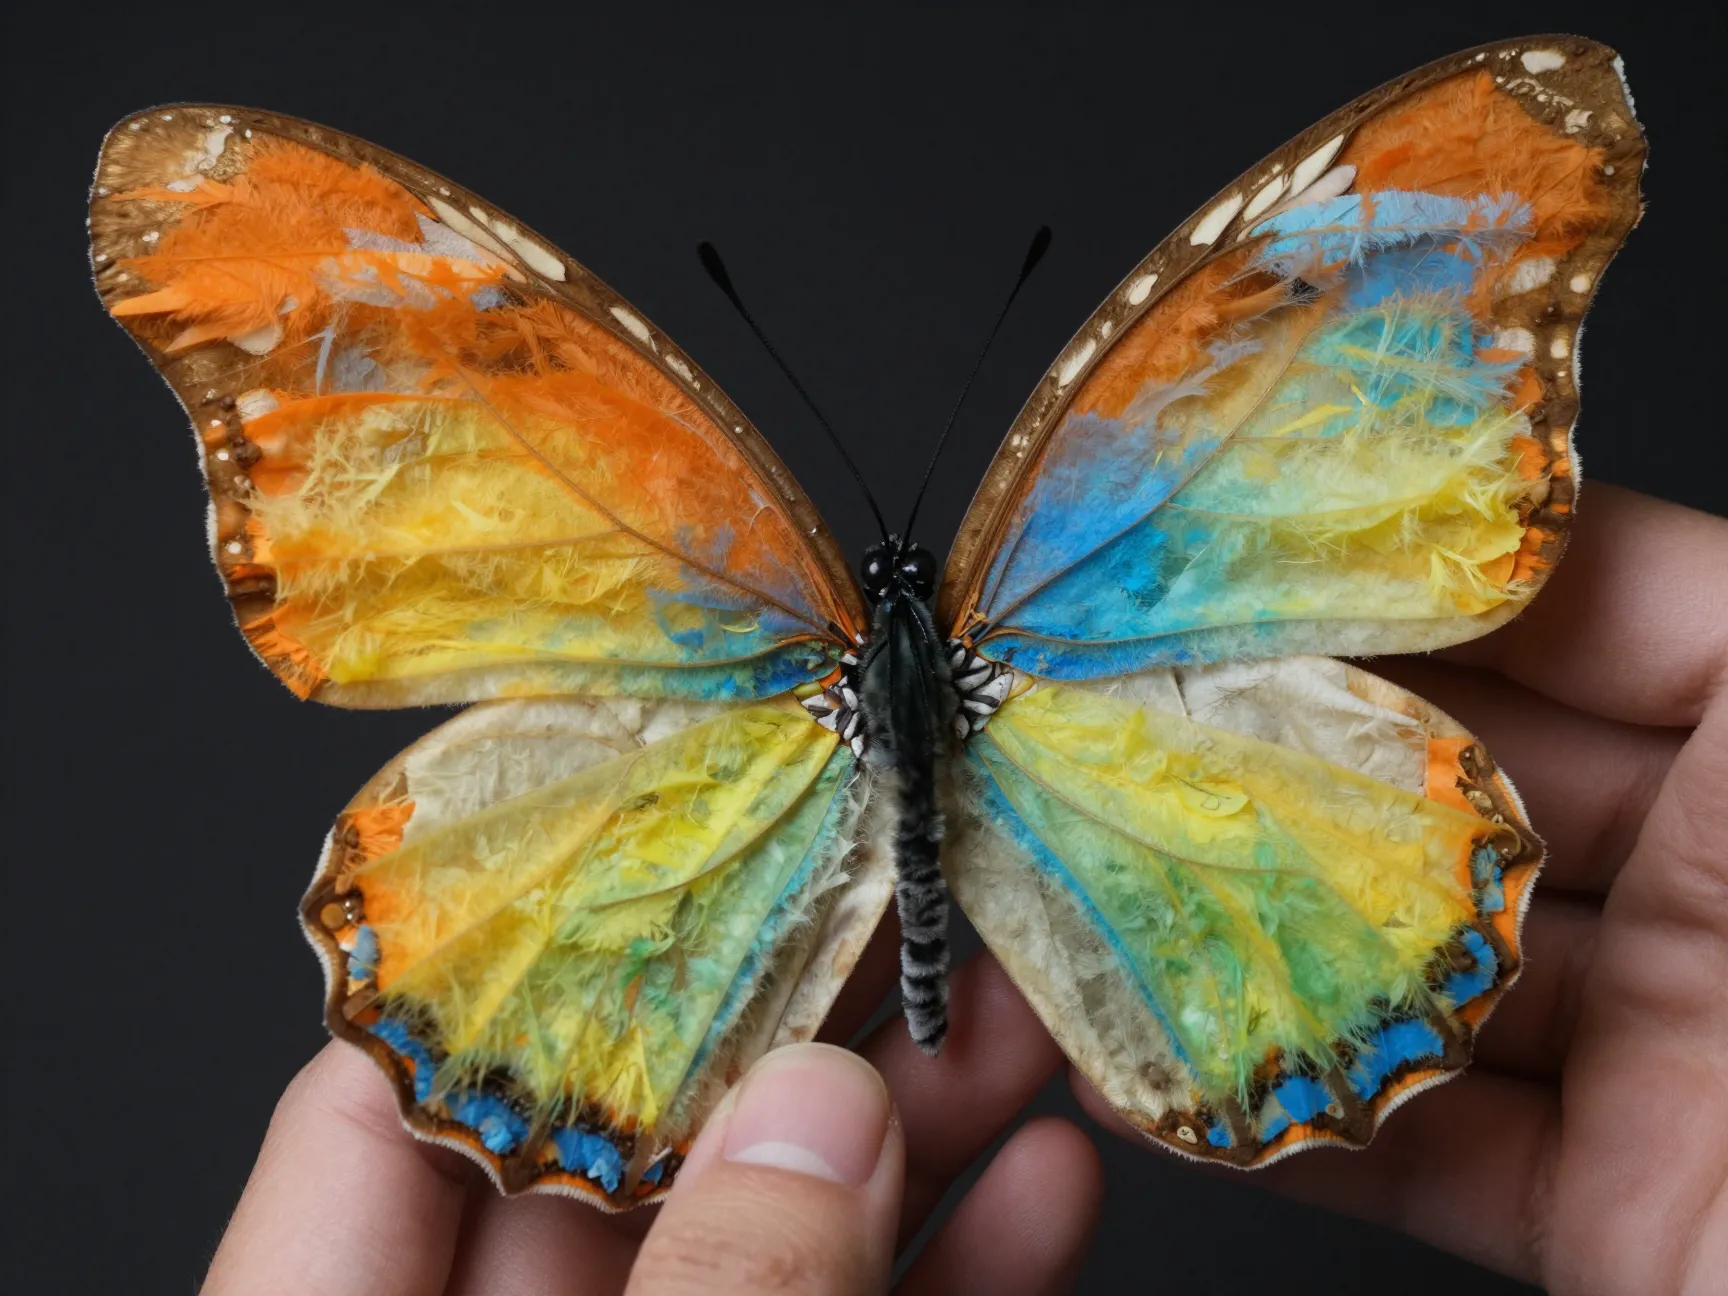
Best for: Ages 6 and up. The layered effect makes these butterflies look especially stunning when hung in a window where light shines through. ☀️
7. Coffee Filter Butterfly Mobile
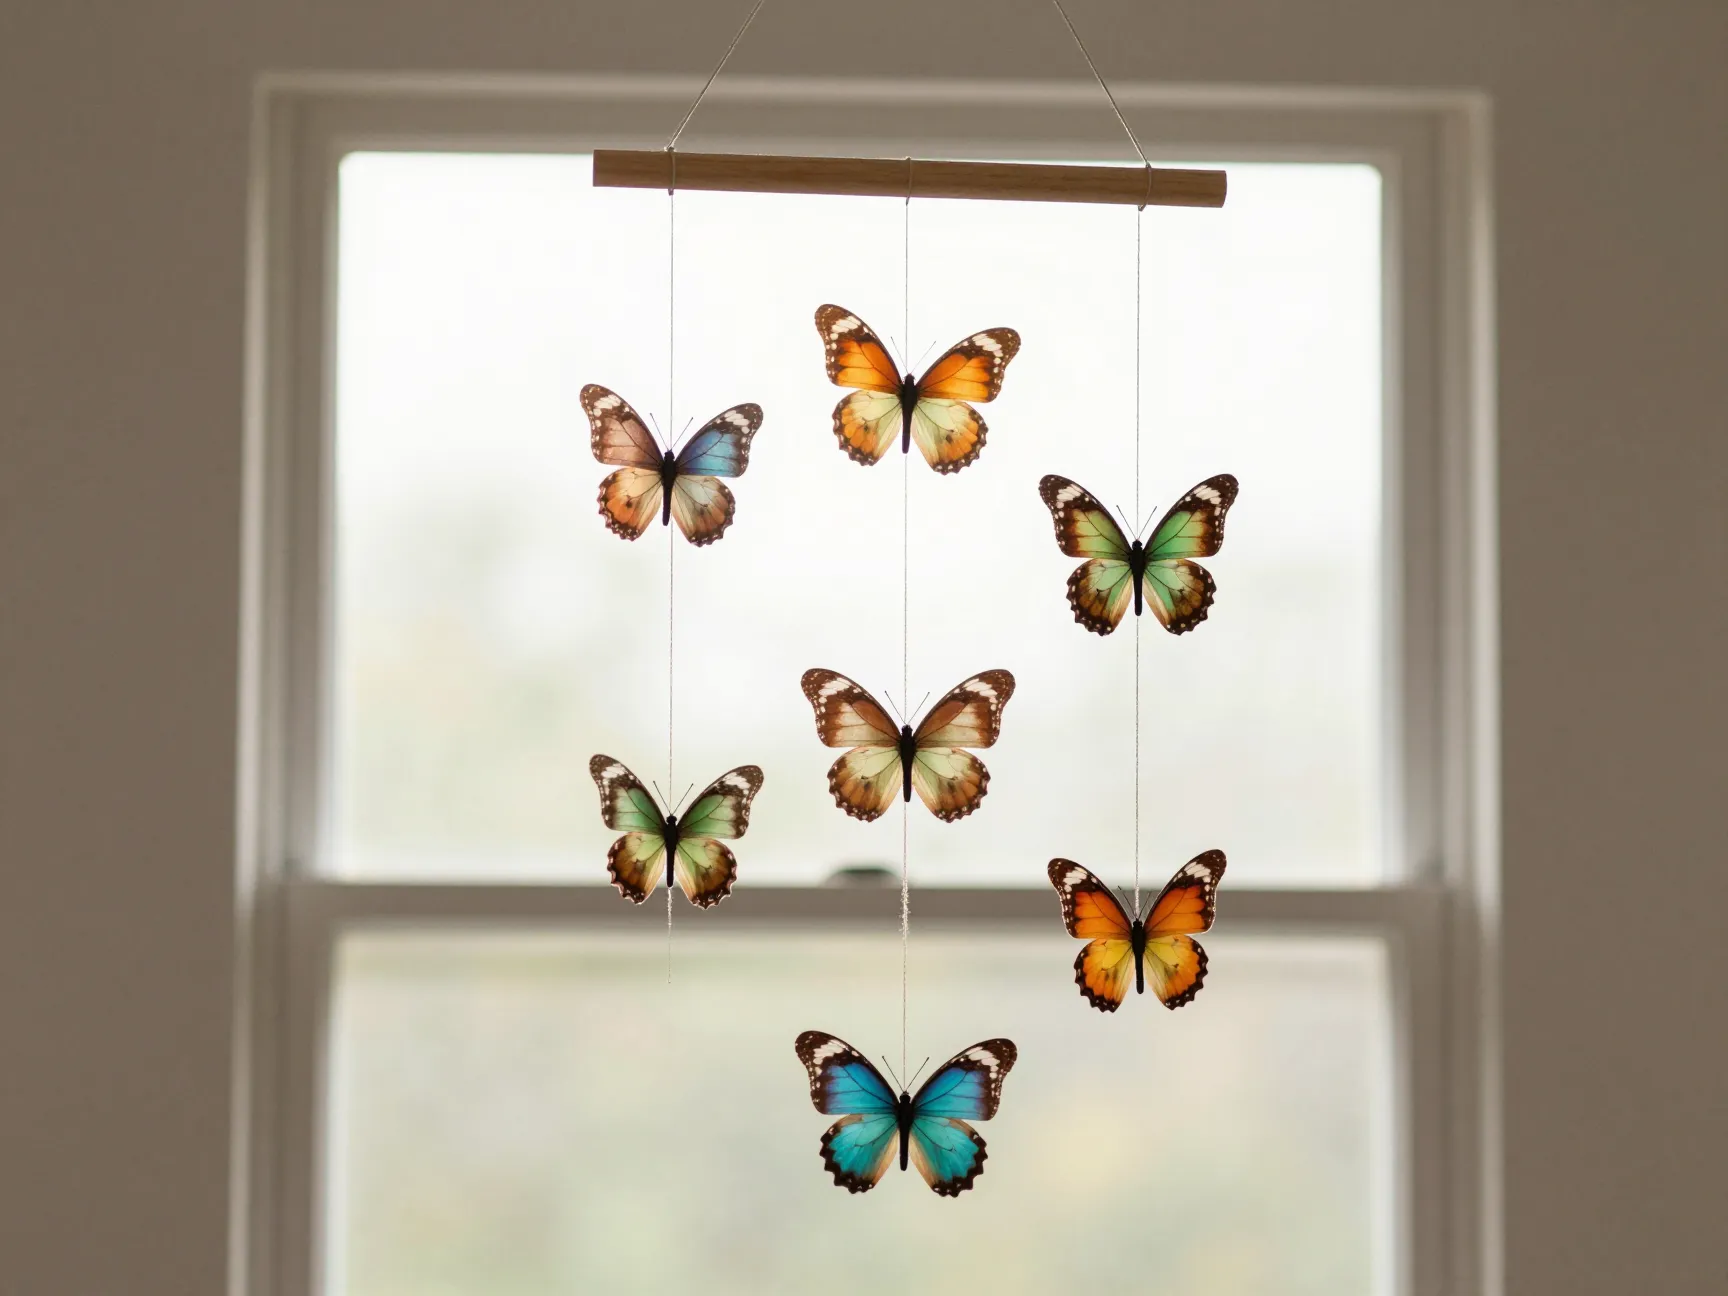
This project takes the basic butterfly and turns it into a decorative mobile — perfect for nurseries, classrooms, or spring home décor.
How to make it:
- Create 6–8 butterflies using any of the methods above.
- Cut varying lengths of string or fishing line (12–24 inches each).
- Tie one end of each string to the center of a butterfly.
- Tie the other ends to a wooden dowel or a sturdy twig at different heights.
- Attach a final string to the center of the dowel for hanging.
- Space the butterflies unevenly for a natural, organic look. 🌸
Best for: A group craft project for older children (ages 7+) or a parent-led project for younger kids. [4][5]
Display tip: Hang the mobile near a window so the translucent wings catch the light. The effect is genuinely breathtaking.
8. Shortcut Method Butterfly (Video Tutorial Inspired)
A YouTube tutorial from Shelby’s Craft (published December 24, 2025) demonstrates a clever shortcut method that simplifies the process for crafting with young children. [2] This version minimizes mess and speeds up the process without sacrificing visual appeal.
How to make it:
- Pre-cut coffee filters into rough wing shapes before coloring (this reduces the need for precise gathering later).
- Use washable markers to color directly onto the pre-cut shapes.
- Lay the colored filters on a damp paper towel instead of spraying — this controls the spread of color more precisely.
- Once dry, stack two wing shapes together and secure at the center with a binder clip or small rubber band.
- Cover the clip with a pipe cleaner wrapped around the center, then curl the ends into antennae.
Why this method works: The damp paper towel technique gives adults more control over how much the colors bleed, making it ideal for group settings where you want consistent results. [2]
Best for: Large groups, classroom settings, or crafting with very young toddlers. [2][4]
Tips for Success Across All 8 Projects
No matter which of the 8 Beautiful Butterfly Craft with Coffee Filters Projects you choose, these universal tips will help you get the best results every time.
🎨 Color tips:
- Use bold, saturated marker colors for the most vivid results after bleeding
- Apply colors close together so they blend naturally when wet
- Avoid opposite color wheel pairs (red/green, blue/orange, yellow/purple) to prevent muddy browns [3][6]
💧 Water tips:
- Less is more — a light spritz is usually enough
- Over-saturating the filter can cause colors to wash out completely
- Place filters on a paper towel or tray before spraying to absorb excess water [1][6]
⏱️ Drying tips:
- Standard drying time is 15–20 minutes for lightly colored filters [1][5]
- Heavily saturated filters may need up to 2 hours to dry completely [5]
- A hair dryer on low heat can speed up the process safely
🛠️ Assembly tips:
- Always wait until filters are completely dry before assembling — damp filters tear easily
- Twist the pipe cleaner tightly at the center gather to hold the wing shape
- Fluff and spread the wings gently after assembly for the best shape [1][3]
Age Guide for Coffee Filter Butterfly Projects
| Age Group | Recommended Projects | Adult Help Needed? |
|---|---|---|
| Toddlers (2–3) | Project 1, Project 8 | Yes — water step |
| Preschoolers (3–5) | Projects 1, 2, 3 | Minimal |
| Kindergarten (5–6) | Projects 1–5 | Optional |
| Ages 6–8 | Projects 4–7 | Independent |
| Ages 8+ | All 8 projects | Independent |
Sources confirm this craft is developmentally appropriate across all these age ranges, with minor adjustments for supervision. [4][5]
Frequently Asked Questions
Can I use paper coffee filters instead of basket-style filters?
Yes! Both round (basket-style) and cone-shaped filters work well. Round filters tend to create more symmetrical wings, while cone filters produce a slightly different wing shape. [1][7]
What if I don’t have a spray bottle?
You can dip a paintbrush in water and lightly brush it across the colored filter, or briefly hold the filter under a slow-running faucet. The spray bottle method gives the most control, but it is not strictly necessary. [6]
How do I display finished butterflies?
Finished butterflies look beautiful:
- Hung in a window with tape or string
- Clipped to a garland or ribbon
- Attached to a wreath
- Displayed in a shadow box frame
- Used as gift toppers or card decorations [7]
Are these butterflies durable?
Coffee filter butterflies are delicate but surprisingly sturdy once dry. They are not waterproof, so keep them away from moisture. For longer-lasting display, a light coat of clear craft spray sealant can help protect them.
Conclusion: Start Your Butterfly Craft Journey Today
The 8 Beautiful Butterfly Craft with Coffee Filters Projects covered in this guide prove that stunning, creative art does not require expensive supplies or advanced skills. From the classic marker-bleed butterfly to the layered wing variation and the shortcut method inspired by video tutorials, there is a project here for every age, skill level, and occasion. [1][2][3][4][5][6]
Here are your actionable next steps:
- Choose one project from the list above that matches your crafter’s age and skill level.
- Gather your supplies — a trip to the dollar store is all you need for most projects. [3]
- Protect your work surface with a plastic tablecloth or newspaper before you begin.
- Experiment with color combinations and encourage children to make predictions about what will happen when water is added — it turns the craft into a science experiment too.
- Display your finished butterflies in a window or create a mobile to share the beauty with everyone who visits your home or classroom.
Whether you make one butterfly or fifty, the process is just as rewarding as the finished product. These coffee filter butterflies are proof that the most beautiful things often come from the simplest materials. 🦋
References
[1] Coffee Filter Butterfly Craft – https://kidsactivityzone.com/coffee-filter-butterfly-craft/
[2] Watch – https://www.youtube.com/watch?v=9pNAiOOoGYs
[3] How To Make Coffee Filter Butterflies – https://www.organizedisland.com/how-to-make-coffee-filter-butterflies/
[4] Coffee Filter Butterfly Crafts For Preschoolers – https://www.redtedart.com/coffee-filter-butterfly-crafts-for-preschoolers/
[5] Coffee Filter Butterfly Craft – https://www.honeyandlime.co/coffee-filter-butterfly-craft/
[6] Easy Coffee Filter Butterfly Craft – https://www.darcyandbrian.com/easy-coffee-filter-butterfly-craft/
[7] Coffee Filter Butterflies – https://onelittleproject.com/coffee-filter-butterflies/